
Click ⭐ if you like the project. Pull Requests are highly appreciated. Follow me @SudheerJonna for technical updates.

Practice 280+ JavaScript coding interview questions in-browser. Built by ex-FAANG interviewers. No AI-generated fluff. No fake reviews. Try GreatFrontEnd → 💡

I recommend this React course to become top 10% at React and this coding interview bootcamp to ace your coding interview and actually get hired.

Note: This repository is specific to ReactJS. Please check JavaScript Interview Questions for core JavaScript questions and Data Structures and Algorithms for DSA-related questions or problems.
Hide/Show table of contents
Hide/Show table of contents
-
React (aka React.js or ReactJS) is an open-source front-end JavaScript library for building user interfaces based on components. It's used for handling the view layer in web and mobile applications, and allows developers to create reusable UI components and manage the state of those components efficiently.
React was created by Jordan Walke, a software engineer at Facebook (now Meta). It was first deployed on Facebook's News Feed in 2011 and on Instagram in 2012. The library was open-sourced in May 2013 and has since become one of the most popular JavaScript libraries for building modern user interfaces.
-
The history of ReactJS started in 2010 with the creation of XHP. XHP is a PHP extension which improved the syntax of the language such that XML document fragments become valid PHP expressions and the primary purpose was used to create custom and reusable HTML elements.
The main principle of this extension was to make front-end code easier to understand and to help avoid cross-site scripting attacks. The project was successful to prevent the malicious content submitted by the scrubbing user.
But there was a different problem with XHP in which dynamic web applications require many roundtrips to the server, and XHP did not solve this problem. Also, the whole UI was re-rendered for small change in the application. Later, the initial prototype of React is created with the name FaxJ by Jordan inspired from XHP. Finally after sometime React has been introduced as a new library into JavaScript world.
See deep-dive answer
The evolution of React has a fascinating history that spans over a decade:2010-2011: The Origins
- The journey began with XHP, a PHP extension created at Facebook that allowed HTML components to be used in PHP code
- XHP improved front-end code readability and helped prevent cross-site scripting (XSS) attacks
- However, XHP had limitations with dynamic web applications, requiring frequent server roundtrips and complete UI re-renders for small changes
2011-2012: Early Development
- Jordan Walke created the first prototype called FaxJS (later renamed to React), inspired by XHP's component model
- The key innovation was bringing XHP's component model to JavaScript with performance improvements
- React introduced the Virtual DOM concept to solve the performance issues of full page re-renders
- First deployed internally on Facebook's News Feed in 2011 and Instagram in 2012
2013: Public Release
- React was officially open-sourced at JSConf US in May 2013
- Initial public reception was mixed, with some developers skeptical about the JSX syntax and the approach of mixing markup with JavaScript
2014-2015: Growing Adoption
- React Native was announced in 2015, extending React's paradigm to mobile app development
- The ecosystem began to grow with tools like Redux for state management
- Companies beyond Facebook began adopting React for production applications
2016-2018: Maturation
- React 16 ("Fiber") was released in 2017 with a complete rewrite of the core architecture
- Introduction of new features like Error Boundaries, Portals, and improved server-side rendering
- React 16.3 introduced the Context API for easier state management
2019-Present: Modern React
- React Hooks were introduced in React 16.8 (February 2019), revolutionizing state management in functional components
- React 17 (October 2020) focused on making React upgrades easier
- React 18 (March 2022) introduced concurrent rendering and automatic batching
- React continues to evolve with Server Components, the new React compiler (React Forget), and other performance improvements
Note: JSX, React's syntax extension, was indeed inspired by XHP's approach of embedding XML-like syntax in code.
-
React offers a powerful set of features that have made it one of the most popular JavaScript libraries for building user interfaces:
Core Features:
-
Component-Based Architecture: React applications are built using components - independent, reusable pieces of code that return HTML via a render function. This modular approach enables better code organization, reusability, and maintenance.
-
Virtual DOM: React creates an in-memory data structure cache, computes the resulting differences, and efficiently updates only the changed parts in the browser DOM. This approach significantly improves performance compared to direct DOM manipulation.
-
JSX (JavaScript XML): A syntax extension that allows writing HTML-like code in JavaScript. JSX makes the code more readable and expressive while providing the full power of JavaScript.
-
Unidirectional Data Flow: React follows a one-way data binding model where data flows from parent to child components. This makes the code more predictable and easier to debug.
-
Declarative UI: React allows you to describe what your UI should look like for a given state, and it handles the DOM updates when the underlying data changes.
Advanced Features:
-
React Hooks: Introduced in React 16.8, hooks allow using state and other React features in functional components without writing classes.
-
Context API: Provides a way to share values between components without explicitly passing props through every level of the component tree.
-
Error Boundaries: Components that catch JavaScript errors anywhere in their child component tree and display fallback UI instead of crashing.
-
Server-Side Rendering (SSR): Enables rendering React components on the server before sending HTML to the client, improving performance and SEO.
-
Concurrent Mode: A set of new features (in development) that help React apps stay responsive and gracefully adjust to the user's device capabilities and network speed.
-
React Server Components: A new feature that allows components to be rendered entirely on the server, reducing bundle size and improving performance.
-
Suspense: A feature that lets your components "wait" for something before rendering, supporting code-splitting and data fetching with cleaner code.
These features collectively make React powerful for building everything from small widgets to complex, large-scale web applications.
-
-
JSX stands for JavaScript XML and it is an XML-like syntax extension to ECMAScript. Basically it just provides the syntactic sugar for the
React.createElement(type, props, ...children)function, giving us expressiveness of JavaScript along with HTML like template syntax.In the example below, the text inside
<h1>tag is returned as JavaScript function to the render function.export default function App() { return <h1 className="greeting">{"Hello, this is a JSX Code!"}</h1>; }
If you don't use JSX syntax then the respective JavaScript code should be written as below,
import { createElement } from "react";

export default function App() {
  return createElement(
    "h1",
    { className: "greeting" },
    "Hello, this is a JSX Code!"
  );
}
See Class
class App extends React.Component {
  render() {
    return <h1 className="greeting">{"Hello, this is a JSX Code!"}</h1>;
  }
}
Note: JSX is stricter than HTML
-
Element:
-
A React Element is a plain JavaScript object that describes what you want to see on the UI. It represents a DOM node or a component at a specific point in time.
-
Elements are immutable: once created, you cannot change their properties. Instead, you create new elements to reflect updates.
-
Elements can be nested within other elements through their
props. -
Creating an element is a fast, lightweight operation—it does not create any actual DOM nodes or render anything to the screen directly.
Example (without JSX):
const element = React.createElement("button", { id: "login-btn" }, "Login");
Equivalent JSX syntax:
<button id="login-btn">Login</button>
The object returned by
React.createElement:{ type: 'button', props: { id: 'login-btn', children: 'Login' } }
Elements are then passed to the React DOM renderer (e.g.,
ReactDOM.render()), which translates them to actual DOM nodes.
Component:
-
A Component is a function or class that returns an element (or a tree of elements) to describe part of the UI. Components can accept inputs (called props) and manage their own state (in case of class or function components with hooks).
-
Components allow you to split the UI into independent, reusable pieces, each isolated and composable.
-
You can define a component using a function or a class:
Example (Function Component with JSX):
const Button = ({ handleLogin }) => (
  <button id="login-btn" onClick={handleLogin}>
    Login
  </button>
);
When JSX is compiled, it's transformed into a tree of
React.createElementcalls:const Button = ({ handleLogin }) => React.createElement( "button", { id: "login-btn", onClick: handleLogin }, "Login" );
In summary:
- Elements are the smallest building blocks in React—objects that describe what you want to see.
- Components are functions or classes that return elements and encapsulate logic, structure, and behavior for parts of your UI.
Think of elements as the instructions for creating UI, and components as reusable blueprints that combine logic and structure to generate those instructions.
-
-
Components are the building blocks of creating User Interfaces(UI) in React. There are two possible ways to create a component.
-
Function Components: This is the simplest way to create a component. Those are pure JavaScript functions that accept props object as the one and only one parameter and return React elements to render the output:
function Greeting({ message }) {
  return <h1>{`Hello, ${message}`}</h1>;
}
-
Class Components: You can also use ES6 class to define a component. The above function component can be written as a class component:
class Greeting extends React.Component {
  render() {
    return <h1>{`Hello, ${this.props.message}`}</h1>;
  }
}
-
-
After the addition of Hooks(i.e. React 16.8 onwards) it is always recommended to use Function components over Class components in React. Because you could use state, lifecycle methods and other features that were only available in class component present in function component too.
But even there are two reasons to use Class components over Function components.
- If you need a React functionality whose Function component equivalent is not present yet, like Error Boundaries.
- In older versions, If the component needs state or lifecycle methods then you need to use class component.
So the summary to this question is as follows:
Use Function Components:
- If you don't need state or lifecycle methods, and your component is purely presentational.
- For simplicity, readability, and modern code practices, especially with the use of React Hooks for state and side effects.
Use Class Components:
- If you need to manage state or use lifecycle methods.
- In scenarios where backward compatibility or integration with older code is necessary.
Note: You can also use reusable react error boundary third-party component without writing any class. i.e, No need to use class components for Error boundaries.
The usage of Error boundaries from the above library is quite straight forward.
Note when using react-error-boundary: ErrorBoundary is a client component. You can only pass props to it that are serializable or use it in files that have a
"use client";directive."use client"; import { ErrorBoundary } from "react-error-boundary"; <ErrorBoundary fallback={<div>Something went wrong</div>}> <ExampleApplication /> </ErrorBoundary>;
-
Pure components are the components which render the same output for the same state and props. In function components, you can achieve these pure components through memoized
React.memo()API wrapping around the component. This API prevents unnecessary re-renders by comparing the previous props and new props using shallow comparison. So it will be helpful for performance optimizations.But at the same time, it won't compare the previous state with the current state because function component itself prevents the unnecessary rendering by default when you set the same state again.
The syntactic representation of memoized components looks like below,
const MemoizedComponent = memo(SomeComponent, arePropsEqual?);
Below is the example of how child component(i.e., EmployeeProfile) prevents re-renders for the same props passed by parent component(i.e.,EmployeeRegForm).
import { memo, useState } from "react";

const EmployeeProfile = memo(function EmployeeProfile({ name, email }) {
  return (
    <>
      <p>Name:{name}</p>
      <p>Email: {email}</p>
    </>
  );
});
export default function EmployeeRegForm() {
  const [name, setName] = useState("");
  const [email, setEmail] = useState("");
  return (
    <>
      <label>
        Name:{" "}
        <input value={name} onChange={(e) => setName(e.target.value)} />
      </label>
      <label>
        Email:{" "}
        <input value={email} onChange={(e) => setEmail(e.target.value)} />
      </label>
      <hr />
      <EmployeeProfile name={name} />
    </>
  );
}
In the above code, the email prop has not been passed to child component. So there won't be any re-renders for email prop change.
In class components, the components extending
React.PureComponentinstead ofReact.Componentbecome the pure components. When props or state changes, PureComponent will do a shallow comparison on both props and state by invokingshouldComponentUpdate()lifecycle method.Note:
React.memo()is a higher-order component. -
State of a component is an object that holds some information that may change over the lifetime of the component. The important point is whenever the state object changes, the component re-renders. It is always recommended to make our state as simple as possible and minimize the number of stateful components.
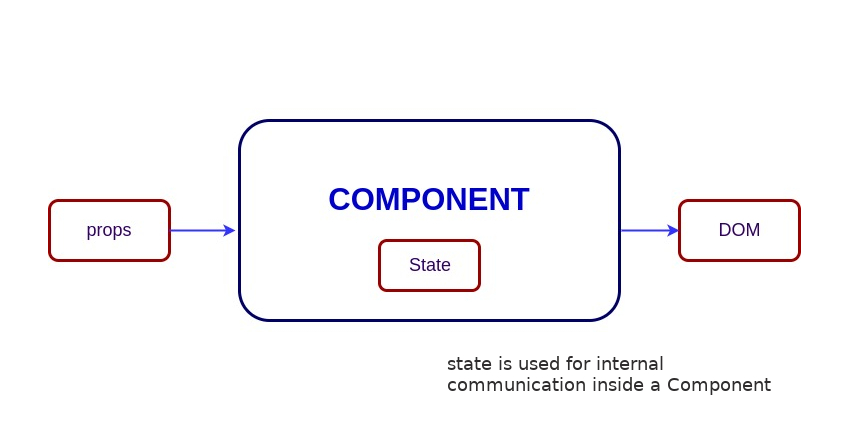
Let's take an example of User component with
messagestate. Here, useState hook has been used to add state to the User component and it returns an array with current state and function to update it.import { useState } from "react"; function User() { const [message, setMessage] = useState("Welcome to React world"); return ( <div> <h1>{message}</h1> </div> ); }
Whenever React calls your component or access
useStatehook, it gives you a snapshot of the state for that particular render.See Class
import React from "react";
class User extends React.Component {
  constructor(props) {
    super(props);

    this.state = {
      message: "Welcome to React world",
    };
  }

  render() {
    return (
      <div>
        <h1>{this.state.message}</h1>
      </div>
    );
  }
}
State is similar to props, but it is private and fully controlled by the component ,i.e., it is not accessible to any other component till the owner component decides to pass it.
-
Props are inputs to components. They are single values or objects containing a set of values that are passed to components on creation similar to HTML-tag attributes. Here, the data is passed down from a parent component to a child component.
The primary purpose of props in React is to provide following component functionality:
- Pass custom data to your component.
- Trigger state changes.
- Use via
this.props.reactPropinside component'srender()method.
For example, let us create an element with
reactPropproperty:<Element reactProp={"1"} />
This
reactProp(or whatever you came up with) attribute name then becomes a property attached to React's native props object which originally already exists on all components created using React library.props.reactProp;
For example, the usage of props in function component looks like below:
import React from "react";
import ReactDOM from "react-dom";

const ChildComponent = (props) => {
  return (
    <div>
      <p>{props.name}</p>
      <p>{props.age}</p>
      <p>{props.gender}</p>
    </div>
  );
};

const ParentComponent = () => {
  return (
    <div>
      <ChildComponent name="John" age="30" gender="male" />
      <ChildComponent name="Mary" age="25" geneder="female" />
    </div>
  );
};

The properties from props object can be accessed directly using destructing feature from ES6 (ECMAScript 2015). It is also possible to fallback to default value when the prop value is not specified. The above child component can be simplified like below.
const ChildComponent = ({ name, age, gender = "male" }) => {
  return (
    <div>
      <p>{name}</p>
      <p>{age}</p>
      <p>{gender}</p>
    </div>
  );
};
Note: The default value won't be used if you pass null or 0 value. i.e, default value is only used if the prop value is missed or undefined value has been passed.
See Class
The Props accessed in Class Based Component as belowimport React from "react";
import ReactDOM from "react-dom";
class ChildComponent extends React.Component {
render() {
return (
<div>
<p>{this.props.name}</p>
<p>{this.props.age}</p>
<p>{this.props.gender}</p>
</div>
);
}
}
class ParentComponent extends React.Component {
render() {
return (
<div>
<ChildComponent name="John" age="30" gender="male" />
<ChildComponent name="Mary" age="25" gender="female" />
</div>
);
}
}-
In React, both state and props are plain JavaScript objects, but they serve different purposes and have distinct behaviors:
- Definition:
State is a data structure that is managed within a component. It represents information that can change over the lifetime of the component. - Mutability:
State is mutable, meaning it can be changed using the setter function (setStatein class components or the updater function fromuseStatein functional components). - Scope:
State is local to the component where it is defined. Only that component can modify its own state. - Usage:
State is typically used for data that needs to change in response to user actions, network responses, or other dynamic events. - Re-rendering:
Updating the state triggers a re-render of the component and its descendants.
- Definition:
Props (short for “properties”) are inputs to a component, provided by its parent component. - Mutability:
Props are read-only. A component cannot modify its own props; they are immutable from the component’s perspective. - Scope:
Props are used to pass data and event handlers down the component tree, enabling parent components to configure or communicate with their children. - Usage:
Props are commonly used to make components reusable and configurable. They allow the same component to be rendered with different data or behavior. - Analogy:
Think of props as arguments to a function, whereas state is like variables declared inside the function.
Feature State Props Managed by The component itself Parent component Mutable Yes No (read-only) Scope Local to the component Passed from parent to child Usage Manage dynamic data and UI changes Configure and customize component Update Using setState/useState Cannot be updated by the component
- Definition:
-
Below are some of the main differences between HTML and React event handling,
-
In HTML, the event name usually represents in lowercase as a convention:
<button onclick="activateLasers()"></button>
Whereas in React it follows camelCase convention:
<button onClick={activateLasers}>
-
In HTML, you can return
falseto prevent default behavior:<a href="#" onclick='console.log("The link was clicked."); return false;' />
Whereas in React you must call
preventDefault()explicitly:function handleClick(event) { event.preventDefault(); console.log("The link was clicked."); }
-
In HTML, you need to invoke the function by appending
()Whereas in react you should not append()with the function name. (refer "activateLasers" function in the first point for example)
-
-
SyntheticEventis a cross-browser wrapper around the browser's native event. Its API is same as the browser's native event, includingstopPropagation()andpreventDefault(), except the events work identically across all browsers. The native events can be accessed directly from synthetic events usingnativeEventattribute.Let's take an example of
BookStoretitle search component with the ability to get all native event propertiesfunction BookStore() { function handleTitleChange(e) { console.log("The new title is:", e.target.value); console.log('Synthetic event:', e); // React SyntheticEvent console.log('Native event:', e.nativeEvent); // Browser native event e.stopPropagation(); e.preventDefault(); } return <input name="title" onChange={handleTitleChange} />; }
List of common synthetic events are:
onClickonChangeonSubmitonKeyDown,onKeyUponFocus,onBluronMouseEnter,onMouseLeaveonTouchStart,onTouchEnd
-
You can use either if statements or ternary expressions which are available in JS(and JSX in React) to conditionally execute or render expressions. Apart from these approaches, you can also embed any expressions in JSX by wrapping them in curly braces and then followed by JS logical operator
&&. It is helpful to render elements conditionally within a single line and commonly used for concise logic, especially in JSX rendering.<h1>Hello!</h1>; { messages.length > 0 && !isLogin ? ( <h2>You have {messages.length} unread messages.</h2> ) : ( <h2>You don't have unread messages.</h2> ); }
-
A
keyis a special attribute you should include when mapping over arrays to render data. Key prop helps React identify which items have changed, are added, or are removed.Keys should be unique among its siblings. Most often we use ID from our data as key:
const todoItems = todos.map((todo) => <li key={todo.id}>{todo.text}</li>);
When you don't have stable IDs for rendered items, you may use the item index as a key as a last resort:
const todoItems = todos.map((todo, index) => (
  <li key={index}>{todo.text}</li>
));
Benefits of key:
- Enables React to efficiently update and re-render components.
- Prevents unnecessary re-renders by reusing components when possible.
- Helps maintain internal state of list items correctly.
Note:
- Using indexes for keys is not recommended if the order of items may change. This can negatively impact performance and may cause issues with component state.
- If you extract list item as separate component then apply keys on list component instead of
litag. - There will be a warning message in the console if the
keyprop is not present on list items. - The key attribute accepts either string or number and internally convert it as string type.
- Don't generate the key on the fly something like
key={Math.random()}. Because the keys will never match up between re-renders and DOM created everytime.
-
The Virtual DOM (VDOM) is a lightweight, in-memory representation of Real DOM used by libraries like React to optimize UI rendering. The representation of a UI is kept in memory and synced with the "real" DOM. It's a step that happens between the render function being called and the displaying of elements on the screen. This entire process is called reconciliation.
-
The Virtual DOM works in five simple steps.
1. Initial Render
When a UI component renders for the first time, it returns JSX. React uses this structure to create a Virtual DOM tree, which is a lightweight copy of the actual DOM. This Virtual DOM is then used to build and render the Real DOM in the browser.2. State or Props Change
When the component's state or props change, React creates a new Virtual DOM reflecting the updated UI. However, it doesn't immediately update the Real DOM; instead, it works in memory to prepare for an efficient update.
3. Diffing Algorithm
React then compares the new Virtual DOM with the previous one using a process called diffing. It determines what has changed between the two versions and identifies the minimal set of updates needed.
4. Reconciliation
Based on the diffing results, React decides which parts of the Real DOM should be updated. It avoids re-rendering the entire DOM and instead updates only the elements that actually changed.
5. Efficient DOM Updates
This entire process—working with the Virtual DOM, diffing, and selective updating—makes the UI rendering much faster and more efficient than manipulating the Real DOM directly. -
The Shadow DOM is a browser technology designed primarily for scoping variables and CSS in web components. The Virtual DOM is a concept implemented by libraries in JavaScript on top of browser APIs.
The key differences in a table format shown below:
Feature Shadow DOM Virtual DOM Purpose Encapsulation for Web Components Efficient UI rendering Managed by Browser JS frameworks (e.g., React) DOM Type Part of real DOM (scoped) In-memory representation Encapsulation Yes No Use Case Web Components, scoped styling UI diffing and minimal DOM updates -
React Fiber is the new reconciliation engine in React, introduced in React 16. It’s a complete rewrite of React’s core algorithm(old stack-based algorithm) for rendering and updating the UI. Fiber enhances React’s ability to handle asynchronous rendering, prioritized updates(assign priority to different types of updates), and interruption(ability to pause, abort, or reuse work) of rendering work, enabling smoother and more responsive user interfaces.
-
The goal of React Fiber is to increase its suitability for areas like animation, layout, and gestures. Its headline feature is incremental rendering: the ability to split rendering work into chunks and spread it out over multiple frames.
Its main goals are:
- Incremental Rendering – Breaks work into chunks for smoother updates.
- Interruptible Rendering – Pauses and resumes rendering to keep the UI responsive.
- Prioritization – Handles high-priority updates (e.g. animations) before low-priority ones.
- Concurrency Support – Enables working on multiple UI versions simultaneously.
- Better Error Handling – Supports component-level error boundaries.
- Suspense Support – Allows waiting for async data before rendering.
- Improved DevTools – Enables better debugging and performance tracking.
-
A controlled component is a React component that fully manages the form element's state(e.g, elements like
<input>,<textarea>, or<select>)) using React's internal state mechanism. i.e, The component does not manage its own internal state — instead, React acts as the single source of truth for form data.The controlled components will be implemented using the below steps,
- Initialize the state using
useStatehooks in function components or inside constructor for class components. - Set the value of the form element to the respective state variable.
- Create an event handler(
onChange) to handle the user input changes throughuseState's updater function orsetStatefrom class component. - Attach the above event handler to form element's change or click events
Note: React re-renders the component every time the input value changes.
- Initialize the state using


For example, the name input field updates the username using handleChange event handler as below,
import React, { useState } from "react";

function UserProfile() {
  const [username, setUsername] = useState("");

  const handleChange = (e) => {
    setUsername(e.target.value);
  };

  return (
    <form>
      <label>
        Name:
        <input type="text" value={username} onChange={handleChange} />
      </label>
    </form>
  );
}
In these components, DOM does not hold the actual data instead React does.
Benefits:
- Easy to implement validation, conditional formatting, or live feedback.
- Full control over form data.
- Easier to test and debug because the data is centralized in the component’s state.
-
The Uncontrolled components are form elements (like
<input>,<textarea>, or<select>) that manage their own state internally via the DOM, rather than through React state. You can query the DOM using arefto find its current value when you need it. This is a bit more like traditional HTML.The uncontrolled components will be implemented using the below steps,
- Create a ref using
useRefreact hook in function component orReact.createRef()in class based component. - Attach this
refto the form element. - The form element value can be accessed directly through
refin event handlers orcomponentDidMountfor class components
In the below UserProfile component, the
usernameinput is accessed using ref.import React, { useRef } from "react"; function UserProfile() { const usernameRef = useRef(null); const handleSubmit = (event) => { event.preventDefault(); console.log("The submitted username is: " + usernameRef.current.value); }; return ( <form onSubmit={handleSubmit}> <label> Username: <input type="text" ref={usernameRef} /> </label> <button type="submit">Submit</button> </form> ); }
Note: Here, DOM is in charge of the value. React only accesses the value when needed (via
ref).Benefits:
- Less boilerplate — no need for
useStateandonChange. - Useful for quick form setups or when integrating with non-React code.
- Slightly better performance in very large forms (fewer re-renders).
In most cases, it's recommend to use controlled components to implement forms. In a controlled component, form data is handled by a React component. The alternative is uncontrolled components, where form data is handled by the DOM itself.
See Class
class UserProfile extends React.Component {
  constructor(props) {
    super(props);
    this.handleSubmit = this.handleSubmit.bind(this);
    this.input = React.createRef();
  }

  handleSubmit(event) {
    alert("A name was submitted: " + this.input.current.value);
    event.preventDefault();
  }

  render() {
    return (
      <form onSubmit={this.handleSubmit}>
        <label>
          {"Name:"}
          <input type="text" ref={this.input} />
        </label>
        <input type="submit" value="Submit" />
      </form>
    );
  }
}
- Create a ref using
-
Both
React.createElementandReact.cloneElementare used to work with React elements, but they serve different purposes.Creates a new React element from scratch. JSX elements will be transpiled to
React.createElement()functions to create React elements which are going to be used for the object representation of UI. Syntax:React.createElement(type, props, ...children)
Example:
React.createElement('button', { className: 'btn' }, 'Click Me')
The
cloneElementmethod is used to clone an existing React element and optionally adds or overrides props.Syntax:
React.cloneElement(element, newProps, ...children)
Example:
const button = <button className="btn">Click Me</button>;
const cloned = React.cloneElement(button, { className: 'btn-primary' });
// Result: <button className="btn-primary">Click Me</button>
-
When several components need to share the same changing data then it is recommended to lift the shared state up to their closest common ancestor. That means if two child components share the same data from its parent, then move the state to parent instead of maintaining local state in both of the child components.
-
A higher-order component (HOC) is a function that takes a component and returns a new enhanced component with additional props, behavior, or data. It’s a design pattern based on React’s compositional nature, allowing you to reuse logic across multiple components without modifying their internals.
We consider HOCs pure components because they don’t mutate or copy behavior from the original component—they simply wrap it, enhance it, and pass through the necessary props. The wrapped component remains decoupled and reusable.
const EnhancedComponent = higherOrderComponent(WrappedComponent);
Let's take an example of a
withAuthhigher-order component (HOC) in React. This HOC will check if a user is authenticated and either render the wrapped component if authenticated or redirect (or show a message) if not.withAuth HOC Example:
import React from 'react';
import { Navigate } from 'react-router-dom'; // For redirection (assuming React Router v6)

const isAuthenticated = () => {
  // e.g., check for a valid token in localStorage or context
  return !!localStorage.getItem('authToken');
};

function withAuth(WrappedComponent) {
  return function AuthenticatedComponent(props) {
    if (!isAuthenticated()) {
      // User is NOT authenticated, redirect to login page
      return <Navigate to="/login" replace />;
    }

    // User is authenticated, render the wrapped component
    return <WrappedComponent {...props} />;
  };
}

export default withAuth;
Usage
import React from 'react';
import withAuth from './withAuth';

function Dashboard() {
  return <h1>Welcome to the Dashboard!</h1>;
}

// Wrap Dashboard with withAuth HOC
export default withAuth(Dashboard);
HOC can be used for many use cases:
- Code reuse, logic and bootstrap abstraction (e.g., fetching data, permissions, theming).
- Render hijacking (e.g., conditional rendering or layout changes).
- State abstraction and manipulation(e.g., handling form logic).
- Props manipulation(e.g., injecting additional props or filtering them).
Some of the real-world examples of HOCs in react eco-system:
- connect() from react-redux
- withRouter() from React Router v5
- withTranslation() from react-i18next
- withApollo() from Apollo client
- withFormik from Formik library
- withTheme from styled components
-
The
childrenprop is a special prop in React used to pass elements between the opening and closing tags of a component. It is commonly used in layout and wrapper componnents.A simple usage of children prop looks as below,
function MyDiv({ children }){
    return (
      <div>
        {children}
      </div>;
    );
}

export default function Greeting() {
  return (
    <MyDiv>
      <span>{"Hello"}</span>
      <span>{"World"}</span>
    </MyDiv>
  );
}
Here, everything inside
<MyDiv>...</MyDiv>is passed as children to the custom div component.The children can be text, JSX elements, fragments, arrays and functions(for advance use case like render props).
See Class
const MyDiv = React.createClass({
  render: function () {
    return <div>{this.props.children}</div>;
  },
});

ReactDOM.render(
  <MyDiv>
    <span>{"Hello"}</span>
    <span>{"World"}</span>
  </MyDiv>,
  node
);
Note: There are several methods available in the legacy React API to work with this prop. These include
React.Children.map,React.Children.forEach,React.Children.count,React.Children.only,React.Children.toArray. -
The comments in React/JSX are similar to JavaScript Multiline comments but are wrapped in curly braces.
Single-line comments:
<div>
  {/* Single-line comments(In vanilla JavaScript, the single-line comments are represented by double slash(//)) */}
  {`Welcome ${user}, let's play React`}
</div>
Multi-line comments:
<div>
  {/* Multi-line comments for more than
   one line */}
  {`Welcome ${user}, let's play React`}
</div>
You can use
//and/* */in JS logic, hooks, and functions. -
Reconciliationis the process through which React updates the Browser DOM and makes React work faster. React use adiffing algorithmso that component updates are predictable and faster. React would first calculate the difference between thereal DOMand the copy of DOM(Virtual DOM)when there's an update of components. React stores a copy of Browser DOM which is calledVirtual DOM. When we make changes or add data, React creates a new Virtual DOM and compares it with the previous one. This comparison is done byDiffing Algorithm. Now React compares the Virtual DOM with Real DOM. It finds out the changed nodes and updates only the changed nodes in Real DOM leaving the rest nodes as it is. This process is called Reconciliation. -
No, currently
React.lazyfunction supports default exports only. If you would like to import modules which are named exports, you can create an intermediate module that reexports it as the default. It also ensures that tree shaking keeps working and don’t pull unused components. Let's take a component file which exports multiple named components,// MoreComponents.js export const SomeComponent = /* ... */; export const UnusedComponent = /* ... */;
and reexport
MoreComponents.jscomponents in an intermediate fileIntermediateComponent.js// IntermediateComponent.js export { SomeComponent as default } from "./MoreComponents.js";
Now you can import the module using lazy function as below,
import React, { lazy } from "react";
const SomeComponent = lazy(() => import("./IntermediateComponent.js"));
-
React uses className instead of class because of a JavaScript naming conflict with the class keyword.
-
classis a reserved keyword in JavaScript In JavaScript, class is used to define ES6 classes:class Person { constructor(name) { this.name = name; } }
If you try to use class as a variable or property name, it will throw a syntax error. Since JSX is just JavaScript with XML-like syntax, using class directly in JSX would break the parser.
-
JSX Is JavaScript
When you write JSX like this:
<div class="btn">Click</div>
It will be compiled to:
React.createElement('div', { class: 'btn' }, 'Click');
But
classis invalid in this object literal context (since it clashes with the JS keyword), hence React instead uses className.<div className="btn">Click</div>
which compiles to:
React.createElement('div', { className: 'btn' }, 'Click');
React then translates
classNametoclassin the final HTML DOM. -
Aligns with DOM APIs In vanilla JavaScript, you interact with element classes using:
element.className = 'my-class';
React follows this convention, staying consistent with the DOM API's property name rather than HTML’s attribute.
-
-
It's a common pattern or practice in React for a component to return multiple elements. Fragments let you group a list of children without adding extra nodes to the DOM. You need to use either
<Fragment>or a shorter syntax having empty tag (<></>).Below is the example of how to use fragment inside Story component.
function Story({ title, description, date }) {
  return (
    <Fragment>
      <h2>{title}</h2>
      <p>{description}</p>
      <p>{date}</p>
    </Fragment>
  );
}
It is also possible to render list of fragments inside a loop with the mandatory key attribute supplied.
function StoryBook() {
  return stories.map((story) => (
    <Fragment key={story.id}>
      <h2>{story.title}</h2>
      <p>{story.description}</p>
      <p>{story.date}</p>
    </Fragment>
  ));
}
Usually, you don't need to use
<Fragment>until there is a need of key attribute. The usage of shorter syntax looks like below.function Story({ title, description, date }) { return ( <> <h2>{title}</h2> <p>{description}</p> <p>{date}</p> </> ); }
-
Below are the list of reasons to prefer fragments over container DOM elements,
- Fragments are a bit faster and use less memory by not creating an extra DOM node. This only has a real benefit on very large and deep trees.
- Some CSS mechanisms like Flexbox and CSS Grid have a special parent-child relationships, and adding divs in the middle makes it hard to keep the desired layout.
- The DOM Inspector is less cluttered.
-
A Portal is a React feature that enables rendering children into a DOM node that exists outside the parent component's DOM hierarchy, while still preserving the React component hierarchy. Portals help avoid CSS stacking issues—for example, elements with position: fixed may not behave as expected inside a parent with transform. Portals solve this by rendering content (like modals or tooltips) outside such constrained DOM contexts.
ReactDOM.createPortal(child, container);
child: Any valid React node (e.g., JSX, string, fragment).container: A real DOM node (e.g.,document.getElementById('modal-root')).
Even though the content renders elsewhere in the DOM, it still behaves like a normal child in React. It has access to context, state, and event handling.
Example:- Modal:
function Modal({ children }) {
  return ReactDOM.createPortal(
    <div className="modal">{children}</div>,
    document.body)
  );
}
The above code will render the modal content into the body element in the HTML, not inside the component's usual location.
-
If the behaviour of a component is independent of its state then it can be a stateless component. You can use either a function or a class for creating stateless components. But unless you need to use a lifecycle hook in your components, you should go for function components. There are a lot of benefits if you decide to use function components here; they are easy to write, understand, and test, a little faster, and you can avoid the
thiskeyword altogether. -
If the behaviour of a component is dependent on the state of the component then it can be termed as stateful component. These stateful components are either function components with hooks or class components.
Let's take an example of function stateful component which update the state based on click event,
import React, {useState} from 'react';

const App = (props) => {
const [count, setCount] = useState(0);
handleIncrement() {
  setCount(count+1);
}

return (
  <>
    <button onClick={handleIncrement}>Increment</button>
    <span>Counter: {count}</span>
  </>
  )
}
See Class
The equivalent class stateful component with a state that gets initialized in the `constructor`.
class App extends Component {
  constructor(props) {
    super(props);
    this.state = { count: 0 };
  }

  handleIncrement() {
    setState({ count: this.state.count + 1 });
  }

  render() {
    <>
      <button onClick={() => this.handleIncrement}>Increment</button>
      <span>Count: {count}</span>
    </>;
  }
}
-
When the application is running in development mode, React will automatically check all props that we set on components to make sure they have correct type. If the type is incorrect, React will generate warning messages in the console. It's disabled in production mode due to performance impact. The mandatory props are defined with
isRequired.The set of predefined prop types:
PropTypes.numberPropTypes.stringPropTypes.arrayPropTypes.objectPropTypes.funcPropTypes.nodePropTypes.elementPropTypes.boolPropTypes.symbolPropTypes.any
We can define
propTypesforUsercomponent as below:import React from "react"; import PropTypes from "prop-types"; class User extends React.Component { static propTypes = { name: PropTypes.string.isRequired, age: PropTypes.number.isRequired, }; render() { return ( <> <h1>{`Welcome, ${this.props.name}`}</h1> <h2>{`Age, ${this.props.age}`}</h2> </> ); } }
Note: In React v15.5 PropTypes were moved from
React.PropTypestoprop-typeslibrary.Modern Recommendation: While PropTypes are still supported, TypeScript is now the industry standard for type checking in React applications. Consider using TypeScript for better type safety, IDE support, and compile-time error detection.
The Equivalent Functional Component
import React from "react";
import PropTypes from "prop-types";

function User({ name, age }) {
  return (
    <>
      <h1>{`Welcome, ${name}`}</h1>
      <h2>{`Age, ${age}`}</h2>
    </>
  );
}

User.propTypes = {
  name: PropTypes.string.isRequired,
  age: PropTypes.number.isRequired,
};
Modern TypeScript Version
import React from "react";

interface UserProps {
  name: string;
  age: number;
}

function User({ name, age }: UserProps) {
  return (
    <>
      <h1>{`Welcome, ${name}`}</h1>
      <h2>{`Age, ${age}`}</h2>
    </>
  );
}
-
Below are the list of main advantages of React,
- Increases the application's performance with Virtual DOM.
- JSX makes code easy to read and write.
- It renders both on client and server side (SSR).
- Easy to integrate with frameworks (Angular, Backbone) since it is only a view library.
- Easy to write unit and integration tests with tools such as Jest.
-
Apart from the advantages, there are few limitations of React too,
- React is just a view library, not a full framework.
- There is a learning curve for beginners who are new to web development.
- Integrating React into a traditional MVC framework requires some additional configuration.
- The code complexity increases with inline templating and JSX.
- Too many smaller components leading to over engineering or boilerplate.
-
Modern Recommendation (2026): TypeScript is the industry standard for type checking in React applications.
While PropTypes (
React.PropTypesmoved toprop-typespackage since React v15.5) are still available for runtime type checking, they have significant limitations:- Only check types at runtime
- No compile-time errors
- Limited IDE autocomplete support
- No inference for complex types
TypeScript is now the recommended approach because it provides:
- Compile-time type checking
- Excellent IDE support with IntelliSense
- Type inference and generic types
- Better refactoring capabilities
- Growing ecosystem and community support
Note: Flow (Facebook's type checker) has seen declining adoption and is rarely used in new projects.
Example with TypeScript:
interface UserProps {
  name: string;
  age: number;
  isActive?: boolean;
}

function User({ name, age, isActive = true }: UserProps) {
  return <div>{name} - {age}</div>;
}
-
The
react-dompackage provides DOM-specific methods that can be used at the top level of your app. Most of the components are not required to use this module. Some of the methods of this package are:render()hydrate()unmountComponentAtNode()findDOMNode()createPortal()
-
The
ReactDOMServerobject enables you to render components to static markup (typically used on node server). This object is mainly used for server-side rendering (SSR). The following methods can be used in both the server and browser environments:renderToString()renderToStaticMarkup()
For example, you generally run a Node-based web server like Express, Hapi, or Koa, and you call
renderToStringto render your root component to a string, which you then send as response.// using Express import { renderToString } from "react-dom/server"; import MyPage from "./MyPage"; app.get("/", (req, res) => { res.write( "<!DOCTYPE html><html><head><title>My Page</title></head><body>" ); res.write('<div id="content">'); res.write(renderToString(<MyPage />)); res.write("</div></body></html>"); res.end(); });
-
The
dangerouslySetInnerHTMLattribute is React's replacement for usinginnerHTMLin the browser DOM. Just likeinnerHTML, it is risky to use this attribute considering cross-site scripting (XSS) attacks. You just need to pass a__htmlobject as key and HTML text as value.In this example MyComponent uses
dangerouslySetInnerHTMLattribute for setting HTML markup:function createMarkup() { return { __html: "First · Second" }; } function MyComponent() { return <div dangerouslySetInnerHTML={createMarkup()} />; }
-
The
styleattribute accepts a JavaScript object with camelCased properties rather than a CSS string. This is consistent with the DOM style JavaScript property, is more efficient, and prevents XSS security holes.const divStyle = { color: "blue", backgroundImage: "url(" + imgUrl + ")", }; function HelloWorldComponent() { return <div style={divStyle}>Hello World!</div>; }
Style keys are camelCased in order to be consistent with accessing the properties on DOM nodes in JavaScript (e.g.
node.style.backgroundImage). -
Handling events in React elements has some syntactic differences:
- React event handlers are named using camelCase, rather than lowercase.
- With JSX you pass a function as the event handler, rather than a string.
-
Keys should be stable, predictable, and unique so that React can keep track of elements.
In the below code snippet each element's key will be based on ordering, rather than tied to the data that is being represented. This limits the optimizations that React can do and creates confusing bugs in the application.
{
  todos.map((todo, index) => <Todo {...todo} key={index} />);
}
If you use element data for unique key, assuming
todo.idis unique to this list and stable, React would be able to reorder elements without needing to reevaluate them as much.{ todos.map((todo) => <Todo {...todo} key={todo.id} />); }
Note: If you don't specify
keyprop at all, React will use index as a key's value while iterating over an array of data. -
In some cases you want to render different components depending on some state. JSX does not render
falseorundefined, so you can use conditional short-circuiting to render a given part of your component only if a certain condition is true.const MyComponent = ({ name, address }) => ( <div> <h2>{name}</h2> {address && <p>{address}</p>} </div> );
If you need an
if-elsecondition then use ternary operator.const MyComponent = ({ name, address }) => ( <div> <h2>{name}</h2> {address ? <p>{address}</p> : <p>{"Address is not available"}</p>} </div> );
-
When we spread props we run into the risk of adding unknown HTML attributes, which is a bad practice. Instead we can use prop destructuring with
...restoperator, so it will add only required props.For example,
const ComponentA = () => (
  <ComponentB isDisplay={true} className={"componentStyle"} />
);

const ComponentB = ({ isDisplay, ...domProps }) => (
  <div {...domProps}>{"ComponentB"}</div>
);
-
There are memoize libraries available which can be used on function components.
For example
moizelibrary can memoize the component in another component.import moize from "moize"; import Component from "./components/Component"; // this module exports a non-memoized component const MemoizedFoo = moize.react(Component); const Consumer = () => { <div> {"I will memoize the following entry:"} <MemoizedFoo /> </div>; };
Update: Since React v16.6.0, we have a
React.memo. It provides a higher order component which memoizes component unless the props change. To use it, simply wrap the component using React.memo before you use it.const MemoComponent = React.memo(function MemoComponent(props) { /* render using props */ }); OR; export default React.memo(MyFunctionComponent);
-
React is already equipped to handle rendering on Node servers. A special version of the DOM renderer is available, which follows the same pattern as on the client side.
import ReactDOMServer from "react-dom/server";
import App from "./App";

ReactDOMServer.renderToString(<App />);
This method will output the regular HTML as a string, which can be then placed inside a page body as part of the server response. On the client side, React detects the pre-rendered content and seamlessly picks up where it left off.
-
You should use Webpack's
DefinePluginmethod to setNODE_ENVtoproduction, by which it strip out things like propType validation and extra warnings. Apart from this, if you minify the code, for example, Uglify's dead-code elimination to strip out development only code and comments, it will drastically reduce the size of your bundle. -
Both render props and higher-order components render only a single child but in most of the cases Hooks are a simpler way to serve this by reducing nesting in your tree.
-
A switching component is a component that renders one of many components. We need to use object to map prop values to components.
For example, a switching component to display different pages based on
pageprop:import HomePage from "./HomePage"; import AboutPage from "./AboutPage"; import ServicesPage from "./ServicesPage"; import ContactPage from "./ContactPage"; const PAGES = { home: HomePage, about: AboutPage, services: ServicesPage, contact: ContactPage, }; const Page = (props) => { const Handler = PAGES[props.page] || ContactPage; return <Handler {...props} />; }; // The keys of the PAGES object can be used in the prop types to catch dev-time errors. Page.propTypes = { page: PropTypes.oneOf(Object.keys(PAGES)).isRequired, };
-
Pointer Events provide a unified way of handling all input events. In the old days we had a mouse and respective event listeners to handle them but nowadays we have many devices which don't correlate to having a mouse, like phones with touch surface or pens. We need to remember that these events will only work in browsers that support the Pointer Events specification.
The following event types are now available in React DOM:
onPointerDownonPointerMoveonPointerUponPointerCancelonGotPointerCaptureonLostPointerCaptureonPointerEnteronPointerLeaveonPointerOveronPointerOut
-
If you are rendering your component using JSX, the name of that component has to begin with a capital letter otherwise React will throw an error as an unrecognized tag. This convention is because only HTML elements and SVG tags can begin with a lowercase letter.
function SomeComponent {
  // Code goes here
}
You can define function component whose name starts with lowercase letter, but when it's imported it should have a capital letter. Here lowercase is fine:
function myComponent {
  render() {
    return <div />;
  }
}

export default myComponent;
While when imported in another file it should start with capital letter:
import MyComponent from "./myComponent";
-
Note: This question references React v16, which is outdated. The information below applies to React 16+, including current versions (React 18/19).
Yes. Starting with React 16, React no longer ignores unknown DOM attributes. If you write JSX with an attribute that React doesn't recognize, React will pass it through to the DOM.
For example, let's take a look at the below attribute:
<div mycustomattribute={"something"} />
In React 15 and earlier, this would render an empty div:
<div />
In React 16 and later (including React 18/19), any unknown attributes will end up in the DOM:
<div mycustomattribute="something" />
This is useful for supplying browser-specific non-standard attributes, trying new DOM APIs, and integrating with opinionated third-party libraries.
-
You can simply use
Array.prototype.mapwith ES6 arrow function syntax.For example, the
itemsarray of objects is mapped into an array of components:<tbody> {items.map((item) => ( <SomeComponent key={item.id} name={item.name} /> ))} </tbody>
But you can't iterate using
forloop:<tbody> for (let i = 0; i < items.length; i++) { <SomeComponent key={items[i].id} name={items[i].name} /> } </tbody>
This is because JSX tags are transpiled into function calls, and you can't use statements inside expressions. This may change thanks to
doexpressions which are stage 1 proposal. -
React (or JSX) doesn't support variable interpolation inside an attribute value. The below representation won't work:
<img className="image" src="images/{this.props.image}" />
But you can put any JS expression inside curly braces as the entire attribute value. So the below expression works:
<img className="image" src={"images/" + this.props.image} />
Using template strings will also work:
<img className="image" src={`images/${this.props.image}`} />
-
If you want to pass an array of objects to a component with a particular shape then use
React.PropTypes.shape()as an argument toReact.PropTypes.arrayOf().ReactComponent.propTypes = { arrayWithShape: React.PropTypes.arrayOf( React.PropTypes.shape({ color: React.PropTypes.string.isRequired, fontSize: React.PropTypes.number.isRequired, }) ).isRequired, };
-
You shouldn't use curly braces inside quotes because it is going to be evaluated as a string.
<div className="btn-panel {this.props.visible ? 'show' : 'hidden'}">
Instead you need to move curly braces outside (don't forget to include spaces between class names):
<div className={'btn-panel ' + (this.props.visible ? 'show' : 'hidden')}>
Template strings will also work:
<div className={`btn-panel ${this.props.visible ? 'show' : 'hidden'}`}>
-
The
reactpackage containsReact.createElement(),React.Component,React.Children, and other helpers related to elements and component classes. You can think of these as the isomorphic or universal helpers that you need to build components. Thereact-dompackage containsReactDOM.render(), and inreact-dom/serverwe have server-side rendering support withReactDOMServer.renderToString()andReactDOMServer.renderToStaticMarkup(). -
The React team worked on extracting all DOM-related features into a separate library called ReactDOM. React v0.14 is the first release in which the libraries are split. By looking at some of the packages,
react-native,react-art,react-canvas, andreact-three, it has become clear that the beauty and essence of React has nothing to do with browsers or the DOM.To build more environments that React can render to, React team planned to split the main React package into two:
reactandreact-dom. This paves the way to writing components that can be shared between the web version of React and React Native. -
If you try to render a
<label>element bound to a text input using the standardforattribute, then it produces HTML missing that attribute and prints a warning to the console.<label for={'user'}>{'User'}</label> <input type={'text'} id={'user'} />
Since
foris a reserved keyword in JavaScript, usehtmlForinstead.<label htmlFor={'user'}>{'User'}</label> <input type={'text'} id={'user'} />
-
You can use spread operator in regular React:
<button style={{ ...styles.panel.button, ...styles.panel.submitButton }}>
  {"Submit"}
</button>
If you're using React Native then you can use the array notation:
<button style={[styles.panel.button, styles.panel.submitButton]}>
  {"Submit"}
</button>
-
You can use the
useStatehook to manage the width and height state variables, and theuseEffecthook to add and remove theresizeevent listener. The[]dependency array passed to useEffect ensures that the effect only runs once (on mount) and not on every re-render.import React, { useState, useEffect } from "react"; function WindowDimensions() { const [dimensions, setDimensions] = useState({ width: window.innerWidth, height: window.innerHeight, }); useEffect(() => { function handleResize() { setDimensions({ width: window.innerWidth, height: window.innerHeight, }); } window.addEventListener("resize", handleResize); return () => window.removeEventListener("resize", handleResize); }, []); return ( <span> {dimensions.width} x {dimensions.height} </span> ); }
You can listen to the
resizeevent incomponentDidMount()and then update the dimensions (widthandheight). You should remove the listener incomponentWillUnmount()method.class WindowDimensions extends React.Component { constructor(props) { super(props); this.updateDimensions = this.updateDimensions.bind(this); } componentWillMount() { this.updateDimensions(); } componentDidMount() { window.addEventListener("resize", this.updateDimensions); } componentWillUnmount() { window.removeEventListener("resize", this.updateDimensions); } updateDimensions() { this.setState({ width: window.innerWidth, height: window.innerHeight, }); } render() { return ( <span> {this.state.width} x {this.state.height} </span> ); } }
-
We can use
<pre>tag so that the formatting of theJSON.stringify()is retained:const data = { name: "John", age: 42 }; function User { return <pre>{JSON.stringify(data, null, 2)}</pre>; } const container = createRoot(document.getElementById("container")); container.render(<User />);
See Class
const data = { name: "John", age: 42 };

class User extends React.Component {
  render() {
    return <pre>{JSON.stringify(data, null, 2)}</pre>;
  }
}

React.render(<User />, document.getElementById("container"));
-
The React philosophy is that props should be immutable(read only) and top-down. This means that a parent can send any prop values to a child, but the child can't modify received props.
-
You need to use
useEffecthook to set focus on input field during page load time for functional component.import React, { useEffect, useRef } from "react"; const App = () => { const inputElRef = useRef(null); useEffect(() => { inputElRef.current.focus(); }, []); return ( <div> <input defaultValue={"Won't focus"} /> <input ref={inputElRef} defaultValue={"Will focus"} /> </div> ); }; ReactDOM.render(<App />, document.getElementById("app"));
See Class
You can do it by creating _ref_ for `input` element and using it in `componentDidMount()`:
class App extends React.Component {
  componentDidMount() {
    this.nameInput.focus();
  }

  render() {
    return (
      <div>
        <input defaultValue={"Won't focus"} />
        <input
          ref={(input) => (this.nameInput = input)}
          defaultValue={"Will focus"}
        />
      </div>
    );
  }
}

ReactDOM.render(<App />, document.getElementById("app"));
-
You can use
React.versionto get the version.const REACT_VERSION = React.version; ReactDOM.render( <div>{`React version: ${REACT_VERSION}`}</div>, document.getElementById("app") );
-
Add a listener on the
historyobject to record each page view:history.listen(function (location) { window.ga("set", "page", location.pathname + location.search); window.ga("send", "pageview", location.pathname + location.search); });
-
React does not apply vendor prefixes automatically. You need to add vendor prefixes manually.
<div
  style={{
    transform: "rotate(90deg)",
    WebkitTransform: "rotate(90deg)", // note the capital 'W' here
    msTransform: "rotate(90deg)", // 'ms' is the only lowercase vendor prefix
  }}
/>
-
You should use default for exporting the components
import User from "user";

export default function MyProfile {
    return <User type="customer">//...</User>;
}
See Class
```jsx harmony import React from "react"; import User from "user";
export default class MyProfile extends React.Component { render() { return //...; } }
</p>
</details>

With the export specifier, the MyProfile is going to be the member and exported to this module and the same can be imported without mentioning the name in other components.
-
The component names should start with an uppercase letter but there are few exceptions to this convention. The lowercase tag names with a dot (property accessors) are still considered as valid component names. For example, the below tag can be compiled to a valid component,
     render() {
          return (
            <obj.component/> // `React.createElement(obj.component)`
          )
    }
-
Yes, you can use
async/awaitin plain React, as long as your JavaScript environment supports ES2017+. Nowadays most modern browsers and build tools support ES2017+ version. If you're using Create React App, Next.js, Remix, or any modern React setup,async/awaitis supported out of the box through Babel.import { useEffect, useState } from 'react'; function UserProfile() { const [user, setUser] = useState(null); useEffect(() => { const fetchUser = async () => { const response = await fetch('/api/user'); const data = await response.json(); setUser(data); }; fetchUser(); }, []); return user ? <div>Hello, {user.name}</div> : <div>Loading...</div>; }
But If you're not using a bundler like Webpack or Babel, you will need Babel and transform-async-to-generator plugin. However, React Native ships with Babel and a set of transforms.
-
There are two common practices for React project file structure.
- Grouping by features or routes:
One common way to structure projects is locate CSS, JS, and tests together, grouped by feature or route.
common/ ├─ Avatar.js ├─ Avatar.css ├─ APIUtils.js └─ APIUtils.test.js feed/ ├─ index.js ├─ Feed.js ├─ Feed.css ├─ FeedStory.js ├─ FeedStory.test.js └─ FeedAPI.js profile/ ├─ index.js ├─ Profile.js ├─ ProfileHeader.js ├─ ProfileHeader.css └─ ProfileAPI.js- Grouping by file type:
Another popular way to structure projects is to group similar files together.
api/
├─ APIUtils.js
├─ APIUtils.test.js
├─ ProfileAPI.js
└─ UserAPI.js
components/
├─ Avatar.js
├─ Avatar.css
├─ Feed.js
├─ Feed.css
├─ FeedStory.js
├─ FeedStory.test.js
├─ Profile.js
├─ ProfileHeader.js
└─ ProfileHeader.css
-
React Transition Group and React Motion are popular animation packages in React ecosystem.
-
It is recommended to avoid hard coding style values in components. Any values that are likely to be used across different UI components should be extracted into their own modules.
For example, these styles could be extracted into a separate component:
export const colors = {
  white,
  black,
  blue,
};

export const space = [0, 8, 16, 32, 64];
And then imported individually in other components:
import { space, colors } from "./styles";
-
ESLint is a popular JavaScript linter. There are plugins available that analyse specific code styles. One of the most common for React is an npm package called
eslint-plugin-react. By default, it will check a number of best practices, with rules checking things from keys in iterators to a complete set of prop types.Another popular plugin is
eslint-plugin-jsx-a11y, which will help fix common issues with accessibility. As JSX offers slightly different syntax to regular HTML, issues withalttext andtabindex, for example, will not be picked up by regular plugins.
-
React Router is a powerful routing library built on top of React that helps you add new screens and flows to your application incredibly quickly, all while keeping the URL in sync with what's being displayed on the page.
-
React Router is a wrapper around the
historylibrary which handles interaction with the browser'swindow.historywith its browser and hash histories. It also provides memory history which is useful for environments that don't have global history, such as mobile app development (React Native) and unit testing with Node.
-
React Router v6 provides below 4
<Router>components:<BrowserRouter>:Uses the HTML5 history API for standard web apps.<HashRouter>:Uses hash-based routing for static servers.<MemoryRouter>:Uses in-memory routing for testing and non-browser environments.<StaticRouter>:Provides static routing for server-side rendering (SSR).
The above components will create browser, hash, memory and static history instances. React Router v6 makes the properties and methods of the
historyinstance associated with your router available through the context in therouterobject.
-
A history instance has two methods for navigation purpose.
push()replace()
If you think of the history as an array of visited locations,
push()will add a new location to the array andreplace()will replace the current location in the array with the new one.
-
There are three different ways to achieve programmatic routing/navigation within components.
-
Using the
withRouter()higher-order function:The
withRouter()higher-order function will inject the history object as a prop of the component. This object providespush()andreplace()methods to avoid the usage of context.import { withRouter } from "react-router-dom"; // this also works with 'react-router-native' const Button = withRouter(({ history }) => ( <button type="button" onClick={() => { history.push("/new-location"); }} > {"Click Me!"} </button> ));
-
Using
<Route>component and render props pattern:The
<Route>component passes the same props aswithRouter(), so you will be able to access the history methods through the history prop.import { Route } from "react-router-dom"; const Button = () => ( <Route render={({ history }) => ( <button type="button" onClick={() => { history.push("/new-location"); }} > {"Click Me!"} </button> )} /> );
-
Using context:
This option is not recommended and treated as unstable API.
const Button = (props, context) => (
  <button
    type="button"
    onClick={() => {
      context.history.push("/new-location");
    }}
  >
    {"Click Me!"}
  </button>
);

Button.contextTypes = {
  history: React.PropTypes.shape({
    push: React.PropTypes.func.isRequired,
  }),
};
-
-
The ability to parse query strings was taken out of React Router v4 because there have been user requests over the years to support different implementation. So the decision has been given to users to choose the implementation they like. The recommended approach is to use query strings library.
const queryString = require("query-string");
const parsed = queryString.parse(props.location.search);
You can also use
URLSearchParamsif you want something native:const params = new URLSearchParams(props.location.search); const foo = params.get("name");
You should use a polyfill for IE11.
-
You have to wrap your Route's in a
<Switch>block because<Switch>is unique in that it renders a route exclusively.At first you need to add
Switchto your imports:import { Switch, Router, Route } from "react-router";
Then define the routes within
<Switch>block:<Router> <Switch> <Route {/* ... */} /> <Route {/* ... */} /> </Switch> </Router>
-
While navigating you can pass props to the
historyobject:this.props.history.push({ pathname: "/template", search: "?name=sudheer", state: { detail: response.data }, });
The
searchproperty is used to pass query params inpush()method.
-
A
<Switch>renders the first child<Route>that matches. A<Route>with no path always matches. So you just need to simply drop path attribute as below<Switch> <Route exact path="/" component={Home} /> <Route path="/user" component={User} /> <Route component={NotFound} /> </Switch>
-
Below are the list of steps to get history object on React Router v4,
-
Create a module that exports a
historyobject and import this module across the project.For example, create
history.jsfile:import { createBrowserHistory } from "history"; export default createBrowserHistory({ /* pass a configuration object here if needed */ });
-
You should use the
<Router>component instead of built-in routers. Import the abovehistory.jsinsideindex.jsfile:import { Router } from "react-router-dom"; import history from "./history"; import App from "./App"; ReactDOM.render( <Router history={history}> <App /> </Router>, holder );
-
You can also use push method of
historyobject similar to built-in history object:// some-other-file.js import history from "./history"; history.push("/go-here");
-
-
The
react-routerpackage provides<Redirect>component in React Router. Rendering a<Redirect>will navigate to a new location. Like server-side redirects, the new location will override the current location in the history stack.import { Redirect } from "react-router"; export default function Login { if (this.state.isLoggedIn === true) { return <Redirect to="/your/redirect/page" />; } else { return <div>{"Login Please"}</div>; } }
See Class
import React, { Component } from "react";
import { Redirect } from "react-router";

export default class LoginComponent extends Component {
  render() {
    if (this.state.isLoggedIn === true) {
      return <Redirect to="/your/redirect/page" />;
    } else {
      return <div>{"Login Please"}</div>;
    }
  }
}
-
The React Intl library makes internationalization in React straightforward, with off-the-shelf components and an API that can handle everything from formatting strings, dates, and numbers, to pluralization. React Intl is part of FormatJS which provides bindings to React via its components and API.
-
Below are the main features of React Intl,
- Display numbers with separators.
- Display dates and times correctly.
- Display dates relative to "now".
- Pluralize labels in strings.
- Support for 150+ languages.
- Runs in the browser and Node.
- Built on standards.
-
The library provides two ways to format strings, numbers, and dates:
-
Using react components:
<FormattedMessage
  id={"account"}
  defaultMessage={"The amount is less than minimum balance."}
/>
-
Using an API:
const messages = defineMessages({
  accountMessage: {
    id: "account",
    defaultMessage: "The amount is less than minimum balance.",
  },
});

formatMessage(messages.accountMessage);
-
-
The
<Formatted... />components fromreact-intlreturn elements, not plain text, so they can't be used for placeholders, alt text, etc. In that case, you should use lower level APIformatMessage(). You can inject theintlobject into your component usinginjectIntl()higher-order component and then format the message usingformatMessage()available on that object.import React from "react"; import { injectIntl, intlShape } from "react-intl"; const MyComponent = ({ intl }) => { const placeholder = intl.formatMessage({ id: "messageId" }); return <input placeholder={placeholder} />; }; MyComponent.propTypes = { intl: intlShape.isRequired, }; export default injectIntl(MyComponent);
-
You can get the current locale in any component of your application using
injectIntl():import { injectIntl, intlShape } from "react-intl"; const MyComponent = ({ intl }) => ( <div>{`The current locale is ${intl.locale}`}</div> ); MyComponent.propTypes = { intl: intlShape.isRequired, }; export default injectIntl(MyComponent);
-
The
injectIntl()higher-order component will give you access to theformatDate()method via the props in your component. The method is used internally by instances ofFormattedDateand it returns the string representation of the formatted date.import { injectIntl, intlShape } from "react-intl"; const stringDate = this.props.intl.formatDate(date, { year: "numeric", month: "numeric", day: "numeric", }); const MyComponent = ({ intl }) => ( <div>{`The formatted date is ${stringDate}`}</div> ); MyComponent.propTypes = { intl: intlShape.isRequired, }; export default injectIntl(MyComponent);
-
Shallow rendering is useful for writing unit test cases in React. It lets you render a component one level deep and assert facts about what its render method returns, without worrying about the behavior of child components, which are not instantiated or rendered.
For example, if you have the following component:
function MyComponent() {
  return (
    <div>
      <span className={"heading"}>{"Title"}</span>
      <span className={"description"}>{"Description"}</span>
    </div>
  );
}
Then you can assert as follows:
import ShallowRenderer from "react-test-renderer/shallow";

// in your test
const renderer = new ShallowRenderer();
renderer.render(<MyComponent />);

const result = renderer.getRenderOutput();

expect(result.type).toBe("div");
expect(result.props.children).toEqual([
  <span className={"heading"}>{"Title"}</span>,
  <span className={"description"}>{"Description"}</span>,
]);
-
This package provides a renderer that can be used to render components to pure JavaScript objects, without depending on the DOM or a native mobile environment. This package makes it easy to grab a snapshot of the platform view hierarchy (similar to a DOM tree) rendered by a ReactDOM or React Native without using a browser or
jsdom.import TestRenderer from "react-test-renderer"; const Link = ({ page, children }) => <a href={page}>{children}</a>; const testRenderer = TestRenderer.create( <Link page={"https://www.facebook.com/"}>{"Facebook"}</Link> ); console.log(testRenderer.toJSON()); // { // type: 'a', // props: { href: 'https://www.facebook.com/' }, // children: [ 'Facebook' ] // }
-
ReactTestUtils are provided in the
with-addonspackage and allow you to perform actions against a simulated DOM for the purpose of unit testing.
-
Jest is a JavaScript unit testing framework created by Facebook based on Jasmine and provides automated mock creation and a
jsdomenvironment. It's often used for testing components.
-
There are couple of advantages compared to Jasmine:
- Automatically finds tests to execute in your source code.
- Automatically mocks dependencies when running your tests.
- Allows you to test asynchronous code synchronously.
- Runs your tests with a fake DOM implementation (via
jsdom) so that your tests can be run on the command line. - Runs tests in parallel processes so that they finish sooner.
-
Let's write a test for a function that adds two numbers in
sum.jsfile:const sum = (a, b) => a + b; export default sum;
Create a file named
sum.test.jswhich contains actual test:import sum from "./sum"; test("adds 1 + 2 to equal 3", () => { expect(sum(1, 2)).toBe(3); });
And then add the following section to your
package.json:{ "scripts": { "test": "jest" } }Finally, run
yarn testornpm testand Jest will print a result:$ yarn test PASS ./sum.test.js ✓ adds 1 + 2 to equal 3 (2ms)
-
Flux is an application architecture (not a framework or library) designed by Facebook to manage data flow in React applications. It was created as an alternative to the traditional MVC (Model-View-Controller) pattern, and it emphasizes a unidirectional data flow to make state changes more predictable and easier to debug.
Flux complements React by organizing the way data moves through your application, especially in large-scale or complex projects.
Flux operates using four key components, each with a specific responsibility:
- Actions
- Plain JavaScript objects or functions that describe what happened (e.g., user interactions or API responses).
- Example:
{ type: 'ADD_TODO', payload: 'Buy milk' }
- Dispatcher
- A central hub that receives actions and dispatches them to the appropriate stores.
- There is only one dispatcher in a Flux application.
- Stores
- Hold the application state and business logic.
- Respond to actions from the dispatcher and update themselves accordingly.
- They emit change events that views can listen to.
- Views (React Components)
- Subscribe to stores and re-render when the data changes.
- They can also trigger new actions (e.g., on user input).
The workflow between dispatcher, stores and views components with distinct inputs and outputs as follows:
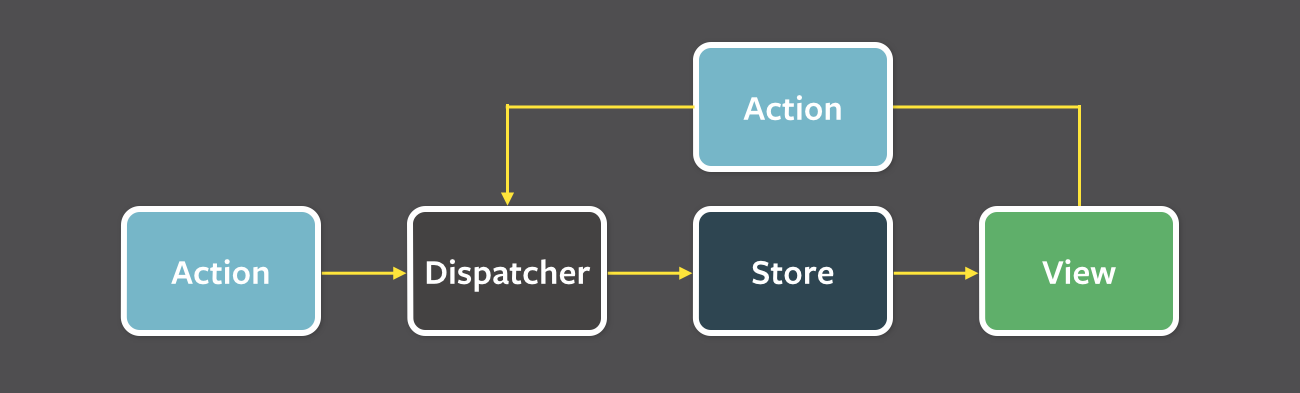
- Actions

- Redux is a predictable state container for JavaScript applications, most commonly used with React. It helps you manage and centralize your application’s state in a single source of truth, enabling easier debugging, testing, and maintenance—especially in large or complex applications. Redux core is tiny library(about 2.5kB gzipped) and has no dependencies.
-
Redux follows three fundamental principles:
- Single source of truth: The state of your whole application is stored in an object tree within a single store. The single state tree makes it easier to keep track of changes over time and debug or inspect the application.
const store = createStore(reducer);
- State is read-only: The only way to change the state is to emit an action, an object describing what happened. This ensures that neither the views nor the network callbacks will ever write directly to the state.
const action = { type: 'INCREMENT' };
store.dispatch(action);
- Changes are made with pure functions(Reducers): To specify how the state tree is transformed by actions, you write reducers. Reducers are just pure functions that take the previous state and an action as parameters, and return the next state.
function counter(state = 0, action) {
  switch (action.type) {
    case 'INCREMENT':
      return state + 1;
    case 'DECREMENT':
      return state - 1;
    default:
      return state;
  }
}
-
While Redux offers a powerful and predictable state management solution, it comes with a few trade-offs when compared to Flux. These include:
- Immutability is essential
Redux enforces a strict immutability model for state updates, which differs from Flux’s more relaxed approach. This means you must avoid mutating state directly. Many Redux-related libraries assume immutability, so your team must be disciplined in writing pure update logic. You can use tools likeredux-immutable-state-invariant,Immer, orImmutable.jsto help enforce this practice, especially during development. - Careful selection of complementary packages
Redux is more minimal by design and provides extension points such as middleware and store enhancers. This has led to a large ecosystem, but it also means you must thoughtfully choose and configure additional packages for features like undo/redo, persistence, or form handling—something Flux explicitly leaves out but may be simpler to manage in smaller setups. - Limited static type integration
While Flux has mature support for static type checking with tools like Flow, Redux’s type integration is less seamless. Although TypeScript is commonly used with Redux now, early Flow support was limited, and more boilerplate was required for static type safety. This may affect teams that rely heavily on type systems for large codebases.
- Immutability is essential
-
mapStateToProps()is a utility which helps your component get updated state (which is updated by some other components):const mapStateToProps = (state) => { return { todos: getVisibleTodos(state.todos, state.visibilityFilter), }; };
mapDispatchToProps()is a utility which will help your component to fire an action event (dispatching action which may cause change of application state):const mapDispatchToProps = (dispatch) => { return { onTodoClick: (id) => { dispatch(toggleTodo(id)); }, }; };
It is recommended to always use the “object shorthand” form for the
mapDispatchToProps.Redux wraps it in another function that looks like (…args) => dispatch(onTodoClick(…args)), and pass that wrapper function as a prop to your component.
const mapDispatchToProps = {
  onTodoClick,
};
-
Dispatching an action within a reducer is an anti-pattern. Your reducer should be without side effects, simply digesting the action payload and returning a new state object. Adding listeners and dispatching actions within the reducer can lead to chained actions and other side effects.
-
You just need to export the store from the module where it created with
createStore(). Also, it shouldn't pollute the global window object.store = createStore(myReducer); export default store;
-
- DOM manipulation is very expensive which causes applications to behave slow and inefficient.
- Due to circular dependencies, a complicated model was created around models and views.
- Lot of data changes happens for collaborative applications(like Google Docs).
- No way to do undo (travel back in time) easily without adding so much extra code.
-
These libraries are very different for very different purposes, but there are some vague similarities.
Redux is a tool for managing state throughout the application. It is usually used as an architecture for UIs. Think of it as an alternative to (half of) Angular. RxJS is a reactive programming library. It is usually used as a tool to accomplish asynchronous tasks in JavaScript. Think of it as an alternative to Promises. Redux uses the Reactive paradigm because the Store is reactive. The Store observes actions from a distance, and changes itself. RxJS also uses the Reactive paradigm, but instead of being an architecture, it gives you basic building blocks, Observables, to accomplish this pattern.
-
You need to write a root reducer in your application which delegate handling the action to the reducer generated by
combineReducers().For example, let us take
rootReducer()to return the initial state afterUSER_LOGOUTaction. As we know, reducers are supposed to return the initial state when they are called withundefinedas the first argument, no matter the action.const appReducer = combineReducers({ /* your app's top-level reducers */ }); const rootReducer = (state, action) => { if (action.type === "USER_LOGOUT") { state = undefined; } return appReducer(state, action); };
In case of using
redux-persist, you may also need to clean your storage.redux-persistkeeps a copy of your state in a storage engine. First, you need to import the appropriate storage engine and then, to parse the state before setting it to undefined and clean each storage state key.const appReducer = combineReducers({ /* your app's top-level reducers */ }); const rootReducer = (state, action) => { if (action.type === "USER_LOGOUT") { Object.keys(state).forEach((key) => { storage.removeItem(`persist:${key}`); }); state = undefined; } return appReducer(state, action); };
-
You can use Context in your application directly and is going to be great for passing down data to deeply nested components which what it was designed for.
Whereas Redux is much more powerful and provides a large number of features that the Context API doesn't provide. Also, React Redux uses context internally but it doesn't expose this fact in the public API.
Aspect Context API Redux Purpose Dependency injection — passes data through the tree without prop drilling Full state-management library with a predictable, centralized store State updates Plain useState/useReducernext to the provider; no built-in middlewareActions + reducers, with middleware support ( redux-thunk,redux-saga, etc.)Performance Every consumer re-renders on any value change unless you split contexts/memoize Uses selectors ( useSelector/connect) so components only re-render when the selected slice changesDevTools None built-in Time-travel debugging, action logs via Redux DevTools Async logic You wire it yourself (custom hooks, effects) Standardized patterns via middleware Boilerplate Minimal — just createContext/useContextMore setup, though Redux Toolkit reduces this significantly Not entirely — they solve overlapping but different problems, so the right choice depends on the app's needs:
- Context is a good fit for low-frequency, mostly-static data that many components need (theme, locale, authenticated user, feature flags). Combined with
useReducer, it can even model simple local/global state without pulling in Redux (see Can you combine useReducer with useContext?). - Redux is still preferable for large apps with complex, frequently-updating state, cross-cutting concerns like caching/undo/logging, a need for middleware (async flows, side effects), or debugging tools like time-travel and action replay.
- Performance matters: Context has no built-in mechanism to prevent unnecessary re-renders of all consumers when the provided value changes, whereas Redux's
useSelectorre-renders only the components that depend on the changed slice of state.
In short, Context is a simpler tool for prop-drilling/dependency-injection use cases, while Redux remains a more robust, scalable option for complex application-wide state management. Many apps use both together — Context for simple, rarely-changing values and Redux (or another store) for the rest.
- Context is a good fit for low-frequency, mostly-static data that many components need (theme, locale, authenticated user, feature flags). Combined with
-
Reducers always return the accumulation of the state (based on all previous and current actions). Therefore, they act as a reducer of state. Each time a Redux reducer is called, the state and action are passed as parameters. This state is then reduced (or accumulated) based on the action, and then the next state is returned. You could reduce a collection of actions and an initial state (of the store) on which to perform these actions to get the resulting final state.
-
You can use
redux-thunkmiddleware which allows you to define async actions.Let's take an example of fetching specific account as an AJAX call using fetch API:
export function fetchAccount(id) {
  return (dispatch) => {
    dispatch(setLoadingAccountState()); // Show a loading spinner
    fetch(`/account/${id}`, (response) => {
      dispatch(doneFetchingAccount()); // Hide loading spinner
      if (response.status === 200) {
        dispatch(setAccount(response.json)); // Use a normal function to set the received state
      } else {
        dispatch(someError);
      }
    });
  };
}

function setAccount(data) {
  return { type: "SET_Account", data: data };
}
-
Keep your data in the Redux store, and the UI related state internally in the component.
-
The best way to access your store in a component is to use the
connect()function, that creates a new component that wraps around your existing one. This pattern is called Higher-Order Components, and is generally the preferred way of extending a component's functionality in React. This allows you to map state and action creators to your component, and have them passed in automatically as your store updates.Let's take an example of
<FilterLink>component using connect:import { connect } from "react-redux"; import { setVisibilityFilter } from "../actions"; import Link from "../components/Link"; const mapStateToProps = (state, ownProps) => ({ active: ownProps.filter === state.visibilityFilter, }); const mapDispatchToProps = (dispatch, ownProps) => ({ onClick: () => dispatch(setVisibilityFilter(ownProps.filter)), }); const FilterLink = connect(mapStateToProps, mapDispatchToProps)(Link); export default FilterLink;
Due to it having quite a few performance optimizations and generally being less likely to cause bugs, the Redux developers almost always recommend using
connect()over accessing the store directly (using context API).function MyComponent { someMethod() { doSomethingWith(this.context.store); } }
-
Component is a class or function component that describes the presentational part of your application.
Container is an informal term for a component that is connected to a Redux store. Containers subscribe to Redux state updates and dispatch actions, and they usually don't render DOM elements; they delegate rendering to presentational child components.
-
Constants allows you to easily find all usages of that specific functionality across the project when you use an IDE. It also prevents you from introducing silly bugs caused by typos – in which case, you will get a
ReferenceErrorimmediately.Normally we will save them in a single file (
constants.jsoractionTypes.js).export const ADD_TODO = "ADD_TODO"; export const DELETE_TODO = "DELETE_TODO"; export const EDIT_TODO = "EDIT_TODO"; export const COMPLETE_TODO = "COMPLETE_TODO"; export const COMPLETE_ALL = "COMPLETE_ALL"; export const CLEAR_COMPLETED = "CLEAR_COMPLETED";
In Redux, you use them in two places:
-
During action creation:
Let's take
actions.js:import { ADD_TODO } from "./actionTypes"; export function addTodo(text) { return { type: ADD_TODO, text }; }
-
In reducers:
Let's create
reducer.js:import { ADD_TODO } from "./actionTypes"; export default (state = [], action) => { switch (action.type) { case ADD_TODO: return [ ...state, { text: action.text, completed: false, }, ]; default: return state; } };
-
-
There are a few ways of binding action creators to
dispatch()inmapDispatchToProps().Below are the possible options:
const mapDispatchToProps = (dispatch) => ({
  action: () => dispatch(action()),
});
const mapDispatchToProps = (dispatch) => ({
  action: bindActionCreators(action, dispatch),
});
const mapDispatchToProps = { action };
The third option is just a shorthand for the first one.
-
If the
ownPropsparameter is specified, React Redux will pass the props that were passed to the component into your connect functions. So, if you use a connected component:import ConnectedComponent from "./containers/ConnectedComponent"; <ConnectedComponent user={"john"} />;
The
ownPropsinside yourmapStateToProps()andmapDispatchToProps()functions will be an object:{ user: "john"; }
You can use this object to decide what to return from those functions.
-
Most of the applications has several top-level directories as below:
- Components: Used for dumb components unaware of Redux.
- Containers: Used for smart components connected to Redux.
- Actions: Used for all action creators, where file names correspond to part of the app.
- Reducers: Used for all reducers, where files name correspond to state key.
- Store: Used for store initialization.
This structure works well for small and medium size apps.
-
redux-sagais a library that aims to make side effects (asynchronous things like data fetching and impure things like accessing the browser cache) in React/Redux applications easier and better.It is available in NPM:
$ npm install --save redux-saga
-
Saga is like a separate thread in your application, that's solely responsible for side effects.
redux-sagais a redux middleware, which means this thread can be started, paused and cancelled from the main application with normal Redux actions, it has access to the full Redux application state and it can dispatch Redux actions as well.
-
Both
call()andput()are effect creator functions.call()function is used to create effect description, which instructs middleware to call the promise.put()function creates an effect, which instructs middleware to dispatch an action to the store.Let's take example of how these effects work for fetching particular user data.
function* fetchUserSaga(action) {
  // `call` function accepts rest arguments, which will be passed to `api.fetchUser` function.
  // Instructing middleware to call promise, it resolved value will be assigned to `userData` variable
  const userData = yield call(api.fetchUser, action.userId);

  // Instructing middleware to dispatch corresponding action.
  yield put({
    type: "FETCH_USER_SUCCESS",
    userData,
  });
}
-
Redux Thunk middleware allows you to write action creators that return a function instead of an action. The thunk can be used to delay the dispatch of an action, or to dispatch only if a certain condition is met. The inner function receives the store methods
dispatch()andgetState()as parameters.
-
Both Redux Thunk and Redux Saga take care of dealing with side effects. In most of the scenarios, Thunk uses Promises to deal with them, whereas Saga uses Generators. Thunk is simple to use and Promises are familiar to many developers, Sagas/Generators are more powerful but you will need to learn them. But both middleware can coexist, so you can start with Thunks and introduce Sagas when/if you need them.
-
Redux DevTools is a live-editing time travel environment for Redux with hot reloading, action replay, and customizable UI. If you don't want to bother with installing Redux DevTools and integrating it into your project, consider using Redux DevTools Extension for Chrome and Firefox.
-
Some of the main features of Redux DevTools are below,
- Lets you inspect every state and action payload.
- Lets you go back in time by cancelling actions.
- If you change the reducer code, each staged action will be re-evaluated.
- If the reducers throw, you will see during which action this happened, and what the error was.
- With
persistState()store enhancer, you can persist debug sessions across page reloads.
-
Selectors are functions that take Redux state as an argument and return some data to pass to the component.
For example, to get user details from the state:
const getUserData = (state) => state.user.data;
These selectors have two main benefits,
- The selector can compute derived data, allowing Redux to store the minimal possible state
- The selector is not recomputed unless one of its arguments changes
-
Redux Form works with React and Redux to enable a form in React to use Redux to store all of its state. Redux Form can be used with raw HTML5 inputs, but it also works very well with common UI frameworks like Material UI, React Widgets and React Bootstrap.
-
Some of the main features of Redux Form are:
- Field values persistence via Redux store.
- Validation (sync/async) and submission.
- Formatting, parsing and normalization of field values.
-
You can use
applyMiddleware().For example, you can add
redux-thunkandloggerpassing them as arguments toapplyMiddleware():import { createStore, applyMiddleware } from "redux"; const createStoreWithMiddleware = applyMiddleware( ReduxThunk, logger )(createStore);
-
You need to pass initial state as second argument to createStore:
const rootReducer = combineReducers({
  todos: todos,
  visibilityFilter: visibilityFilter,
});

const initialState = {
  todos: [{ id: 123, name: "example", completed: false }],
};

const store = createStore(rootReducer, initialState);
-
Relay is similar to Redux in that they both use a single store. The main difference is that relay only manages state originated from the server, and all access to the state is used via GraphQL queries (for reading data) and mutations (for changing data). Relay caches the data for you and optimizes data fetching for you, by fetching only changed data and nothing more.
-
Actions are plain JavaScript objects or payloads of information that send data from your application to your store. They are the only source of information for the store. Actions must have a type property that indicates the type of action being performed.
For example, let's take an action which represents adding a new todo item:
{
  type: ADD_TODO,
  text: 'Add todo item'
}
-
React is a JavaScript library, supporting both front end web and being run on the server, for building user interfaces and web applications.
React Native is a mobile framework that compiles to native app components, allowing you to build native mobile applications (iOS, Android, and Windows) in JavaScript that allows you to use React to build your components, and implements React under the hood.
-
React Native can be tested only in mobile simulators like iOS and Android. You can run the app in your mobile using expo app (https://expo.io) Where it syncs using QR code, your mobile and computer should be in same wireless network.
-
You can use
console.log,console.warn, etc. As of React Native v0.29 you can simply run the following to see logs in the console:$ react-native log-ios $ react-native log-android
-
Follow the below steps to debug React Native app:
- Run your application in the iOS simulator.
- Press
Command + Dand a webpage should open up athttp://localhost:8081/debugger-ui. - Enable Pause On Caught Exceptions for a better debugging experience.
- Press
Command + Option + Ito open the Chrome Developer tools, or open it viaView->Developer->Developer Tools. - You should now be able to debug as you normally would.
-
Reselect is a selector library (for Redux) which uses memoization concept. It was originally written to compute derived data from Redux-like applications state, but it can't be tied to any architecture or library.
Reselect keeps a copy of the last inputs/outputs of the last call, and recomputes the result only if one of the inputs changes. If the same inputs are provided twice in a row, Reselect returns the cached output. It's memoization and cache are fully customizable.
-
Flow is a static type checker designed to find type errors in JavaScript. Flow types can express much more fine-grained distinctions than traditional type systems. For example, Flow helps you catch errors involving
null, unlike most type systems.
-
Flow is a static analysis tool (static checker) which uses a superset of the language, allowing you to add type annotations to all of your code and catch an entire class of bugs at compile time.
PropTypes is a basic type checker (runtime checker) which has been patched onto React. It can't check anything other than the types of the props being passed to a given component. If you want more flexible typechecking for your entire project Flow/TypeScript are appropriate choices.
-
The below steps followed to include Font Awesome in React:
-
Install
font-awesome:$ npm install --save font-awesome -
Import
font-awesomein yourindex.jsfile:import "font-awesome/css/font-awesome.min.css";
-
Add Font Awesome classes in
className:function MyComponent { return <div><i className={'fa fa-spinner'} /></div> }
-
-
React Developer Tools let you inspect the component hierarchy, including component props and state. It exists both as a browser extension (for Chrome and Firefox), and as a standalone app (works with other environments including Safari, IE, and React Native).
The official extensions available for different browsers or environments.
- Chrome extension
- Firefox extension
- Standalone app (Safari, React Native, etc)
-
If you opened a local HTML file in your browser (
file://...) then you must first open Chrome Extensions and checkAllow access to file URLs.
-
You need to follow below steps to use Polymer in React,
-
Create a Polymer element:
<link
  rel="import"
  href="../../bower_components/polymer/polymer.html"
/>;
Polymer({
  is: "calendar-element",
  ready: function () {
    this.textContent = "I am a calendar";
  },
});
-
Create the Polymer component HTML tag by importing it in a HTML document, e.g. import it in the
index.htmlof your React application:<link rel="import" href="./src/polymer-components/calendar-element.html" />
-
Use that element in the JSX file:
export default function MyComponent {
  return <calendar-element />;
}
-
-
React has the following advantages over Vue.js:
- Gives more flexibility in large apps developing.
- Easier to test.
- Suitable for mobile apps creating.
- More information and solutions available.
Note: The above list of advantages are purely opinionated and it vary based on the professional experience. But they are helpful as base parameters.
-
Let's see the difference between React and Angular in a table format.
React Angular React is a library and has only the View layer Angular is a framework and has complete MVC functionality React handles rendering on the server side AngularJS renders only on the client side but Angular 2 and above renders on the server side React uses JSX that looks like HTML in JS which can be confusing Angular follows the template approach for HTML, which makes code shorter and easy to understand React Native, which is a React type to build mobile applications are faster and more stable Ionic, Angular's mobile native app is relatively less stable and slower In React, data flows only in one way and hence debugging is easy In Angular, data flows both way i.e it has two-way data binding between children and parent and hence debugging is often difficult
Note: The above list of differences are purely opinionated and it vary based on the professional experience. But they are helpful as base parameters.
-
When the page loads, React DevTools sets a global named
__REACT_DEVTOOLS_GLOBAL_HOOK__, then React communicates with that hook during initialization. If the website is not using React or if React fails to communicate with DevTools then it won't show up the tab.
-
styled-componentsis a JavaScript library for styling React applications. It removes the mapping between styles and components, and lets you write actual CSS augmented with JavaScript.
-
Lets create
<Title>and<Wrapper>components with specific styles for each.import React from "react"; import styled from "styled-components"; // Create a <Title> component that renders an <h1> which is centered, red and sized at 1.5em const Title = styled.h1` font-size: 1.5em; text-align: center; color: palevioletred; `; // Create a <Wrapper> component that renders a <section> with some padding and a papayawhip background const Wrapper = styled.section` padding: 4em; background: papayawhip; `;
These two variables,
TitleandWrapper, are now components that you can render just like any other react component.<Wrapper> <Title>{"Lets start first styled component!"}</Title> </Wrapper>
-
Relay is a JavaScript framework for providing a data layer and client-server communication to web applications using the React view layer.
-
Let's see the main features of Reselect library,
- Selectors can compute derived data, allowing Redux to store the minimal possible state.
- Selectors are efficient. A selector is not recomputed unless one of its arguments changes.
- Selectors are composable. They can be used as input to other selectors.
-
Let's take calculations and different amounts of a shipment order with the simplified usage of Reselect:
import { createSelector } from "reselect";

const shopItemsSelector = (state) => state.shop.items;
const taxPercentSelector = (state) => state.shop.taxPercent;

const subtotalSelector = createSelector(shopItemsSelector, (items) =>
  items.reduce((acc, item) => acc + item.value, 0)
);

const taxSelector = createSelector(
  subtotalSelector,
  taxPercentSelector,
  (subtotal, taxPercent) => subtotal * (taxPercent / 100)
);

export const totalSelector = createSelector(
  subtotalSelector,
  taxSelector,
  (subtotal, tax) => ({ total: subtotal + tax })
);

let exampleState = {
  shop: {
    taxPercent: 8,
    items: [
      { name: "apple", value: 1.2 },
      { name: "orange", value: 0.95 },
    ],
  },
};

console.log(subtotalSelector(exampleState)); // 2.15
console.log(taxSelector(exampleState)); // 0.172
console.log(totalSelector(exampleState)); // { total: 2.322 }
-
Redux can be used as a data store for any UI layer. The most common usage is with React and React Native, but there are bindings available for Angular, Angular 2, Vue, Mithril, and more. Redux simply provides a subscription mechanism which can be used by any other code.
-
Redux is originally written in ES6 and transpiled for production into ES5 with Webpack and Babel. You should be able to use it regardless of your JavaScript build process. Redux also offers a UMD build that can be used directly without any build process at all.
-
You need to add
enableReinitialize : truesetting.const InitializeFromStateForm = reduxForm({ form: "initializeFromState", enableReinitialize: true, })(UserEdit);
If your
initialValuesprop gets updated, your form will update too.
-
You can use
oneOfType()method ofPropTypes.For example, the height property can be defined with either
stringornumbertype as below:Component.propTypes = { size: PropTypes.oneOfType([PropTypes.string, PropTypes.number]), };
-
You can import SVG directly as component instead of loading it as a file. This feature is available with
react-scripts@2.0.0and higher.import { ReactComponent as Logo } from "./logo.svg"; const App = () => ( <div> {/* Logo is an actual react component */} <Logo /> </div> );
Note: Don't forget about the curly braces in the import.
-
The concept of render hijacking is the ability to control what a component will output from another component. It means that you decorate your component by wrapping it into a Higher-Order component. By wrapping, you can inject additional props or make other changes, which can cause changing logic of rendering. It does not actually enable hijacking, but by using HOC you make your component behave differently.
-
We can pass
numbersaspropsto React component using curly braces{}where asstringsin double quotes""or single quotes''import React from "react"; const ChildComponent = ({ name, age }) => { return ( <> My Name is {name} and Age is {age} </> ); }; const ParentComponent = () => { return ( <> <ChildComponent name="Chetan" age={30} /> </> ); }; export default ParentComponent;
-
It is up to the developer's decision, i.e., it is developer's job to determine what kinds of state make up your application, and where each piece of state should live. Some users prefer to keep every single piece of data in Redux, to maintain a fully serializable and controlled version of their application at all times. Others prefer to keep non-critical or UI state, such as “is this dropdown currently open”, inside a component's internal state.
Below are the rules of thumb to determine what kind of data should be put into Redux
- Do other parts of the application care about this data?
- Do you need to be able to create further derived data based on this original data?
- Is the same data being used to drive multiple components?
- Is there value to you in being able to restore this state to a given point in time (ie, time travel debugging)?
- Do you want to cache the data (i.e, use what's in state if it's already there instead of re-requesting it)?
-
React creates a service worker for you without any configuration by default. The service worker is a web API that helps you cache your assets and other files so that when the user is offline or on a slow network, he/she can still see results on the screen, as such, it helps you build a better user experience, that's what you should know about service worker for now. It's all about adding offline capabilities to your site.
import React from "react";
import ReactDOM from "react-dom";
import App from "./App";
import registerServiceWorker from "./registerServiceWorker";

ReactDOM.render(<App />, document.getElementById("root"));
registerServiceWorker();
-
Class components can be restricted from re-rendering when their input props are the same using PureComponent or shouldComponentUpdate. Now you can do the same with function components by wrapping them in React.memo.
const MyComponent = React.memo(function MyComponent(props) {
  /* only rerenders if props change */
});
-
The
React.lazyfunction lets you render a dynamic import as a regular component. It will automatically load the bundle containing theOtherComponentwhen the component gets rendered. This must return a Promise which resolves to a module with a default export containing a React component.const OtherComponent = React.lazy(() => import("./OtherComponent")); function MyComponent() { return ( <div> <OtherComponent /> </div> ); }
Note:
React.lazyandSuspenseis not yet available for server-side rendering. If you want to do code-splitting in a server rendered app, we still recommend React Loadable.
-
You can compare the current value of the state with an existing state value and decide whether to rerender the page or not. If the values are the same then you need to return null to stop re-rendering otherwise return the latest state value.
For example, the user profile information is conditionally rendered as follows,
getUserProfile = (user) => {
  const latestAddress = user.address;
  this.setState((state) => {
    if (state.address === latestAddress) {
      return null;
    } else {
      return { title: latestAddress };
    }
  });
};
-
Note: This question references React 16. These features remain valid in current React versions (18/19).
Arrays: Starting with React 16, you can return multiple sibling elements without a wrapping element by returning an array or using Fragments.
Array approach:
const ReactJSDevs = () => {
  return [
    <li key="1">John</li>,
    <li key="2">Jackie</li>,
    <li key="3">Jordan</li>,
  ];
};
Fragment approach (preferred):
const ReactJSDevs = () => {
  return (
    <>
      <li>John</li>
      <li>Jackie</li>
      <li>Jordan</li>
    </>
  );
};
You can also merge this array of items in another array component.
const JSDevs = () => {
  return (
    <ul>
      <li>Brad</li>
      <li>Brodge</li>
      <ReactJSDevs />
      <li>Brandon</li>
    </ul>
  );
};
Strings and Numbers: You can also return string and number type from the render method.
render() {
 return 'Welcome to ReactJS questions';
}
// Number
render() {
 return 2018;
}
-
Hooks is a special JavaScript function that allows you use state and other React features without writing a class. This pattern has been introduced as a new feature in React 16.8 and helped to isolate the stateful logic from the components.
Let's see an example of useState hook:
import { useState } from "react";

function Example() {
  // Declare a new state variable, which we'll call "count"
  const [count, setCount] = useState(0);

  return (
    <>
      <p>You clicked {count} times</p>
      <button onClick={() => setCount(count + 1)}>Click me</button>
    </>
  );
}
Note: Hooks can be used inside an existing function component without rewriting the component.
-
You need to follow two rules in order to use hooks,
- Call Hooks only at the top level of your react functions: You should always use hooks at the top level of react function before any early returns. i.e, You shouldn’t call Hooks inside loops, conditions, or nested functions. This will ensure that Hooks are called in the same order each time a component renders and it preserves the state of Hooks between multiple re-renders due to
useStateanduseEffectcalls.
Let's see the difference using an example, Correct usage::
function UserProfile() {
 // Correct: Hooks called at the top level
 const [name, setName] = useState('John');
 const [country, setCountry] = useState('US');

 return (
   <div>
     <h1>Name: {name}</h1>
     <p>Country: {country}</p>
   </div>
 );
}
Incorrect usage::
function UserProfile() {
 const [name, setName] = useState('John');

 if (name === 'John') {
   // Incorrect: useState is called inside a conditional
   const [country, setCountry] = useState('US');
 }

 return (
   <div>
     <h1>Name: {name}</h1>
     <p>Country: {country}</p> {/* This will throw an error if the name condition isn't met */}
   </div>
 );
}
The
useStatehook for the country field is being called conditionally within anifblock. This can lead to inconsistent state behavior and may cause hooks to be called in a different order on each re-render.- Call Hooks from React Functions only: You shouldn’t call Hooks from regular JavaScript functions or class components. Instead, you should call them from either function components or custom hooks.
Let's find the difference of correct and incorrect usage with below examples,
Correct usage::
//Example1:
function Counter() {
 // Correct: useState is used inside a functional component
 const [count, setCount] = useState(0);

 return <div>Counter: {count}</div>;
}
//Example2:
function useFetchData(url) {
 const [data, setData] = useState(null);

 useEffect(() => {
   fetch(url)
     .then((response) => response.json())
     .then((data) => setData(data));
 }, [url]);

 return data;
}

function UserProfile() {
 // Correct: Using a custom hook here
 const user = useFetchData('https://some-api.com/user');

 return (
   <div>
     <h1>{user ? user.name : 'Loading profile...'}</h1>
   </div>
 );
}
Incorrect usage::
 //Example1
 function normalFunction() {
   // Incorrect: Can't call hooks in normal functions
   const [count, setCount] = useState(0);
 }

 //Example2
 function fetchData(url) {
   // Incorrect: Hooks can't be used in non-React functions
   const [data, setData] = useState(null);

   useEffect(() => {
     fetch(url)
       .then((response) => response.json())
       .then((data) => setData(data));
   }, [url]);

   return data;
 }
In the above incorrect usage example, both
useStateanduseEffectare used in non-React functions(normalFunctionandfetchData), which is not allowed. - Call Hooks only at the top level of your react functions: You should always use hooks at the top level of react function before any early returns. i.e, You shouldn’t call Hooks inside loops, conditions, or nested functions. This will ensure that Hooks are called in the same order each time a component renders and it preserves the state of Hooks between multiple re-renders due to
-
React team released an ESLint plugin called eslint-plugin-react-hooks that enforces Hook's two rules. It is part of Hooks API. You can add this plugin to your project using the below command,
npm install eslint-plugin-react-hooks --save-dev
And apply the below config in your ESLint config file,
// Your ESLint configuration
{
  "plugins": [
    // ...
    "react-hooks"
  ],
  "rules": {
    // ...
    "react-hooks/rules-of-hooks": "error"
  }
}
This plugin also provide another important rule through
react-hooks/exhaustive-deps. It ensures that the dependencies of useEffect, useCallback, and useMemo hooks are correctly listed to avoid potential bugs.useEffect(() => { // Forgetting `message` will result in incorrect behavior console.log(message); }, []); // Here `message` should be a dependency
The recommended
eslint-config-react-apppreset already includes the hooks rules of this plugin. For example, the linter enforce proper naming convention for hooks. If you rename your custom hooks which as prefix "use" to something else then linter won't allow you to call built-in hooks such as useState, useEffect etc inside of your custom hook anymore.Note: This plugin is intended to use in Create React App by default.
-
The biggest conceptual difference is the data flow itself:
Flux:

View
 ↓
Action
 ↓
Dispatcher
 ↓
Multiple Stores
 ↓
View
versus:
Redux:

View
 ↓
Action
 ↓
Middleware
 ↓
Reducer
 ↓
Single Store
 ↓
View
Flux routes every action through a single Dispatcher, which broadcasts it to multiple stores, each holding its own slice of state and its own change logic. Redux replaces the dispatcher with middleware (for side effects) and pure reducer functions (for state updates), all funneling into a single store as the one source of truth.
Below are the major differences between Flux and Redux
Flux Redux State is mutable State is immutable The Store contains both state and change logic The Store and change logic are separate There are multiple stores exist There is only one store exist All the stores are disconnected and flat Single store with hierarchical reducers It has a singleton dispatcher There is no concept of dispatcher React components subscribe to the store Container components uses connect function
-
Below are the main benefits of React Router V4 module,
- In React Router v4(version 4), the API is completely about components. A router can be visualized as a single component(
<BrowserRouter>) which wraps specific child router components(<Route>). - You don't need to manually set history. The router module will take care history by wrapping routes with
<BrowserRouter>component. - The application size is reduced by adding only the specific router module(Web, core, or native)
- In React Router v4(version 4), the API is completely about components. A router can be visualized as a single component(
-
The componentDidCatch lifecycle method is invoked after an error has been thrown by a descendant component. The method receives two parameters,
- error: - The error object which was thrown
- info: - An object with a componentStack key contains the information about which component threw the error.
The method structure would be as follows
componentDidCatch(error, info);
-
Below are the cases in which error boundaries don't work,
- Inside Event handlers
- Asynchronous code using setTimeout or requestAnimationFrame callbacks
- During Server side rendering
- When errors thrown in the error boundary code itself
-
Note: This behavior was introduced in React 16 and continues in React 18/19.
In React 16+, errors that are not caught by any error boundary will result in unmounting of the whole React component tree. The reason behind this decision is that it is worse to leave corrupted UI in place than to completely remove it. For example, it is worse for a payments app to display a wrong amount than to render nothing.
Best Practice: Always wrap your application or critical sections in error boundaries to prevent complete unmounting and provide a better user experience.
<ErrorBoundary fallback={<ErrorPage />}>
  <App />
</ErrorBoundary>
-
The granularity of error boundaries usage is up to the developer based on project needs. You can follow either of these approaches,
- You can wrap top-level route components to display a generic error message for the entire application.
- You can also wrap individual components in an error boundary to protect them from crashing the rest of the application.
-
Apart from error messages and javascript stack, React16 will display the component stack trace with file names and line numbers using error boundary concept.
For example, BuggyCounter component displays the component stack trace as below,


-
The defaultProps can be defined as a property on the component to set the default values for the props. These default props are used when props not supplied(i.e., undefined props), but not for
nullor0as props. That means, If you provide null value then it remains null value. It's the same behavior with 0 as well.For example, let us create color default prop for the button component,
function MyButton {
  // ...
}

MyButton.defaultProps = {
  color: "red",
};
If
props.coloris not provided then it will set the default value to 'red'. i.e, Whenever you try to access the color prop it uses the default valuefunction MyButton() { return <MyButton />; // props.color will contain red value }
-
The displayName string is used in debugging messages. Usually, you don’t need to set it explicitly because it’s inferred from the name of the function or class that defines the component. You might want to set it explicitly if you want to display a different name for debugging purposes or when you create a higher-order component.
For example, To ease debugging, choose a display name that communicates that it’s the result of a withSubscription HOC.
function withSubscription(WrappedComponent) {
  class WithSubscription extends React.Component {
    /* ... */
  }
  WithSubscription.displayName = `WithSubscription(${getDisplayName(
    WrappedComponent
  )})`;
  return WithSubscription;
}
function getDisplayName(WrappedComponent) {
  return (
    WrappedComponent.displayName || WrappedComponent.name || "Component"
  );
}
- React supports all popular browsers, including Internet Explorer 9 and above, although some polyfills are required for older browsers such as IE 9 and IE 10. If you use es5-shim and es5-sham polyfill then it even support old browsers that doesn't support ES5 methods.
-
Code-Splitting is a feature supported by bundlers like Webpack and Browserify which can create multiple bundles that can be dynamically loaded at runtime. The react project supports code splitting via dynamic import() feature.
For example, in the below code snippets, it will make moduleA.js and all its unique dependencies as a separate chunk that only loads after the user clicks the 'Load' button.
moduleA.js
const moduleA = "Hello";

export { moduleA };
App.js
export default function App {
  function handleClick() {
    import("./moduleA")
      .then(({ moduleA }) => {
        // Use moduleA
      })
      .catch((err) => {
        // Handle failure
      });
  };

 return (
   <div>
     <button onClick={this.handleClick}>Load</button>
   </div>
 );
}
See Class
  import React, { Component } from "react";

   class App extends Component {
     handleClick = () => {
       import("./moduleA")
         .then(({ moduleA }) => {
           // Use moduleA
         })
         .catch((err) => {
           // Handle failure
         });
     };

     render() {
       return (
         <div>
           <button onClick={this.handleClick}>Load</button>
         </div>
       );
     }
   }

export default App;-
The Fragments declared with the explicit <React.Fragment> syntax may have keys. The general use case is mapping a collection to an array of fragments as below,
function Glossary(props) {
  return (
    <dl>
      {props.items.map((item) => (
        // Without the `key`, React will fire a key warning
        <React.Fragment key={item.id}>
          <dt>{item.term}</dt>
          <dd>{item.description}</dd>
        </React.Fragment>
      ))}
    </dl>
  );
}
Note: key is the only attribute that can be passed to Fragment. In the future, there might be a support for additional attributes, such as event handlers.
-
As of React 16, both standard or custom DOM attributes are fully supported. Since React components often take both custom and DOM-related props, React uses the camelCase convention just like the DOM APIs.
Let us take few props with respect to standard HTML attributes,
<div tabIndex="-1" />      // Just like node.tabIndex DOM API
<div className="Button" /> // Just like node.className DOM API
<input readOnly={true} />  // Just like node.readOnly DOM API
These props work similarly to the corresponding HTML attributes, with the exception of the special cases. It also support all SVG attributes.
-
If you pass no value for a prop, it defaults to true. This behavior is available so that it matches the behavior of HTML.
For example, below expressions are equivalent,
<MyInput autocomplete />

<MyInput autocomplete={true} />
Note: It is not recommended to use this approach because it can be confused with the ES6 object shorthand (example,
{name}which is short for{name: name})
-
Next.js is a popular and lightweight framework for static and server‑rendered applications built with React. It also provides styling and routing solutions. Below are the major features provided by NextJS,
- Server-rendered by default
- Automatic code splitting for faster page loads
- Simple client-side routing (page based)
- Webpack-based dev environment which supports (HMR)
- Able to implement with Express or any other Node.js HTTP server
- Customizable with your own Babel and Webpack configurations
-
You can pass event handlers and other functions as props to child components. The functions can be passed to child component as below,
function Button({ onClick }) {
  return <button onClick={onClick}>Download</button>;
}

export default function downloadExcel() {
  function handleClick() {
    alert("Downloaded");
  }

  return <Button onClick={handleClick}></Button>;
}
-
If you use an event handler such as onClick or onScroll and want to prevent the callback from being fired too quickly, then you can limit the rate at which callback is executed. This can be achieved in the below possible ways,
- Throttling: Changes based on a time based frequency. For example, it can be used using _.throttle lodash function
- Debouncing: Publish changes after a period of inactivity. For example, it can be used using _.debounce lodash function
- RequestAnimationFrame throttling: Changes based on requestAnimationFrame. For example, it can be used using raf-schd lodash function
-
React DOM escapes any values embedded in JSX before rendering them. Thus it ensures that you can never inject anything that’s not explicitly written in your application. Everything is converted to a string before being rendered.
For example, you can embed user input as below,
const name = response.potentiallyMaliciousInput;
const element = <h1>{name}</h1>;
This way you can prevent XSS(Cross-site-scripting) attacks in the application.
-
You can update UI(represented by rendered element) by passing the newly created element to ReactDOM's render method.
For example, lets take a ticking clock example, where it updates the time by calling render method multiple times,
function tick() {
  const element = (
    <div>
      <h1>Hello, world!</h1>
      <h2>It is {new Date().toLocaleTimeString()}.</h2>
    </div>
  );
  ReactDOM.render(element, document.getElementById("root"));
}

setInterval(tick, 1000);
-
When you declare a component as a function or a class, it must never modify its own props.
Let us take a below capital function,
function capital(amount, interest) {
  return amount + interest;
}
The above function is called “pure” because it does not attempt to change their inputs, and always return the same result for the same inputs. Hence, React has a single rule saying "All React components must act like pure functions with respect to their props."
-
There are three conditions to make sure, it is safe use the index as a key.
- The list and items are static– they are not computed and do not change
- The items in the list have no ids
- The list is never reordered or filtered.
-
The keys used within arrays should be unique among their siblings but they don’t need to be globally unique. i.e, You can use the same keys with two different arrays.
For example, the below
Bookcomponent uses two arrays with different arrays,function Book(props) { const index = ( <ul> {props.pages.map((page) => ( <li key={page.id}>{page.title}</li> ))} </ul> ); const content = props.pages.map((page) => ( <div key={page.id}> <h3>{page.title}</h3> <p>{page.content}</p> <p>{page.pageNumber}</p> </div> )); return ( <div> {index} <hr /> {content} </div> ); }
-
Formikis a form library for react which provides solutions such as validation, keeping track of the visited fields, and handling form submission.In detail, You can categorize them as follows,
- Getting values in and out of form state
- Validation and error messages
- Handling form submission
It is used to create a scalable, performant, form helper with a minimal API to solve annoying stuff.
-
Below are the main reasons to recommend formik over redux form library,
- The form state is inherently short-term and local, so tracking it in Redux (or any kind of Flux library) is unnecessary.
- Redux-Form calls your entire top-level Redux reducer multiple times ON EVERY SINGLE KEYSTROKE. This way it increases input latency for large apps.
- Redux-Form is 22.5 kB minified gzipped whereas Formik is 12.7 kB
- In React, it is recommended to use composition over inheritance to reuse code between components. Both Props and composition give you all the flexibility you need to customize a component’s look and behavior explicitly and safely. Whereas, If you want to reuse non-UI functionality between components, it is suggested to extract it into a separate JavaScript module. Later components import it and use that function, object, or class, without extending it.
-
Yes, you can use web components in a react application. Even though many developers won't use this combination, it may require especially if you are using third-party UI components that are written using Web Components.
For example, let us use
Vaadindate picker web component as below,import "./App.css"; import "@vaadin/vaadin-date-picker"; export default function App() { return ( <div className="App"> <vaadin-date-picker label="When were you born?"></vaadin-date-picker> </div> ); }
-
You can achieve code-splitting in your app using dynamic import.
Let's take an example of addition,
- Normal Import
import { add } from "./math";
console.log(add(10, 20));
- Dynamic Import
import("./math").then((math) => {
  console.log(math.add(10, 20));
});
-
With the release of React 18, React.lazy and Suspense are now available for server-side rendering. However, prior to React 18, it was recommended to use Loadable Components for code-splitting in a server-side rendered app because React.lazy and Suspense were not available for server-side rendering. Loadable Components lets you render a dynamic import as a regular component. For example, you can use Loadable Components to load the OtherComponent in a separate bundle like this:
import loadable from "@loadable/component";

const OtherComponent = loadable(() => import("./OtherComponent"));

function MyComponent() {
  return (
    <div>
      <OtherComponent />
    </div>
  );
}
Now OtherComponent will be loaded in a separated bundle Loadable Components provides additional benefits beyond just code-splitting, such as automatic code reloading, error handling, and preloading. By using Loadable Components, you can ensure that your application loads quickly and efficiently, providing a better user experience for your users.
-
React Suspense is a built-in feature that lets you delay rendering part of the UI until asynchronous work (such as loading a component or fetching data) is ready. While waiting, React shows a fallback UI (loading text, skeleton, spinner, etc.) defined by the nearest
<Suspense>boundary.Common use cases:
-
Code splitting with
React.lazy()import { Suspense, lazy } from "react"; const OtherComponent = lazy(() => import("./OtherComponent")); function MyComponent() { return ( <Suspense fallback={<div>Loading component...</div>}> <OtherComponent /> </Suspense> ); }
The fallback is shown until
OtherComponentis downloaded and rendered. -
Data fetching that can suspend
import { Suspense, use } from "react";

function UserProfile() {
  const user = use(fetchUser()); // suspends until promise resolves
  return <div>{user.name}</div>;
}

function App() {
  return (
    <Suspense fallback={<div>Loading user...</div>}>
      <UserProfile />
    </Suspense>
  );
}
-
Nested Suspense for progressive loading
Nested boundaries let important content render first while slower sections keep loading.
import { Suspense, lazy } from "react";

const ProductDetails = lazy(() => import("./ProductDetails"));
const ProductReviews = lazy(() => import("./ProductReviews"));

function ProductPage() {
  return (
    <Suspense fallback={<PageSkeleton />}>
      <ProductDetails />

      <Suspense fallback={<ReviewsSkeleton />}>
        <ProductReviews />
      </Suspense>
    </Suspense>
  );
}
Here,
ProductDetailscan appear first, andProductReviewscan continue loading with its own fallback.
Tip: Keep Suspense boundaries close to slow UI regions so users see meaningful content sooner.
-
-
One of the best place to do code splitting is with routes. The entire page is going to re-render at once so users are unlikely to interact with other elements in the page at the same time. Due to this, the user experience won't be disturbed.
Let us take an example of route based website using libraries like React Router with React.lazy,
import { BrowserRouter as Router, Route, Switch } from "react-router-dom";
import React, { Suspense, lazy } from "react";

const Home = lazy(() => import("./routes/Home"));
const About = lazy(() => import("./routes/About"));

const App = () => (
  <Router>
    <Suspense fallback={<div>Loading...</div>}>
      <Switch>
        <Route exact path="/" component={Home} />
        <Route path="/about" component={About} />
      </Switch>
    </Suspense>
  </Router>
);
In the above code, the code splitting will happen at each route level.
-
The defaultValue argument is only used when a component does not have a matching Provider above it in the tree. This can be helpful for testing components in isolation without wrapping them.
Below code snippet provides default theme value as Luna.
const MyContext = React.createContext(defaultValue);
-
React needs to use algorithms to find out how to efficiently update the UI to match the most recent tree. The diffing algorithms is generating the minimum number of operations to transform one tree into another. However, the algorithms have a complexity in the order of O(n³) where n is the number of elements in the tree.
In this case, displaying 1000 elements would require in the order of one billion comparisons. This is far too expensive. Instead, React implements a heuristic O(n) algorithm based on two assumptions:
- Two elements of different types will produce different trees.
- The developer can hint at which child elements may be stable across different renders with a key prop.
-
When diffing two trees, React first compares the two root elements. The behavior is different depending on the types of the root elements. It covers the below rules during reconciliation algorithm,
-
Elements Of Different Types: Whenever the root elements have different types, React will tear down the old tree and build the new tree from scratch. For example, elements to
to of different types lead a full rebuild., or from
-
DOM Elements Of The Same Type: When comparing two React DOM elements of the same type, React looks at the attributes of both, keeps the same underlying DOM node, and only updates the changed attributes. Lets take an example with same DOM elements except className attribute,
<div className="show" title="ReactJS" />

<div className="hide" title="ReactJS" />
-
Component Elements Of The Same Type: When a component updates, the instance stays the same, so that state is maintained across renders. React updates the props of the underlying component instance to match the new element, and calls componentWillReceiveProps() and componentWillUpdate() on the underlying instance. After that, the render() method is called and the diff algorithm recurses on the previous result and the new result.
-
Recursing On Children: when recursing on the children of a DOM node, React just iterates over both lists of children at the same time and generates a mutation whenever there’s a difference. For example, when adding an element at the end of the children, converting between these two trees works well.
<ul>
  <li>first</li>
  <li>second</li>
</ul>

<ul>
  <li>first</li>
  <li>second</li>
  <li>third</li>
</ul>
-
Handling keys: React supports a key attribute. When children have keys, React uses the key to match children in the original tree with children in the subsequent tree. For example, adding a key can make the tree conversion efficient,
<ul>
  <li key="2015">Duke</li>
  <li key="2016">Villanova</li>
</ul>

<ul>
  <li key="2014">Connecticut</li>
  <li key="2015">Duke</li>
  <li key="2016">Villanova</li>
</ul>
-
-
There are few use cases to go for refs,
- Managing focus, text selection, or media playback.
- Triggering imperative animations.
- Integrating with third-party DOM libraries.
-
Even though the pattern named render props, you don’t have to use a prop named render to use this pattern. i.e, Any prop that is a function that a component uses to know what to render is technically a “render prop”. Lets take an example with the children prop for render props,
<Mouse
  children={(mouse) => (
    <p>
      The mouse position is {mouse.x}, {mouse.y}
    </p>
  )}
/>
Actually children prop doesn’t need to be named in the list of “attributes” in JSX element. Instead, you can keep it directly inside element,
<Mouse>
  {(mouse) => (
    <p>
      The mouse position is {mouse.x}, {mouse.y}
    </p>
  )}
</Mouse>
While using this above technique(without any name), explicitly state that children should be a function in your propTypes.
Mouse.propTypes = {
  children: PropTypes.func.isRequired,
};
-
If you create a function inside a render method, it negates the purpose of pure component. Because the shallow prop comparison will always return false for new props, and each render in this case will generate a new value for the render prop. You can solve this issue by defining the render function as instance method.
class Mouse extends React.PureComponent {
  render() {
    // BAD: a new arrow function reference is created on every render,
    // so PureComponent's shallow comparison always sees "new" props
    return <MouseTracker render={(mouse) => <Cat mouse={mouse} />} />;
  }
}
class MouseWithCat extends React.PureComponent {
  // GOOD: defined once as an instance method/class property, so the
  // reference stays stable across renders
  renderTheCat = (mouse) => <Cat mouse={mouse} />;

  render() {
    return <MouseTracker render={this.renderTheCat} />;
  }
}
- Windowing is a technique that only renders a small subset of your rows at any given time, and can dramatically reduce the time it takes to re-render the components as well as the number of DOM nodes created. If your application renders long lists of data then this technique is recommended. Both react-window and react-virtualized are popular windowing libraries which provides several reusable components for displaying lists, grids, and tabular data.
-
The falsy values such as false, null, undefined, and true are valid children but they don't render anything. If you still want to display them then you need to convert it to string. Let's take an example on how to convert to a string,
<div>My JavaScript variable is {String(myVariable)}.</div>
-
React Portals are primarily used to render UI components such as modals, tooltips, dropdowns, hovercards, and notifications outside of their parent component's DOM tree. This helps avoid common CSS issues caused by parent elements, such as:
**overflow: hidden**on parent elements clipping or hiding child elements like modals or tooltips,- stacking context and
**z-index**conflicts created by parent containers that prevent child elements from appearing above other content.
That means, you need to visually “break out” of its container. By rendering these UI elements into a separate DOM node (often directly under
<body>), portals ensure they appear above all other content and are not restricted by the parent’s CSS or layout constraints, resulting in correct positioning and visibility regardless of the parent’s styling.
 In React, the value attribute on form elements will override the value in the DOM. With an uncontrolled component, you might want React to specify the initial value, but leave subsequent updates uncontrolled. To handle this case, you can specify a **defaultValue** attribute instead of **value**.

 ```javascript
 render() {
   return (
     <form onSubmit={this.handleSubmit}>
       <label>
         User Name:
         <input
           defaultValue="John"
           type="text"
           ref={this.input} />
       </label>
       <input type="submit" value="Submit" />
     </form>
   );
 }
 ```

 The same applies for `select` and `textArea` inputs. But you need to use **defaultChecked** for `checkbox` and `radio` inputs.
- Even though the tech stack varies from developer to developer, the most popular stack is used in react boilerplate project code. It mainly uses Redux and redux-saga for state management and asynchronous side-effects, react-router for routing purpose, styled-components for styling react components, axios for invoking REST api, and other supported stack such as webpack, reselect, ESNext, Babel. You can clone the project https://github.com/react-boilerplate/react-boilerplate and start working on any new react project.
-
Below are the main differences between Real DOM and Virtual DOM,
Real DOM Virtual DOM Updates are slow Updates are fast DOM manipulation is very expensive. DOM manipulation is very easy You can update HTML directly. You Can’t directly update HTML It causes too much of memory wastage There is no memory wastage Creates a new DOM if element updates It updates the JSX if element update
-
Bootstrap can be added to your React app in a three possible ways,
- Using the Bootstrap CDN: This is the easiest way to add bootstrap. Add both bootstrap CSS and JS resources in a head tag.
- Bootstrap as Dependency:
If you are using a build tool or a module bundler such as Webpack, then this is the preferred option for adding Bootstrap to your React application
npm install bootstrap
- React Bootstrap Package:
In this case, you can add Bootstrap to our React app is by using a package that has rebuilt Bootstrap components to work particularly as React components. Below packages are popular in this category,
- react-bootstrap
- reactstrap
-
Below are the
top 10 websitesusing React as their front-end framework,- Uber
- Khan Academy
- Airbnb
- Dropbox
- Netflix
- PayPal
- React does not have any opinion about how styles are defined but if you are a beginner then good starting point is to define your styles in a separate *.css file as usual and refer to them using className. This functionality is not part of React but came from third-party libraries. But If you want to try a different approach(CSS-In-JS) then styled-components library is a good option.
- No. But you can try Hooks in a few components(or new components) without rewriting any existing code. Because there are no plans to remove classes in ReactJS.
-
The
useEffecthook is a React Hook that lets you perform side effects in function components. Side effects are operations that interact with the outside world or system and aren't directly related to rendering UI — such as fetching data, setting up subscriptions, timers, manually manipulating the DOM, etc.In function components, useEffect replaces the class component lifecycle methods(
componentDidMount,componentDidUpdateandcomponentWillUnmount) with a single, unified API.Syntax
useEffect(() => {
   // Side effect logic here

   return () => {
   // Cleanup logic (optional)
   };
   }, [dependencies]);
This effect hook can be used to fetch data from an API and to set the data in the local state of the component with the useState hook’s update function.
Here is an example of fetching a list of ReactJS articles from an API using fetch.
import React from "react";

function App() {
  const [data, setData] = React.useState({ hits: [] });

  React.useEffect(() => {
    fetch("http://hn.algolia.com/api/v1/search?query=react")
      .then((response) => response.json())
      .then((data) => setData(data));
  }, []);

  return (
    <ul>
      {data.hits.map((item) => (
        <li key={item.objectID}>
          <a href={item.url}>{item.title}</a>
        </li>
      ))}
    </ul>
  );
}

export default App;
A popular way to simplify this is by using the library axios.
We provided an empty array as second argument to the useEffect hook to avoid activating it on component updates. This way, it only fetches on component mount.
- Hooks doesn't cover all use cases of classes but there is a plan to add them soon. Currently there are no Hook equivalents to the uncommon getSnapshotBeforeUpdate and componentDidCatch lifecycles yet.
-
React includes a stable implementation of React Hooks in 16.8 release for below packages
- React DOM
- React DOM Server
- React Test Renderer
- React Shallow Renderer
-
When we declare a state variable with
useState, it returns a pair — an array with two items. The first item is the current value, and the second is a function that updates the value. Using [0] and [1] to access them is a bit confusing because they have a specific meaning. This is why we use array destructuring instead.For example, the array index access would look as follows:
var userStateVariable = useState("userProfile"); // Returns an array pair
var user = userStateVariable[0]; // Access first item
var setUser = userStateVariable[1]; // Access second item
Whereas with array destructuring the variables can be accessed as follows:
const [user, setUser] = useState("userProfile");
-
Hooks got the ideas from several different sources. Below are some of them,
- Previous experiments with functional APIs in the react-future repository
- Community experiments with render prop APIs such as Reactions Component
- State variables and state cells in DisplayScript.
- Subscriptions in Rx.
- Reducer components in ReasonReact.
- Web Components often expose an imperative API to implement its functions. You will need to use a ref to interact with the DOM node directly if you want to access imperative API of a web component. But if you are using third-party Web Components, the best solution is to write a React component that behaves as a wrapper for your Web Component.
-
Formik is a small react form library that helps you with the three major problems,
- Getting values in and out of form state
- Validation and error messages
- Handling form submission
-
Some of the popular middleware choices for handling asynchronous calls in Redux eco system are
Redux Thunk, Redux Promise, Redux Saga.
- No, browsers can't understand JSX code. You need a transpiler to convert your JSX to regular Javascript that browsers can understand. The most widely used transpiler right now is Babel.
- React implements one-way reactive data flow using props which reduce boilerplate and is easier to understand than traditional two-way data binding.
-
MobX is a simple, scalable and battle tested state management solution for applying functional reactive programming (TFRP). For ReactJS application, you need to install below packages,
npm install mobx --save
npm install mobx-react --save
-
Below are the main differences between Redux and MobX,
Topic Redux MobX Definition It is a javascript library for managing the application state It is a library for reactively managing the state of your applications Programming It is mainly written in ES6 It is written in JavaScript(ES5) Data Store There is only one large store exist for data storage There is more than one store for storage Usage Mainly used for large and complex applications Used for simple applications Performance Need to be improved Provides better performance How it stores Uses JS Object to store Uses observable to store the data
-
No, you don’t have to learn es2015/es6 to learn react. But you may find many resources or React ecosystem uses ES6 extensively. Let's see some of the frequently used ES6 features,
-
Destructuring: To get props and use them in a component
// in es 5
var someData = this.props.someData;
var dispatch = this.props.dispatch;

// in es6
const { someData, dispatch } = this.props;
-
Spread operator: Helps in passing props down into a component
// in es 5
<SomeComponent someData={this.props.someData} dispatch={this.props.dispatch} />

// in es6
<SomeComponent {...this.props} />
-
Arrow functions: Makes compact syntax
// es 5
var users = usersList.map(function (user) {
  return <li>{user.name}</li>;
});
// es 6
const users = usersList.map((user) => <li>{user.name}</li>);
-
-
Concurrent rendering in React 18 lets React prepare UI updates in a non-blocking way. This means React can pause low-priority rendering work, handle urgent updates first (like typing or clicking), and then continue rendering.
import { useMemo, useState, useTransition } from "react";

const items = Array.from({ length: 10000 }, (_, i) => `Item ${i + 1}`);

export default function SearchList() {
  const [query, setQuery] = useState("");
  const [filter, setFilter] = useState("");
  const [isPending, startTransition] = useTransition();

  function handleChange(e) {
    const value = e.target.value;
    setQuery(value); // urgent: keep input in sync

    // non-urgent: expensive list filtering can be interrupted
    startTransition(() => {
      setFilter(value);
    });
  }

  const filteredItems = useMemo(
    () => items.filter((item) => item.toLowerCase().includes(filter.toLowerCase())),
    [filter]
  );

  return (
    <div>
      <input value={query} onChange={handleChange} placeholder="Type to filter" />
      {isPending && <p>Updating results...</p>}
      <ul>
        {filteredItems.slice(0, 200).map((item) => (
          <li key={item}>{item}</li>
        ))}
      </ul>
    </div>
  );
}
In this example, typing remains smooth because React prioritizes updating the input first, while list filtering is treated as interruptible background work.
- Both refers the same thing. Previously concurrent Mode being referred to as "Async Mode" by React team. The name has been changed to highlight React’s ability to perform work on different priority levels. So it avoids the confusion from other approaches to Async Rendering.
-
The ESLint plugin enforces rules of Hooks to avoid bugs. It assumes that any function starting with ”use” and a capital letter right after it is a Hook. In particular, the rule enforces that,
- Calls to Hooks are either inside a PascalCase function (assumed to be a component) or another useSomething function (assumed to be a custom Hook).
- Hooks are called in the same order on every render.
-
Imagine a simple UI component, such as a "Like" button. When you tap it, it turns blue if it was previously grey, and grey if it was previously blue.
The imperative way of doing this would be:
if (user.likes()) {
  if (hasBlue()) {
    removeBlue();
    addGrey();
  } else {
    removeGrey();
    addBlue();
  }
}
Basically, you have to check what is currently on the screen and handle all the changes necessary to redraw it with the current state, including undoing the changes from the previous state. You can imagine how complex this could be in a real-world scenario.
In contrast, the declarative approach would be:
if (this.state.liked) {
  return <blueLike />;
} else {
  return <greyLike />;
}
Because the declarative approach separates concerns, this part of it only needs to handle how the UI should look in a specific state, and is therefore much simpler to understand.
-
Below are some of the benefits of using TypeScript with ReactJS,
- It is possible to use latest JavaScript features
- Use of interfaces for complex type definitions
- IDEs such as VS Code was made for TypeScript
- Avoid bugs with the ease of readability and Validation
-
How do you make sure that user remains authenticated on page refresh while using Context API State Management?
When a user logs in and reload, to persist the state generally we add the load user action in the useEffect hooks in the main App.js. While using Redux, loadUser action can be easily accessed.
App.js
import { loadUser } from "../actions/auth";
store.dispatch(loadUser());
- But while using Context API, to access context in App.js, wrap the AuthState in index.js so that App.js can access the auth context. Now whenever the page reloads, no matter what route you are on, the user will be authenticated as loadUser action will be triggered on each re-render.
index.js
import React from "react"; import ReactDOM from "react-dom"; import App from "./App"; import AuthState from "./context/auth/AuthState"; ReactDOM.render( <React.StrictMode> <AuthState> <App /> </AuthState> </React.StrictMode>, document.getElementById("root") );
App.js
const authContext = useContext(AuthContext); const { loadUser } = authContext; useEffect(() => { loadUser(); }, []);
loadUser
const loadUser = async () => { const token = sessionStorage.getItem("token"); if (!token) { dispatch({ type: ERROR, }); } setAuthToken(token); try { const res = await axios("/api/auth"); dispatch({ type: USER_LOADED, payload: res.data.data, }); } catch (err) { console.error(err); } };
-
There are three major benefits of new JSX transform,
- It is possible to use JSX without importing React packages
- The compiled output might improve the bundle size in a small amount
- The future improvements provides the flexibility to reduce the number of concepts to learn React.
-
The new JSX transform doesn’t require React to be in scope. i.e, You don't need to import React package for simple scenarios.
Let's take an example to look at the main differences between the old and the new transform,
Old Transform:
import React from "react"; function App() { return <h1>Good morning!!</h1>; }
Now JSX transform convert the above code into regular JavaScript as below,
import React from "react"; function App() { return React.createElement("h1", null, "Good morning!!"); }
New Transform:
The new JSX transform doesn't require any React imports
function App() { return <h1>Good morning!!</h1>; }
Under the hood JSX transform compiles to below code
import { jsx as _jsx } from "react/jsx-runtime"; function App() { return _jsx("h1", { children: "Good morning!!" }); }
Note: You still need to import React to use Hooks.
-
React Server Component is a way to write React component that gets rendered in the server-side with the purpose of improving React app performance. These components allow us to load components from the backend.
Note: React Server Components is still under development and not recommended for production yet.
- Prop Drilling is the process by which you pass data from one component of the React Component tree to another by going through other components that do not need the data but only help in passing it around.
-
- useState causes components to re-render after state updates whereas useRef doesn’t cause a component to re-render when the value or state changes.
Essentially, useRef is like a “box” that can hold a mutable value in its (
.current) property. - useState allows us to update the state inside components. While useRef allows referencing DOM elements and tracking values.
- useState causes components to re-render after state updates whereas useRef doesn’t cause a component to re-render when the value or state changes.
Essentially, useRef is like a “box” that can hold a mutable value in its (
-
A wrapper in React is a component that wraps or surrounds another component or group of components. It can be used for a variety of purposes such as adding additional functionality, styling, or layout to the wrapped components.
For example, consider a simple component that displays a message:
const Message = ({ text }) => { return <p>{text}</p>; };
We can create a wrapper component that will add a border to the message component:
const MessageWrapper = (props) => { return ( <div style={{ border: "1px solid black" }}> <Message {...props} /> </div> ); };
Now we can use the MessageWrapper component instead of the Message component and the message will be displayed with a border:
<MessageWrapper text="Hello World" />
Wrapper component can also accept its own props and pass them down to the wrapped component, for example, we can create a wrapper component that will add a title to the message component:
const MessageWrapperWithTitle = ({ title, ...props }) => { return ( <div> <h3>{title}</h3> <Message {...props} /> </div> ); };
Now we can use the MessageWrapperWithTitle component and pass title props:
<MessageWrapperWithTitle title="My Message" text="Hello World" />
This way, the wrapper component can add additional functionality, styling, or layout to the wrapped component while keeping the wrapped component simple and reusable.
-
useEffect and useLayoutEffect are both React hooks that can be used to synchronize a component with an external system, such as a browser API or a third-party library. However, there are some key differences between the two:
-
Timing: useEffect runs after the browser has finished painting, while useLayoutEffect runs synchronously before the browser paints. This means that useLayoutEffect can be used to measure and update layout in a way that feels more synchronous to the user.
-
Browser Paint: useEffect allows browser to paint the changes before running the effect, hence it may cause some visual flicker. useLayoutEffect synchronously runs the effect before browser paints and hence it will avoid visual flicker.
-
Execution Order: The order in which multiple useEffect hooks are executed is determined by React and may not be predictable. However, the order in which multiple useLayoutEffect hooks are executed is determined by the order in which they were called.
-
Error handling: useEffect has a built-in mechanism for handling errors that occur during the execution of the effect, so that it does not crash the entire application. useLayoutEffect does not have this mechanism, and errors that occur during the execution of the effect will crash the entire application.
In general, it's recommended to use useEffect as much as possible, because it is more performant and less prone to errors. useLayoutEffect should only be used when you need to measure or update layout, and you can't achieve the same result using useEffect.
-
-
There are two different ways to create components in ReactJS. The main differences are listed down as below,
The class components uses ES6 classes to create the components. It uses
renderfunction to display the HTML content in the webpage.The syntax for class component looks like as below.
class App extends React.Component { render() { return <h1>This is a class component</h1>; } }
Note: The Pascal Case is the recommended approach to provide naming to a component.
Functional component has been improved over the years with some added features like Hooks. Here is a syntax for functional component.
function App() { return ( <div className="App"> <h1>Hello, I'm a function component</h1> </div> ); }
State contains information or data about a component which may change over time.
In class component, you can update the state when a user interacts with it or server updates the data using the
setState()method. The initial state is going to be assigned in theConstructor()method using thethis.stateobject and it is possible to assign different data types such as string, boolean, numbers, etc.A simple example showing how we use the setState() and constructor():
class App extends Component { constructor() { super(); this.state = { message: "This is a class component", }; } updateMessage() { this.setState({ message: "Updating the class component", }); } render() { return ( <> <h1>{this.state.message}</h1> <button onClick={() => { this.updateMessage(); }}> Click!! </button> </> ); } }
You didn't use state in functional components because it was only supported in class components. But over the years hooks have been implemented in functional components which enables to use state too.
The
useState()hook can used to implement state in functional components. It returns an array with two items: the first item is current state and the next one is a function (setState) that updates the value of the current state.Let's see an example to demonstrate the state in functional components,
function App() { const [message, setMessage] = useState("This is a functional component"); const updateMessage = () => { setMessage("Updating the functional component"); }; return ( <div className="App"> <h1>{message} </h1> <button onClick={updateMessage}>Click me!!</button> </div> ); }
Props are referred to as "properties". The props are passed into React component just like arguments passed to a function. In other words, they are similar to HTML attributes.
The props are accessible in child class component using
this.propsas shown in below example,class Child extends React.Component { render() { return ( <h1> {" "} This is a functional component and component name is { this.props.name }{" "} </h1> ); } } class Parent extends React.Component { render() { return ( <div className="Parent"> <Child name="First child component" /> <Child name="Second child component" /> </div> ); } }
Props in functional components are similar to that of the class components but the difference is the absence of 'this' keyword.
function Child(props) { return ( <h1> This is a child component and the component name is{props.name} </h1> ); } function Parent() { return ( <div className="Parent"> <Child name="First child component" /> <Child name="Second child component" /> </div> ); }
-
React.StrictModeis a useful component for highlighting potential problems in an application. Just like<Fragment>,<StrictMode>does not render any extra DOM elements. It activates additional checks and warnings for its descendants. These checks apply for development mode only.import { StrictMode } from "react"; function App() { return ( <div> <Header /> <StrictMode> <div> <ComponentOne /> <ComponentTwo /> </div> </StrictMode> <Header /> </div> ); }
In the example above, the strict mode checks apply to
<ComponentOne>and<ComponentTwo>components only. i.e., Part of the application only.Note: Frameworks such as NextJS has this flag enabled by default.
-
The will be helpful in the below cases,
- To find the bugs caused by impure rendering where the components will re-render twice.
- To find the bugs caused by missing cleanup of effects where the components will re-run effects one more extra time.
- Identifying components with unsafe lifecycle methods.
- Warning about legacy string ref API usage.
- Detecting unexpected side effects.
- Detecting legacy context API.
- Warning about deprecated findDOMNode usage
-
StrictMode renders components twice in development mode(not production) in order to detect any problems with your code and warn you about those problems. This is used to detect accidental side effects in the render phase. If you used
create-react-appdevelopment tool then it automatically enables StrictMode by default.const root = createRoot(document.getElementById("root")); root.render( <StrictMode> <App /> </StrictMode> );
If you want to disable this behavior then you can simply remove
strictmode.const root = createRoot(document.getElementById("root")); root.render(<App />);
To detect side effects the following functions are invoked twice:
- Function component bodies, excluding the code inside event handlers.
- Functions passed to
useState,useMemo, oruseReducer(any other Hook) - Class component's
constructor,render, andshouldComponentUpdatemethods - Class component static
getDerivedStateFromPropsmethod - State updater functions
-
The below 3 rules needs to be followed while using JSX in a react application.
-
Return a single root element: If you are returning multiple elements from a component, wrap them in a single parent element. Otherwise you will receive the below error in your browser console.
html Adjacent JSX elements must be wrapped in an enclosing tag. -
All the tags needs to be closed: Unlike HTML, all tags needs to closed explicitly with in JSX. This rule applies for self-closing tags(like hr, br and img tags) as well.
-
Use camelCase naming: It is suggested to use camelCase naming for attributes in JSX. For example, the common attributes of HTML elements such as
class,tabindexwill be used asclassNameandtabIndex.
Note: There is an exception foraria-*anddata-*attributes which should be lower cased all the time.
-
-
Behind the scenes, JSX is transformed into plain javascript objects. It is not possible to return two or more objects from a function without wrapping into an array. This is the reason you can't simply return two or more JSX tags from a function without wrapping them into a single parent tag or a Fragment.
-
The preexisting variables outside of the function scope including state, props and context leads to a mutation and they result in unpredictable bugs during the rendering stage. The below points should be taken care while working with arrays variables.
- You need to take copy of the original array and perform array operations on it for the rendering purpose. This is called local mutation.
- Avoid triggering mutation methods such as push, pop, sort and reverse methods on original array. It is safe to use filter, map and slice method because they create a new array.
-
The
onClickCaptureReact event is helpful to catch all the events of child elements irrespective of event propagation logic or even if the events propagation stopped. This is useful if you need to log every click events for analytics purpose.For example, the below code triggers the click event of parent first followed by second level child eventhough leaf child button elements stops the propagation.
<div onClickCapture={() => alert("parent")}> <div onClickCapture={() => alert("child")}> <button onClick={(e) => e.stopPropagation()} /> <button onClick={(e) => e.stopPropagation()} /> </div> </div>
The event propagation for the above code snippet happens in the following order:
- It travels downwards in the DOM tree by calling all
onClickCaptureevent handlers. - It executes
onClickevent handler on the target element. - It travels upwards in the DOM tree by call all
onClickevent handlers above to it.
- It travels downwards in the DOM tree by calling all
-
React updates UI in three steps,
-
Triggering or initiating a render: The component is going to triggered for render in two ways.
- Initial render: When the app starts, you can trigger the initial render by calling
creatRootwith the target DOM node followed by invoking component'srendermethod. For example, the following code snippet rendersAppcomponent on root DOM node.
import { createRoot } from "react-dom/client"; const root = createRoot(document.getElementById("root")); root.render(<App />);
- Re-render when the state updated: When you update the component state using the state setter function, the componen't state automatically queues for a render.
- Initial render: When the app starts, you can trigger the initial render by calling
-
Rendering components: After triggering a render, React will call your components to display them on the screen. React will call the root component for initial render and call the function component whose state update triggered the render. This is a recursive process for all nested components of the target component.
-
Commit changes to DOM: After calling components, React will modify the DOM for initial render using
appendChild()DOM API and apply minimal necessary DOM updates for re-renders based on differences between rerenders.
-
-
React prevents component from re-rendering for each and every state update by grouping multiple state updates within an event handler. This strategy improves the application performance and this process known as batching. The older version of React only supported batching for browser events whereas React18 supported for asynchronous actions, timeouts and intervals along with native events. This improved version of batching is called automatic batching.
Let's demonstrate this automatic batching feature with a below example.
import { useState } from "react"; export default function BatchingState() { const [count, setCount] = useState(0); const [message, setMessage] = useState("batching"); console.log("Application Rendered"); const handleAsyncFetch = () => { fetch("https://jsonplaceholder.typicode.com/users/1").then(() => { // Automatic Batching re-render only once setCount(count + 1); setMessage("users fetched"); }); }; return ( <> <h1>{count}</h1> <button onClick={handleAsyncFetch}>Click Me!</button> </> ); }
The preceding code updated two state variables with in an event handler. However, React will perform automatic batching feature and the component will be re-rendered only once for better performance.
-
Yes, it is possible to prevent automatic batching default behavior. There might be cases where you need to re-render your component after each state update or updating one state depends on another state variable. Considering this situation, React introduced
flushSyncmethod fromreact-domAPI for the usecases where you need to flush state updates to DOM immediately.The usage of
flushSyncmethod within anonClickevent handler will be looking like as below,import { flushSync } from "react-dom"; const handleClick = () => { flushSync(() => { setClicked(!clicked); //Component will create a re-render here }); setCount(count + 1); // Component will create a re-render again here };
In the above click handler, React will update DOM at first using flushSync and second time updates DOM because of the counter setter function by avoiding automatic batching.
-
React hydration is used to add client-side JavaScript interactivity to pre-rendered static HTML generated by the server. It is used only for server-side rendering(SSR) to enhance the initial rendering time and make it SEO friendly application. This hydration acts as a bridge to reduce the gap between server side and client-side rendering.
After the page loaded with generated static HTML, React will add application state and interactivity by attaching all event handlers for the respective elements. Let's demonstrate this with an example.
Consider that React DOM API(using
renderToString) generated HTML for<App>component which contains<button>element to increment the counter.import {useState} from 'react'; import { renderToString } from 'react-dom/server'; export default function App() { const [count, setCount] = React.useState(0); return ( <h1>Counter</h1> <button onClick={() => setCount(prevCount => prevCount + 1)}> {count} times </button> ); } const html = renderToString(<App />);
The above code generates the below HTML with a header text and button component without any interactivity.
<h1>Counter</h1> <button> <!-- -->0<!-- --> times </button>
At this stage
hydrateRootAPI can be used to perform hydration by attachingonClickevent handler.import { hydrateRoot } from "react-dom/client"; import App from "./App.js"; hydrateRoot(document.getElementById("root"), <App />);
After this step, you are able to run React application on server-side and hydrating the javascript bundle on client-side for smooth user experience and SEO purposes.
-
You cannot update the objects which exists in the state directly. Instead, you should create a fresh new object (or copy from the existing object) and update the latest state using the newly created object. Eventhough JavaScript objects are mutable, you need to treat objects inside state as read-only while updating the state.
Let's see this comparison with an example. The issue with regular object mutation approach can be described by updating the user details fields of
Profilecomponent. The properties ofProfilecomponent such as firstName, lastName and age details mutated in an event handler as shown below.import { useState } from "react"; export default function Profile() { const [user, setUser] = useState({ firstName: "John", lastName: "Abraham", age: 30, }); function handleFirstNameChange(e) { user.firstName = e.target.value; } function handleLastNameChange(e) { user.lastName = e.target.value; } function handleAgeChange(e) { user.age = e.target.value; } return ( <> <label> First name: <input value={user.firstName} onChange={handleFirstNameChange} /> </label> <label> Last name: <input value={user.lastName} onChange={handleLastNameChange} /> </label> <label> Age: <input value={user.age} onChange={handleAgeChange} /> </label> <p> Profile: {person.firstName} {person.lastName} ({person.age}) </p> </> ); }
Once you run the application with above user profile component, you can observe that user profile details won't be update upon entering the input fields. This issue can be fixed by creating a new copy of object which includes existing properties through spread syntax(...obj) and add changed values in a single event handler itself as shown below.
handleProfileChange(e) { setUser({ ...user, [e.target.name]: e.target.value }); }
The above event handler is concise instead of maintaining separate event handler for each field. Now, UI displays the updated field values as expected without an issue.
-
You cannot simply use spread syntax for all kinds of objects inside state. Because spread syntax is shallow and it copies properties for one level deep only. If the object has nested object structure, UI doesn't work as expected with regular JavaScript nested property mutation. Let's demonstrate this behavior with an example of User object which has address nested object inside of it.
const user = { name: "John", age: 32, address: { country: "Singapore", postalCode: 440004, }, };
If you try to update the country nested field in a regular javascript fashion(as shown below) then user profile screen won't be updated with latest value.
user.address.country = "Germany";
This issue can be fixed by flattening all the fields into a top-level object or create a new object for each nested object and point it to it's parent object. In this example, first you need to create copy of address object and update it with the latest value. Later, the address object should be linked to parent user object something like below.
setUser({ ...user, address: { ...user.address, country: "Germany", }, });
This approach is bit verbose and not easy for deep hierarchical state updates. But this workaround can be used for few levels of nested objects without much hassle.
-
Eventhough arrays in JavaScript are mutable in nature, you need to treat them as immutable while storing them in a state. That means, similar to objects, the arrays cannot be updated directly inside state. Instead, you need to create a copy of the existing array and then set the state to use newly copied array.
To ensure that arrays are not mutated, the mutation operations like direct direct assignment(arr[1]='one'), push, pop, shift, unshift, splice etc methods should be avoided on original array. Instead, you can create a copy of existing array with help of array operations such as filter, map, slice, spread syntax etc.
For example, the below push operation doesn't add the new todo to the total todo's list in an event handler.
onClick = { todos.push({ id: id+1, name: name }) }
This issue is fixed by replacing push operation with spread syntax where it will create a new array and the UI updated with new todo.
onClick = { [ ...todos, { id: id+1, name: name } ] }
-
Immer library enforces the immutability of state based on copy-on-write mechanism. It uses JavaScript proxy to keep track of updates to immutable states. Immer has 3 main states as below,
- Current state: It refers to actual state
- Draft state: All new changes will be applied to this state. In this state, draft is just a proxy of the current state.
- Next state: It is formed after all mutations applied to the draft state
Immer can be used by following below instructions,
- Install the dependency using
npm install use-immercommand - Replace
useStatehook withuseImmerhook by importing at the top - The setter function of
useImmerhook can be used to update the state.
For example, the mutation syntax of immer library simplifies the nested address object of user state as follows,
import { useImmer } from "use-immer"; const [user, setUser] = useImmer({ name: "John", age: 32, address: { country: "Singapore", postalCode: 440004, }, }); //Update user details upon any event setUser((draft) => { draft.address.country = "Germany"; });
The preceding code enables you to update nested objects with a conceise mutation syntax.
-
The below table represent preferred and non-preferred array operations for updating the component state.
Action Preferred Non-preferred Adding concat, [...arr] push, unshift Removing filter, slice pop, shift, splice Replacing map splice, arr[i] = someValue sorting copying to new array reverse, sort If you use Immer library then you can able to use all array methods without any problem.
Technically it is possible to write nested function components but it is not suggested to write nested function definitions. Because it leads to unexpected bugs and performance issues.
-
Keys are primarily used for rendering list items but they are not just for list items. You can also use them React to distinguish components. By default, React uses order of the components in
-
There are two guidelines to be taken care while writing reducers in your code.
-
Reducers must be pure without mutating the state. That means, same input always returns the same output. These reducers run during rendering time similar to state updater functions. So these functions should not send any requests, schedule time outs and any other side effects.
-
Each action should describe a single user interaction even though there are multiple changes applied to data. For example, if you "reset" registration form which has many user input fields managed by a reducer, it is suggested to send one "reset" action instead of creating separate action for each fields. The proper ordering of actions should reflect the user interactions in the browser and it helps a lot for debugging purpose.
-
-
ReactJS is a powerful JavaScript library for building user interfaces. While it appears simple on the surface, React performs a lot of complex operations behind the scenes to efficiently update the UI. Here's an overview of how it works internally:
React doesn't manipulate the real DOM directly. Instead, it uses a Virtual DOM — a lightweight JavaScript representation of the UI.
When a component renders (e.g.,
<App />):- React executes the component function (e.g.,
App()). - Hooks like
useStateare registered and tracked in order. - React builds a Virtual DOM tree from the returned JSX.
- This virtual DOM is a plain JS object that describes the desired UI.
This process ensures fast and efficient rendering before React decides how to update the real DOM.
React’s core engine is called Fiber, introduced in React 16. Fiber is a reimplementation of the React reconciliation algorithm with the following capabilities:
- Breaks rendering work into units of work (fiber nodes).
- Enables interruptible rendering (important for responsiveness).
- Supports priority scheduling and concurrent rendering.
Each Fiber node represents a component and stores:
- The component type (function/class).
- Props, state, and effects.
- Links to parent, child, and sibling fibers.
When state or props change:
- React re-executes the component to produce a new virtual DOM.
- It compares the new virtual DOM to the previous one using an efficient diffing algorithm.
- React determines the minimal set of DOM changes required.
This process is known as reconciliation.
Once reconciliation is done:
- React enters the commit phase.
- It applies calculated changes to the real DOM.
- It also runs side effects like
useEffectoruseLayoutEffect.
This is the only time React interacts directly with the browser DOM.
With Hooks (like
useState,useEffect):- React keeps an internal list of hooks per component.
- Hooks are identified by their order in the function.
- When state updates occur, React re-renders the component and re-runs the hooks in the same order.
React uses an internal Scheduler to control how updates are prioritized:
- Urgent tasks like clicks and inputs are processed immediately.
- Non-urgent tasks (like data fetching) can be delayed or paused.
- This improves responsiveness and allows for time slicing in Concurrent Mode.
- React executes the component function (e.g.,
-
There are notable differences between
useStateanduseReducerhooks.Feature useStateuseReducerState complexity Simple (one variable or flat object) Complex, multi-part or deeply nested Update style Direct (e.g. setState(x))Through actions (e.g. dispatch({}))Update logic In component In reducer function Reusability & testing Less reusable Highly reusable & testable
-
The
useContexthook is a built-in React Hook that lets you access the value of a context inside a functional component without needing to wrap it in a <Context.Consumer> component.It helps you avoid prop drilling (passing props through multiple levels) by allowing components to access shared data like themes, authentication status, or user preferences.
The usage of useContext involves three main steps:
Use
React.createContext()to create a context object.import React, { createContext } from 'react'; const ThemeContext = createContext(); // default value optional
You typically export this so other components can import it.
Wrap your component tree (or a part of it) with the
Context.Providerand pass avalueprop.function App() { return ( <ThemeContext.Provider value="dark"> <MyComponent /> </ThemeContext.Provider> ); }
Now any component inside
<ThemeContext.Provider>can access the context value.In any functional component inside the Provider, use the
useContexthook:import { useContext } from 'react'; function MyComponent() { const theme = useContext(ThemeContext); // theme = "dark" return <p>Current Theme: {theme}</p>; }
-
The
useContexthook in React is used to share data across components without having to pass props manually through each level. Here are some common and effective use cases:- Theme Customization
useContextcan be used to manage application-wide themes, such as light and dark modes, ensuring consistent styling and enabling user-driven customization. - Localization and Internationalization
It supports localization by providing translated strings or locale-specific content to components, adapting the application for users in different regions. - User Authentication and Session Management
useContextallows global access to authentication status and user data. This enables conditional rendering of components and helps manage protected routes or user-specific UI elements. - Shared Modal or Sidebar Visibility
It's ideal for managing the visibility of shared UI components like modals, drawers, or sidebars, especially when their state needs to be controlled from various parts of the app. - Combining with
**useReducer**for Global State Management
When combined withuseReducer,useContextbecomes a powerful tool for managing more complex global state logic. This pattern helps maintain cleaner, scalable state logic without introducing external libraries like Redux. Some of the common use cases of useContext are listed below,
- Theme Customization
-
You can efficiently build nextjs application if you are aware about which part of the application needs to use client components and which other parts needs to use server components. The common cases of both client and server components are listed below:
Client components:
- Whenever your need to add interactivity and event listeners such as onClick(), onChange(), etc to the pages
- If you need to use State and Lifecycle Effects like useState(), useReducer(), useEffect() etc.
- If there is a requirement to use browser-only APIs.
- If you need to implement custom hooks that depend on state, effects, or browser-only APIs.
- There are React Class components in the pages.
Server components:
- If the component logic is about data fetching.
- If you need to access backend resources directly.
- When you need to keep sensitive information((access tokens, API keys, etc) ) on the server.
- If you want reduce client-side JavaScript and placing large dependencies on the server.
-
Next.js provides two different routing systems: the Page Router (traditional) and the App Router (introduced in Next.js 13). The App Router is built on React Server Components and offers more powerful features for modern web applications.
Here are the main differences between them:
Feature Page Router App Router Directory Uses pages/directoryUses app/directoryRouting File-based routing with files like pages/about.jsFile-based routing with folders and special files like app/about/page.jsComponents All components are Client Components by default All components are Server Components by default Layouts Custom _app.jsand_document.jsfor shared layoutsNative nested layouts using layout.jsfilesData Fetching Uses getServerSideProps,getStaticProps, andgetInitialPropsUses async/awaitin Server Components with nativefetchLoading States Manual implementation required Built-in loading.jsfor streaming and suspenseError Handling Custom _error.jspageBuilt-in error.jsfor error boundaries at any levelStreaming Limited support Built-in support for streaming with Suspense Server Actions Not available Native support for server-side mutations Metadata Using Headcomponent fromnext/headNative Metadata API with metadataobject orgenerateMetadatafunctionRendering SSR, SSG, ISR, and CSR SSR, SSG, ISR, CSR plus React Server Components Example of Page Router structure:
pages/ ├── index.js // Home page (/) ├── about.js // About page (/about) ├── _app.js // Custom App component ├── _document.js // Custom Document └── posts/ └── [id].js // Dynamic route (/posts/:id)Example of App Router structure:
app/ ├── page.js // Home page (/) ├── layout.js // Root layout ├── loading.js // Loading UI ├── error.js // Error UI ├── about/ │ └── page.js // About page (/about) └── posts/ └── [id]/ └── page.js // Dynamic route (/posts/:id)Note: The App Router is recommended for new Next.js applications as it provides better performance, simpler data fetching patterns, and improved developer experience with React Server Components.
-
The
useMemo()Hook in React is used to optimize performance by memoizing the result of expensive calculations. It ensures that a function is only re-executed when its dependencies change, preventing unnecessary computations on every re-render.const memoizedValue = useMemo(() => computeExpensiveValue(arg), [dependencies]);
-
computeExpensiveValue:
A function that returns the computed result. -
dependencies:
An array of values that, when changed, will cause the memoized function to re-run.
If the dependencies haven’t changed since the last render, React returns the cached result instead of re-running the function.
Let's exaplain the usage of
useMemohook with an example of user search and its respective filtered users list.import React, { useState, useMemo } from 'react'; const users = [ { id: 1, name: 'Sudheer' }, { id: 2, name: 'Brendon' }, { id: 3, name: 'Charlie' }, { id: 4, name: 'Dary' }, { id: 5, name: 'Eden' } ]; export default function UserSearch({ users }) { const [searchTerm, setSearchTerm] = useState(''); const [counter, setCounter] = useState(0); // Memoize the filtered user list based on the search term const filteredUsers = useMemo(() => { console.log("Filtering users..."); return users.filter(user => user.name.toLowerCase().includes(searchTerm.toLowerCase()) ); }, [searchTerm]); return ( <div> <h2>Counter: {counter}</h2> <button onClick={() => setCounter(prev => prev + 1)}>Increment Counter</button> <h2>Search Users</h2> <input type="text" value={searchTerm} onChange={(e) => setSearchTerm(e.target.value)} placeholder="Enter name" /> <ul> {filteredUsers.map(user => ( <li key={user.id}>{user.name}</li> ))} </ul> </div> ); }
In the above example:
- The filteredUsers list is only recomputed when searchTerm changes.
- Pressing the "Increment Counter" button does not trigger the filtering logic again, as it's not a dependency.
- The console will only log "Filtering users..." when the search term updates.
-
- No, Hooks cannot be used inside class components. They are specially designed for function components. This is because hooks depend on the sequence in which they are called during a component’s render, something that's only guaranteed in functional components. However, both class and function components can coexist in the same application.
-
An updater function is a form of
setStatewhere you pass a function instead of a direct value. This function receives the previous state as an argument and returns the next state.The updater function expression looks like below,
setCount(prevCount => prevCount + 1); // Safe and predictable
Here,
prevCount => prevCount + 1is the updater function.In the React community, there's often a recommendation to use updater functions when updating state that depends on its previous value. This helps prevent unexpected behaviors that can arise from working with outdated or "stale" state.
While using an updater function is a good habit, it's not always necessary. In most cases, React batches updates and ensures that the state is up-to-date at the beginning of the event handler, so you typically don’t run into stale state issues during a single synchronous event. However, if you’re doing multiple updates to the same state variable within a single handler, using the updater form ensures that each update correctly uses the latest state value, rather than a potentially outdated one.
Example: Multiple Updates in One Handler
function handleCount() { setCounter(a => a + 1); setCounter(a => a + 1); setCounter(a => a + 1); }
In this example,
a => a + 1is an updater function. React queues these updater functions and applies them sequentially, each using the most recent state value. As a result, the counter will correctly increment by 3.In many cases, such as setting state based on user input or assigning static values, you don’t need the updater function:
setName('Sudheer');
-
Yes,
useStatecan take a function as an initial value, and this is a useful feature in React called lazy initialization. This function is also known as initializer function.When you call useState(initialValue), you normally pass in a value directly:
const [count, setCount] = useState(0); // initial value is 0
But if calculating that initial value is expensive or involves logic, you can pass a function that returns the value:
const [count, setCount] = useState(() => { // This function only runs once — when the component first renders return expensiveComputation(); });
This function avoids doing heavy computation on every render. If you don't use this function form and invokes it directly, the function will run everytime the component renders and impact the performance. For example, the below usage is not recommended.
const [count, setCount] = useState(expensiveComputation());
-
The
useStatehook accepts different types of values.- Primitives:
number,string,boolean - Arrays
- Objects
- Functions
nullorundefined
But you needs to be cautious with reference types (objects/arrays) because React compares old and new values by reference, so direct mutations won't trigger a re-render. For example, the correct and wrong ways of state updates as shown below,
user.name = "Sudheer"; //wrong way setUser(prev => ({ ...prev, name: 'Sudheer' })); //correct way
- Primitives:
-
As per rules of React Hooks, hooks must be called unconditionally. For example, if you conditionally call it:
if (someCondition) { const [state, setState] = useState(0); }
React will throw a runtime error because it relies on the order of Hook calls, and conditional logic breaks that order.
-
The
useStatehook is synchronous, but state updates are asynchronous. When you calluseState(), it runs synchronously and returns the state variable and setter function as tuple.const [count, setCount] = useState(0);
This happens immediately during rendering. However, the state update function (setState) is asynchronous in the sense that it doesn't update the state immediately. React batches updates and applies them before the next render. You won’t see the updated value immediately after calling
setState.Example:
const [count, setCount] = useState(0); function handleClick() { setCount(count + 1); console.log(count); // ❗️Still logs the old value }
The >
console.log(count)prints the old value, because the update hasn’t happened yet.To see the updated state value, you can use
useEffect()hook. It runs after the component has re-rendered. By the timeuseEffectruns:- The component has been updated.
- The state contains the new value.
import React, { useState, useEffect } from 'react'; function Counter() { const [count, setCount] = useState(0); const handleClick = () => { setCount(count + 1); console.log('Clicked count (old):', count); // Old value }; useEffect(() => { console.log('Updated count:', count); // New value }, [count]); // Only runs when `count` changes return <button onClick={handleClick}>Count: {count}</button>; }
-
React’s hooks, including
useState, rely on some internal machinery that keeps track of state per component and per hook call during rendering. Here's a simplified explanation of the internal mechanics:- React maintains a linked list or array of "hook states" for each component.
- When a component renders, React keeps track of which hook it is currently processing via a cursor/index.
- Each call to
useState()corresponds to one "slot" in this list.
- Each slot stores:
- The current state value.
- A queue of pending state updates.
- When the component first renders, React:
- Creates a new slot for
useStatewith the initial state (e.g.,0). - Returns
[state, updaterFunction].
- The updater function (
setCount) is a closure that, when called: - Enqueues a state update to React's internal queue.
- Schedules a re-render of the component.
- On the next render:
- React processes all queued updates for each hook slot.
- Updates the stored state value accordingly.
- Returns the new state to the component.
- Hooks must be called in the same order on every render so React can match hook calls to their internal slots.
- That’s why you can’t call hooks conditionally.
The pseudocode for internal implementation of
useStatelooks like below,let hookIndex = 0; const hooks = []; function useState(initialValue) { const currentIndex = hookIndex; if (!hooks[currentIndex]) { // First render: initialize state hooks[currentIndex] = { state: initialValue, queue: [], }; } const hook = hooks[currentIndex]; // Process queued updates hook.queue.forEach(update => { hook.state = update(hook.state); }); hook.queue = []; // Define updater function function setState(action) { // action can be new state or function(state) => new state hook.queue.push(typeof action === 'function' ? action : () => action); scheduleRender(); // triggers React re-render } hookIndex++; return [hook.state, setState]; }
-
The
useReducerhook is a React hook used to manage complex state logic inside functional components. It is conceptually similar to Redux. i.e, Instead of directly updating state like withuseState, you dispatch an action to a reducer function, and the reducer returns the new state.The
useReducerhook takes three arguments:const [state, dispatch] = useReducer(reducer, initialState, initFunction);
**reducer**: A function(state, action) => newStatethat handles how state should change based on the action.**initialState**: The starting state.**dispatch**: A function you call to trigger an update by passing an action.
The
useReducerhook is used when:- The state is complex, such as nested structures or multiple related values.
- State updates depend on the previous state and logic.
- You want to separate state update logic from UI code to make it cleaner and testable.
- You’re managing features like:
- Forms
- Wizards / Multi-step flows
- Undo/Redo functionality
- Shopping cart logic
- Toggle & conditional UI logic
-
The
useReducerhooks works similarly to Redux, where:- You define a reducer function to handle state transitions.
- You dispatch actions to update the state.
Counter Example with Increment, Decrement, and Reset:
-
Reducer function:
Define a counter reducer function that takes the current state and an action object with a type, and returns a new state based on that type.
function counterReducer(state, action) { switch (action.type) { case 'increment': return { count: state.count + 1 }; case 'decrement': return { count: state.count - 1 }; case 'reset': return { count: 0 }; default: return state; } }
-
Using
useReducer: InvokeuseReducerwith above reducer function along with initial state. Thereafter, you can attach dispatch actions for respective button handlers.
import React, { useReducer } from 'react'; function Counter() { const initialState = { count: 0 }; const [state, dispatch] = useReducer(counterReducer, initialState); return ( <div style={{ textAlign: 'center' }}> <h2>Count: {state.count}</h2> <button onClick={() => dispatch({ type: 'increment' })}>Increment</button> <button onClick={() => dispatch({ type: 'decrement' })}>Decrement</button> <button onClick={() => dispatch({ type: 'reset' })}>Reset</button> </div> ); } export default Counter;
Once the new state has been returned, React re-renders the component with the updated
state.count.
-
Yes, it's common to combine useReducer with useContext to build a lightweight state management system similar to Redux:
const AppContext = React.createContext(); function AppProvider({ children }) { const [state, dispatch] = useReducer(reducer, initialState); return ( <AppContext.Provider value={{ state, dispatch }}> {children} </AppContext.Provider> ); }
-
Yes, you can dispatch multiple actions in a row using
useReducerbut not directly in one call. You'd have to call dispatch multiple times or create a composite action in your reducer that performs multiple updates based on the action type.Example: Dispatching Multiple Actions You can define a custom function with dispatching actions one by one.
function handleMultipleActions(dispatch) { dispatch({ type: 'increment' }); dispatch({ type: 'increment' }); dispatch({ type: 'reset' }); }
After that, you need to invoke it through event handler
<button onClick={() => handleMultipleActions(dispatch)}> Run Multiple Actions </button>
Note: You can also define a custom action type If you want multiple state changes to be handled in one reducer call.
case 'increment_twice': return { count: state.count + 2 };
Then dispatch
dispatch({ type: 'increment_twice' });
-
The
dispatchfunction returned byuseReduceris not asynchronous — it is a synchronous function call. When you calldispatch(action), React synchronously invokes your reducer with the current state and the action, computes the new state, and schedules a re-render. However, the state variable does not update immediately within the same render cycle. The updated state is only available in the next render.This behavior is similar to
useState'ssetState— React batches state updates for performance optimization, meaning the component does not re-render immediately after eachdispatchcall. Instead, React processes all dispatched actions and re-renders once with the final state.dispatchis synchronous: The reducer runs immediately whendispatchis called.- State update is not immediate in the current render: The state variable still holds the old value until the next render.
- React batches updates: Multiple
dispatchcalls within the same event handler result in a single re-render. - Reducer is a pure function: It computes the new state without side effects.
import React, { useReducer } from 'react'; function reducer(state, action) { switch (action.type) { case 'increment': return { count: state.count + 1 }; default: return state; } } function Counter() { const [state, dispatch] = useReducer(reducer, { count: 0 }); const handleClick = () => { dispatch({ type: 'increment' }); console.log(state.count); // Still logs the OLD value (e.g., 0), not 1 dispatch({ type: 'increment' }); console.log(state.count); // Still logs the OLD value (e.g., 0), not 2 }; // After re-render, state.count will be 2 (both dispatches are processed) return ( <div> <p>Count: {state.count}</p> <button onClick={handleClick}>Increment Twice</button> </div> ); }
In the above example, even though
dispatchis called twice,state.countstill reflects the previous value inside the event handler. React batches both dispatches and re-renders the component once withcount: 2.If you need the updated value right after dispatching, you have several options:
-
Use
useEffectto react to state changes:useEffect(() => { console.log('Updated count:', state.count); }, [state.count]);
-
Compute the next state manually:
const handleClick = () => { const nextState = reducer(state, { type: 'increment' }); console.log('Next state will be:', nextState.count); dispatch({ type: 'increment' }); };
-
Use
useRefto track the latest state:const stateRef = useRef(state); useEffect(() => { stateRef.current = state; }, [state]);
Note: This behavior is by design in React. The
dispatchfunction itself has a stable identity (it doesn't change between re-renders), which makes it safe to omit fromuseEffectdependency arrays.
-
The
useContexthook can be used for authentication state management across multiple components and pages in a React application.Let's build a simple authentication flow with:
- Login and Logout buttons
- Global
AuthContextto share state - Components that can access and update auth status
1. Create the Auth Context:
You can define
AuthProviderwhich holds and providesuser,login(), andlogout()via context.// AuthContext.js import React, { createContext, useContext, useState } from 'react'; const AuthContext = createContext(); export function AuthProvider({ children }) { const [user, setUser] = useState(null); const login = (username) => setUser({ name: username }); const logout = () => setUser(null); return ( <AuthContext.Provider value={{ user, login, logout }}> {children} </AuthContext.Provider> ); } // Custom hook for cleaner usage export const useAuth = () => useContext(AuthContext);
2. Wrap Your App with the Provider:
Wrap the above created provider in main
App.jsfile// App.js import React from 'react'; import { AuthProvider } from './AuthContext'; import HomePage from './HomePage'; import Dashboard from './Dashboard'; function App() { return ( <AuthProvider> <HomePage /> <Dashboard /> </AuthProvider> ); } export default App;
3. Home page with login: Read or access user and login details through custom useAuth hook and use it inside home page.
// HomePage.js import React from 'react'; import { useAuth } from './AuthContext'; function HomePage() { const { user, login } = useAuth(); return ( <div> <h1>Home</h1> {user ? ( <p>Welcome back, {user.name}!</p> ) : ( <button onClick={() => login('Alice')}>Login</button> )} </div> ); } export default HomePage;
4. Dashboard with logout: Read or access user and logout details from
useAuthcustom hook and use it inside dashboard page.// Dashboard.js import React from 'react'; import { useAuth } from './AuthContext'; function Dashboard() { const { user, logout } = useAuth(); if (!user) { return <p>Please login to view the dashboard.</p>; } return ( <div> <h2>Dashboard</h2> <p>Logged in as: {user.name}</p> <button onClick={logout}>Logout</button> </div> ); } export default Dashboard;
-
Yes, it is possible. You can use multiple contexts inside the same component by calling useContext multiple times, once for each context.
It can be achieved with below steps,
- Create multiple contexts using
createContext(). - Wrap your component tree with multiple
<Provider>s. - Call
useContext()separately for each context in the same component.
Example: Using
ThemeContextandUserContextTogetherimport React, { createContext, useContext } from 'react'; // Step 1: Create two contexts const ThemeContext = createContext(); const UserContext = createContext(); function Dashboard() { // Step 2: Use both contexts const theme = useContext(ThemeContext); const user = useContext(UserContext); return ( <div style={{ background: theme === 'dark' ? '#333' : '#fff' }}> <h1>Welcome, {user.name}</h1> <p>Current theme: {theme}</p> </div> ); } // Step 3: Provide both contexts function App() { return ( <ThemeContext.Provider value="dark"> <UserContext.Provider value={{ name: 'Sudheer' }}> <Dashboard /> </UserContext.Provider> </ThemeContext.Provider> ); } export default App;
- Create multiple contexts using
-
A common pitfall when using
useContextwith objects is triggering unnecessary re-renders across all consuming components — even when only part of the context value changes.When you provide an object as the context value, React compares the entire object reference. If the object changes (even slightly), React assumes the whole context has changed, and all components using
useContext(MyContext)will re-render, regardless of whether they use the part that changed.Example:
const MyContext = React.createContext(); function MyProvider({ children }) { const [user, setUser] = useState(null); const [theme, setTheme] = useState('light'); // This causes all consumers to re-render on any state change const contextValue = { user, setUser, theme, setTheme }; return ( <MyContext.Provider value={contextValue}> {children} </MyContext.Provider> ); }
In this case, a change in
themewill also trigger a re-render in components that only care aboutuser.This issue can be fixed in two ways,
1. Split Contexts
Create separate contexts for unrelated pieces of state:const UserContext = React.createContext(); const ThemeContext = React.createContext();
2. Memoize Context Value
UseuseMemoto prevent unnecessary re-renders:const contextValue = useMemo(() => ({ user, setUser, theme, setTheme }), [user, theme]);
However, this only helps if the object structure and dependencies are well controlled.
-
When a component calls
useContext(SomeContext)but no matching<SomeContext.Provider>is present higher up in the component tree, the default value passed toReact.createContext(defaultValue)is returned.const ThemeContext = React.createContext('light'); // 'light' is the default value function ThemedComponent() { const theme = useContext(ThemeContext); return <div>Current theme: {theme}</div>; } // No ThemeContext.Provider anywhere in the tree
In this case,
themewill be 'light'. It's the default value you provided when you created the context.Note: If you don’t specify a default value, the context value will be undefined when used without a provider:
const AuthContext = React.createContext(); // No default function Profile() { const auth = useContext(AuthContext); // auth will be undefined if there's no AuthContext.Provider }
-
The
useEffecthook accepts an optional dependencies argument that accepts an array of reactive values. The dependency array determines when the effect runs. i.e, It makesuseEffectreactive to changes in specified values.- Empty Dependency Array:
**[]**
useEffect(() => { // runs once after the initial render }, []);
- Effect runs only once (like
componentDidMount). - Ignores all state/prop changes.
- With Specific Dependencies:
**[count, user]**
useEffect(() => { // runs after initial render // AND whenever `count` or `user` changes }, [count, user]);
- Effect runs on first render, and
- Again every time any dependency value changes.
-
No Dependency Array (Omitted)
useEffect(() => { // runs after **every** render });
- Effect runs after every render, regardless of what changed.
- Can lead to performance issues if not used carefully.
React uses shallow comparison of the dependencies. If any value has changed (!==), the effect will re-run.
Note: This hook works well when dependencies are primitives or memoized objects/functions.
- Empty Dependency Array:
-
-
Setup Function Execution (
useEffect)The setup function (or the main function) you pass to
useEffectruns at specific points:- After the component is mounted (if the dependency array is empty
[]) - After every render (if no dependency array is provided)
- After a dependency value changes (if the dependency array contains variables)
- After the component is mounted (if the dependency array is empty
-
Cleanup Function Execution (Returned function from
useEffect)The cleanup function is called before the effect is re-executed and when the component unmounts.
-
-
You should NOT return a Promise from useEffect. React expects the function passed to useEffect to return either nothing (undefined) or a cleanup function (synchronous function). i.e, It does not expect or handle a returned Promise. If you still return a Promise, React will ignore it silently, and it may lead to bugs or warnings in strict mode.
Incorrect:
useEffect(async () => { await fetchData(); // ❌ useEffect shouldn't be async }, []);
Correct:
useEffect(() => { const fetchData = async () => { const res = await fetch('/api'); const data = await res.json(); setData(data); }; fetchData(); }, []);
-
Yes, multiple useEffect hooks are allowed and recommended when you want to separate concerns.
useEffect(() => { // Handles API fetch }, []); useEffect(() => { // Handles event listeners }, []);
Each effect runs independently and helps make code modular and easier to debug.
-
Infinite loops happen when the effect updates state that’s listed in its own dependency array, which causes the effect to re-run, updating state again and so on.
Infinite loop scenario:
useEffect(() => { setCount(count + 1); }, [count]); // Triggers again every time count updates
You need to ensure that setState calls do not depend on values that cause the effect to rerun, or isolate them with a guard.
useEffect(() => { if (count < 5) { setCount(count + 1); } }, [count]);
-
You need to use
useLayoutEffectwhen your effect must run before the browser paints, such as:- Reading layout measurements (e.g., element size, scroll position)
- Synchronously applying DOM styles to prevent visual flicker
- Animating layout or transitions
- Integrating with third-party libraries that require DOM manipulation
If there's no visual or layout dependency, prefer
useEffect— it's more performance-friendly.useLayoutEffect(() => { const width = divRef.current.offsetWidth; if (width < 400) { divRef.current.style.background = 'blue'; // prevents flicker } }, []);
-
The
useLayoutEffecthook does not run on the server, because there is no DOM. React issues a warning in server environments like Next.js ifuseLayoutEffectis used directly.This can be mitigated using a conditional polyfill:
const useIsomorphicLayoutEffect = typeof window !== 'undefined' ? useLayoutEffect : useEffect;
i.e, Use
useIsomorphicLayoutEffectin components that render both on client and server.
-
Using
useLayoutEffectfor logic unrelated to layout or visual DOM changes (such as logging, data fetching, or analytics) is not recommended. It can lead to performance issues or even unexpected behavior.Example: Anti-pattern
useLayoutEffect(() => { console.log("Tracking analytics"); fetch('/log-page-view'); }, []);
The above usage delays the paint of the UI just to send a network request, which could (and should) be done after paint using useEffect.
-
The
useLayoutEffectcan cause layout thrashing when you repeatedly read and write to the DOM in ways that force the browser to recalculate layout multiple times per frame. This is becauseuseLayoutEffectruns before the browser paints, these reflows happen synchronously, blocking rendering and degrading performance.Example:
function ThrashingComponent() { const ref = useRef(); useLayoutEffect(() => { const height = ref.current.offsetHeight; //Read ref.current.style.height = height + 20 + 'px'; //Write const newHeight = ref.current.offsetHeight; //Read again — forces reflow }, []); return <div ref={ref}>Hello</div>; }
In the above code, each read/write cycle triggers synchronous reflows, blocking the main thread and delays UI rendering.
This issue can be avoided by batching your DOM reads and writes and prevent unnecessary reads after writes.
-
The
useRefhook is commonly used in React to directly reference and interact with DOM elements — like focusing an input, scrolling to a section, or controlling media elements.When you assign a ref to a DOM element using useRef, React gives you access to the underlying DOM node via the .current property of the ref object.
Example: Focus an input
import React, { useRef } from 'react'; function FocusInput() { const inputRef = useRef(null); // create the ref const handleFocus = () => { inputRef.current.focus(); // access DOM element and focus it }; return ( <div> <input type="text" ref={inputRef} /> <button onClick={handleFocus}>Focus the input</button> </div> ); }
Note: The DOM reference is only available after the component has mounted — typically accessed in
useEffector event handlers.
-
Yes, you can use
useRefto persist values across renders in React. UnlikeuseState, changing.currentdoes not cause re-renders, but the value is preserved across renders.Example:
function Timer() { const renderCount = useRef(0); useEffect(() => { renderCount.current++; console.log("Render count:", renderCount.current); }); return <div>Check console for render count.</div>; }
-
Yes,
useRefis a common pattern when you want to compare current and previous props or state without causing re-renders.Example: Storing previous state value
import { useEffect, useRef, useState } from 'react'; function PreviousValueExample() { const [count, setCount] = useState(0); const prevCountRef = useRef(); useEffect(() => { prevCountRef.current = count; }, [count]); const prevCount = prevCountRef.current; return ( <div> <p>Current: {count}</p> <p>Previous: {prevCount}</p> <button onClick={() => setCount(c => c + 1)}>Increment</button> </div> ); }
-
Yes, you can access a ref in the render method, but what you get from it depends on how you're using the ref and when in the component lifecycle you're rendering.
For example, when using ref to access a DOM node (e.g., divRef.current), it's not immediately available on the first render.
const divRef = useRef(null); console.log(divRef.current); // ❌ null on initial render return <div ref={divRef}>Hello</div>;
-
Some of the common cases are:
- Automatically focus an input when a component mounts.
- Scroll to a specific element.
- Measure element dimensions (
offsetWidth,clientHeight). - Control video/audio playback.
- Integrate with non-React libraries (like D3 or jQuery).
-
useImperativeHandleis a React Hook that allows a child component to expose custom functions or properties to its parent component, when usingref. It is typically used withforwardRefand is very useful in cases like modals, dialogs, custom inputs, etc., where the parent needs to control behavior imperatively (e.g., open, close, reset).Example: Dialog component
import React, { useRef, useState, useImperativeHandle, forwardRef, } from 'react'; import './Dialog.css'; const Dialog = forwardRef((props, ref) => { const [isOpen, setIsOpen] = useState(false); const [formData, setFormData] = useState(''); useImperativeHandle(ref, () => ({ open: () => setIsOpen(true), close: () => setIsOpen(false), reset: () => setFormData(''), })); if (!isOpen) return null; return ( <div className="dialog"> <h2>Dialog</h2> <input type="text" value={formData} placeholder="Type something..." onChange={(e) => setFormData(e.target.value)} /> <br /> <button onClick={() => setIsOpen(false)}>Close</button> </div> ); }); function Parent() { const dialogRef = useRef(); return ( <div> <h1>useImperativeHandle Dialog Example</h1> <button onClick={() => dialogRef.current.open()}>Open Dialog</button> <button onClick={() => dialogRef.current.reset()}>Reset Dialog</button> <button onClick={() => dialogRef.current.close()}>Close Dialog</button> <Dialog ref={dialogRef} /> </div> ); } export default Parent;
-
The useImperativeHandler hook will be used in below cases:
- You want to expose imperative methods from a child component
- Custom input controls exposing
focus,clear, orvalidatemethods - Modal components exposing
open()andclose()methods - Scroll containers exposing
scrollToTop()orscrollToBottom()methods
- Custom input controls exposing
- You want to hide internal implementation but provide controlled external access.
- You're building reusable component libraries (e.g., inputs, modals, form controls).
- You want to expose imperative methods from a child component
-
No.
useImperativeHandleonly works when the component is wrapped inforwardRef. It's the combination that allows parent components to use arefon a function component.
-
The following table compares both useMemo and useCallback:
Feature useMemouseCallbackPurpose Memoizes the result of a computation Memoizes a function reference Returns A value (e.g., result of a function) A function Usage useMemo(() => computeValue(), [deps])useCallback(() => doSomething(), [deps])Primary Use Case Avoid expensive recalculations Prevent unnecessary re-creations of functions Common Scenario Filtering, sorting, calculating derived data Passing callbacks to child components When It's Useful When the value is expensive to compute When referential equality matters (e.g., props) Recomputed When Dependencies change Dependencies change Returned Value Type Any (number, object, array, etc.) Always a function Overhead Slight (evaluates a function and caches result) Slight (caches a function reference)
-
The
useMemohook does not directly prevent re-rendering of child components. Its main purpose is to memoize the result of an expensive computation so that it doesn’t get recalculated unless its dependencies change. While this can improve performance, it doesn’t inherently control whether a child component re-renders.However,
useMemocan help prevent re-renders when the memoized value is passed as a prop to a child component that is wrapped inReact.memo. In that case, if the memoized value doesn’t change between renders (i.e., it has the same reference), React.memo can skip re-rendering the child. So, whileuseMemodoesn’t stop renders on its own, it works in combination with tools likeReact.memoto optimize rendering behavior.
-
The
useCallbackis a React Hook used to memoize function definitions between renders. It returns the same function reference unless its dependencies change. This is especially useful when passing callbacks to optimized child components (e.g. those wrapped inReact.memo) to prevent unnecessary re-renders.Example:
const handleClick = useCallback(() => { console.log('Button clicked'); }, []);
Without
useCallback, a new function is created on every render, potentially causing child components to re-render unnecessarily.
-
Custom Hooks in React are JavaScript functions that allow you to extract and reuse component logic using React’s built-in Hooks like
useState,useEffect, etc.They start with the word "use" and let you encapsulate logic that multiple components might share—such as fetching data, handling forms, or managing timers—without repeating code.
Let's explain the custom hook usage with
useFetchDataexample. TheuseFetchDatacustom Hook is a reusable function in React that simplifies the process of fetching data from an API. It encapsulates common logic such as initiating the fetch request, managing loading and error states, and storing the fetched data. By using built-in Hooks likeuseStateanduseEffect,useFetchDataprovides a clean interface that returns thedata,loading, anderrorvalues, which can be directly used in components.import { useState, useEffect } from 'react'; function useFetchData(url) { const [data, setData] = useState(null); // Holds the response const [loading, setLoading] = useState(true); // Loading state const [error, setError] = useState(null); // Error state useEffect(() => { let isMounted = true; // Prevent setting state on unmounted component setLoading(true); fetch(url) .then((response) => { if (!response.ok) throw new Error('Network response was not ok'); return response.json(); }) .then((json) => { if (isMounted) { setData(json); setLoading(false); } }) .catch((err) => { if (isMounted) { setError(err.message); setLoading(false); } }); return () => { isMounted = false; // Clean-up function to avoid memory leaks }; }, [url]); return { data, loading, error }; }
The above custom hook can be used to retrieve users data for
AuthorList,ReviewerListcomponents.Example: AuthorList component
function AuthorList() { const { data, loading, error } = useFetchData('https://api.example.com/authors'); if (loading) return <p>Loading authors...</p>; if (error) return <p>Error: {error}</p>; return ( <ul> {data.map((author) => ( <li key={author.id}>{author.name}</li> ))} </ul> ); }
Some of the benefits of custom hooks are:
- Promotes code reuse
- Keeps components clean and focused
- Makes complex logic easier to test and maintain
-
React Fiber is the core engine that enables advanced features like concurrent rendering, prioritization, and interruptibility in React. Here's how it works:
Each component in your app is represented by a Fiber node in a tree structure. A Fiber node contains:
- Component type
- Props & state
- Pointers to parent, child, and sibling nodes
- Effect tags to track changes (e.g., update, placement)
- This forms the Fiber Tree, a data structure React uses instead of the traditional call stack.
- React builds a work-in-progress Fiber tree.
- It walks through each component (begin phase), calculates what needs to change, and collects side effects (complete phase).
- This phase is interruptible—React can pause it and resume later.
- React applies changes to the Real DOM.
- Runs lifecycle methods (e.g.,
componentDidMount,useEffect). - This phase is non-interruptible but fast.
- React breaks rendering into units of work (small tasks).
- These units are scheduled based on priority using the React Scheduler.
- If time runs out (e.g., user starts typing), React can pause and yield control back to the browser.
- React maintains two trees:
- Current Tree – what's visible on the screen.
- Work-In-Progress Tree – the next version being built in memory.
- Only after the new tree is fully ready, React commits it, making it the new current tree.
- React can prepare multiple versions of UI at once (e.g., during slow data loading).
- Updates can be assigned priorities, so urgent updates (like clicks) are handled faster than background work.
-
The
useIdhook is a React hook introduced in React 18 that generates unique IDs that are stable across server and client renders. It's primarily used for accessibility attributes like linking form labels to inputs.const id = useId();
import { useId } from 'react'; function EmailField() { const id = useId(); return ( <div> <label htmlFor={id}>Email:</label> <input id={id} type="email" /> </div> ); }
- Generating unique IDs for form elements (
htmlFor,aria-describedby,aria-labelledby) - Creating stable IDs in server-side rendering (SSR) applications
- Avoiding ID collisions when the same component is rendered multiple times
- As keys in a list (use data-based keys instead)
- As CSS selectors or query selectors
- For any purpose that requires the ID to be predictable
Note: The IDs generated by
useIdcontain colons (:) which may not work in CSS selectors. For multiple related IDs, you can use the sameidas a prefix:${id}-firstName,${id}-lastName. - Generating unique IDs for form elements (
-
The
useDeferredValuehook is used to defer updating a part of the UI to keep other parts responsive. It accepts a value and returns a "deferred" version of that value that may lag behind. This is useful for optimizing performance when rendering expensive components.const deferredValue = useDeferredValue(value);
import { useState, useDeferredValue, useMemo } from 'react'; function SearchResults({ query }) { // Expensive computation or large list filtering const results = useMemo(() => { return largeDataSet.filter(item => item.name.toLowerCase().includes(query.toLowerCase()) ); }, [query]); return ( <ul> {results.map(item => <li key={item.id}>{item.name}</li>)} </ul> ); } function SearchPage() { const [query, setQuery] = useState(''); const deferredQuery = useDeferredValue(query); const isStale = query !== deferredQuery; return ( <div> <input value={query} onChange={(e) => setQuery(e.target.value)} placeholder="Search..." /> <div style={{ opacity: isStale ? 0.5 : 1 }}> <SearchResults query={deferredQuery} /> </div> </div> ); }
The input stays responsive while the expensive
SearchResultscomponent re-renders with a slight delay using the deferred value.
-
The
useTransitionhook allows you to mark certain state updates as non-urgent transitions, keeping the UI responsive during expensive re-renders. It returns aisPendingflag and astartTransitionfunction.const [isPending, startTransition] = useTransition();
import { useState, useTransition } from 'react'; function TabContainer() { const [isPending, startTransition] = useTransition(); const [tab, setTab] = useState('home'); function selectTab(nextTab) { startTransition(() => { setTab(nextTab); }); } return ( <div> <button onClick={() => selectTab('home')}>Home</button> <button onClick={() => selectTab('posts')}>Posts (slow)</button> <button onClick={() => selectTab('contact')}>Contact</button> {isPending && <Spinner />} {tab === 'home' && <HomeTab />} {tab === 'posts' && <PostsTab />} {/* Expensive component */} {tab === 'contact' && <ContactTab />} </div> ); }
Feature useTransition useDeferredValue Controls State updates (wraps setState)Values (wraps a value) Use case When you control the state update When you receive a value from props or other hooks Returns [isPending, startTransition]Deferred value Pending state Built-in isPendingflagManual comparison needed
-
The
useSyncExternalStorehook is designed to subscribe to external stores (non-React state sources) in a way that's compatible with concurrent rendering. It's primarily used by library authors for state management libraries.const state = useSyncExternalStore(subscribe, getSnapshot, getServerSnapshot?);
- subscribe: Function to subscribe to the store, returns an unsubscribe function
- getSnapshot: Function that returns the current store value
- getServerSnapshot: Optional function for SSR that returns the initial server snapshot
import { useSyncExternalStore } from 'react'; function getSnapshot() { return navigator.onLine; } function subscribe(callback) { window.addEventListener('online', callback); window.addEventListener('offline', callback); return () => { window.removeEventListener('online', callback); window.removeEventListener('offline', callback); }; } function useOnlineStatus() { return useSyncExternalStore(subscribe, getSnapshot, () => true); } function StatusBar() { const isOnline = useOnlineStatus(); return <h1>{isOnline ? '✅ Online' : '❌ Disconnected'}</h1>; }
This hook ensures that when the external store changes, React re-renders consistently without tearing (showing inconsistent data).
-
The
useInsertionEffecthook is designed for CSS-in-JS library authors to inject styles into the DOM before any layout effects run. It fires synchronously before DOM mutations.useInsertionEffect(() => { // Insert styles here return () => { // Cleanup }; }, [dependencies]);
1. useInsertionEffect → Inject styles 2. DOM mutations → React updates DOM 3. useLayoutEffect → Read layout, synchronously re-render if needed 4. Browser paint → User sees the result 5. useEffect → Side effects runimport { useInsertionEffect } from 'react'; let isInserted = new Set(); function useCSS(rule) { useInsertionEffect(() => { if (!isInserted.has(rule)) { isInserted.add(rule); const style = document.createElement('style'); style.textContent = rule; document.head.appendChild(style); } }, [rule]); } function Button() { useCSS('.dynamic-btn { background: blue; color: white; }'); return <button className="dynamic-btn">Click me</button>; }
Note: This hook is not intended for application code. It's specifically for CSS-in-JS libraries like styled-components or Emotion to prevent style flickering.
-
Custom hooks allow you to extract and share stateful logic between components without changing their hierarchy. The state itself is not shared—each component using the hook gets its own isolated state.
import { useState, useEffect } from 'react'; function useLocalStorage(key, initialValue) { // Get stored value or use initial value const [storedValue, setStoredValue] = useState(() => { try { const item = window.localStorage.getItem(key); return item ? JSON.parse(item) : initialValue; } catch (error) { console.error(error); return initialValue; } }); // Update localStorage when state changes useEffect(() => { try { window.localStorage.setItem(key, JSON.stringify(storedValue)); } catch (error) { console.error(error); } }, [key, storedValue]); return [storedValue, setStoredValue]; } // Usage in multiple components function ThemeToggle() { const [theme, setTheme] = useLocalStorage('theme', 'light'); return ( <button onClick={() => setTheme(theme === 'light' ? 'dark' : 'light')}> Current: {theme} </button> ); } function FontSizeSelector() { const [fontSize, setFontSize] = useLocalStorage('fontSize', 16); return ( <input type="range" value={fontSize} onChange={(e) => setFontSize(Number(e.target.value))} /> ); }
Both components use
useLocalStorage, but each has its own independent state that persists to localStorage.
-
The
useDebugValuehook is used to display a label for custom hooks in React DevTools. It helps developers debug custom hooks by showing meaningful information.useDebugValue(value); useDebugValue(value, formatFn); // With optional formatter
import { useState, useEffect, useDebugValue } from 'react'; function useOnlineStatus() { const [isOnline, setIsOnline] = useState(true); useEffect(() => { const handleOnline = () => setIsOnline(true); const handleOffline = () => setIsOnline(false); window.addEventListener('online', handleOnline); window.addEventListener('offline', handleOffline); return () => { window.removeEventListener('online', handleOnline); window.removeEventListener('offline', handleOffline); }; }, []); // Shows "OnlineStatus: Online" or "OnlineStatus: Offline" in DevTools useDebugValue(isOnline ? 'Online' : 'Offline'); return isOnline; }
function useUser(userId) { const [user, setUser] = useState(null); // The format function only runs when DevTools is open useDebugValue(user, (user) => user ? `User: ${user.name}` : 'Loading...'); return user; }
Note: Only use
useDebugValuein custom hooks that are part of shared libraries. It's not necessary for every custom hook in application code.
-
The cleanup function in
useEffectis used to clean up side effects before the component unmounts or before the effect runs again. This prevents memory leaks, stale data, and unexpected behavior.useEffect(() => { // Setup code return () => { // Cleanup code }; }, [dependencies]);
1. Event Listeners
useEffect(() => { const handleResize = () => setWidth(window.innerWidth); window.addEventListener('resize', handleResize); return () => window.removeEventListener('resize', handleResize); }, []);
2. Timers and Intervals
useEffect(() => { const intervalId = setInterval(() => { setCount(c => c + 1); }, 1000); return () => clearInterval(intervalId); }, []);
3. Subscriptions
useEffect(() => { const subscription = dataSource.subscribe(handleChange); return () => subscription.unsubscribe(); }, [dataSource]);
4. Abort Fetch Requests
useEffect(() => { const controller = new AbortController(); fetch(url, { signal: controller.signal }) .then(response => response.json()) .then(data => setData(data)) .catch(err => { if (err.name !== 'AbortError') { setError(err); } }); return () => controller.abort(); }, [url]);
When Cleanup Runs:
- Before the component unmounts
- Before re-running the effect when dependencies change
-
useEventis an experimental hook (not yet stable in React) designed to solve the problem of creating stable event handlers that always access the latest props and state without causing re-renders or needing to be in dependency arrays.// Problem: onTick changes on every render, causing interval to reset function Timer({ onTick }) { useEffect(() => { const id = setInterval(() => { onTick(); // Uses stale closure if onTick is not in deps }, 1000); return () => clearInterval(id); }, [onTick]); // Adding onTick causes interval to reset frequently }
import { useEvent } from 'react'; // Experimental function Timer({ onTick }) { const stableOnTick = useEvent(onTick); useEffect(() => { const id = setInterval(() => { stableOnTick(); // Always calls latest onTick }, 1000); return () => clearInterval(id); }, []); // No dependency needed! }
Feature useEffect useEvent (experimental) Purpose Run side effects Create stable callbacks Runs After render During render (creates function) Returns Cleanup function Stable event handler Closure Captures values at render time Always accesses latest values Dependencies Must list all used values Not needed in other hooks' deps Note: Until
useEventis stable, you can useuseCallbackwithuseRefas a workaround for stable callbacks.
-
Following best practices ensures your hooks are predictable, maintainable, and bug-free.
- Only call hooks at the top level (not inside loops, conditions, or nested functions)
- Only call hooks from React functions (components or custom hooks)
npm install eslint-plugin-react-hooks --save-dev
{ "plugins": ["react-hooks"], "rules": { "react-hooks/rules-of-hooks": "error", "react-hooks/exhaustive-deps": "warn" } }// ❌ Bad: One hook doing too much function useEverything() { const [user, setUser] = useState(null); const [posts, setPosts] = useState([]); const [theme, setTheme] = useState('light'); // ... lots of unrelated logic } // ✅ Good: Separate concerns function useUser() { /* user logic */ } function usePosts() { /* posts logic */ } function useTheme() { /* theme logic */ }
// ❌ Bad function useData() { } // ✅ Good function useUserAuthentication() { } function useFetchProducts() { } function useFormValidation() { }
// ❌ Bad: Missing dependency useEffect(() => { fetchUser(userId); }, []); // userId is missing // ✅ Good: All dependencies listed useEffect(() => { fetchUser(userId); }, [userId]);
// ❌ Bad: New object on every render useEffect(() => { doSomething(options); }, [{ page: 1, limit: 10 }]); // Always different reference // ✅ Good: Memoize or extract const options = useMemo(() => ({ page: 1, limit: 10 }), []); useEffect(() => { doSomething(options); }, [options]);
Always return a cleanup function when subscribing to events, timers, or external data sources.
-
React 18, released in March 2022, introduced several groundbreaking features focused on performance and user experience:
Batch multiple state updates together (even in async code) to reduce re-renders.
// Before React 18: Only batched in event handlers // After React 18: Batched everywhere setTimeout(() => { setCount(c => c + 1); setFlag(f => !f); // Only 1 re-render in React 18! }, 1000);
- useTransition: Mark updates as non-urgent
- useDeferredValue: Defer expensive re-renders
- Suspense on Server: SSR with Suspense support
// Old way (React 17) ReactDOM.render(<App />, document.getElementById('root')); // New way (React 18) import { createRoot } from 'react-dom/client'; const root = createRoot(document.getElementById('root')); root.render(<App />);
Stream HTML from server and hydrate components as they arrive.
useId: Generate unique IDs for accessibilityuseSyncExternalStore: Subscribe to external storesuseInsertionEffect: For CSS-in-JS libraries
Double-invokes effects in development to catch bugs.
-
React 19 (released 2024) brings major improvements for full-stack React applications:
Automatic memoization - no more manual
useMemo,useCallback, orReact.memoneeded!// Before: Manual optimization const memoizedValue = useMemo(() => expensiveCalc(a, b), [a, b]); // React 19: Compiler does it automatically const value = expensiveCalc(a, b); // Automatically optimized!
Call server functions directly from components:
async function createPost(formData) { 'use server' const post = await db.posts.create({ title: formData.get('title') }); revalidatePath('/posts'); return post; } function NewPost() { return ( <form action={createPost}> <input name="title" /> <button type="submit">Create</button> </form> ); }
Automatic handling of pending states, errors, and optimistic updates:
function Form() { const [state, formAction] = useFormState(serverAction, initialState); const { pending } = useFormStatus(); return ( <form action={formAction}> <input disabled={pending} /> <button disabled={pending}> {pending ? 'Submitting...' : 'Submit'} </button> </form> ); }
Read resources (Promises, Context) inside render:
function User({ userPromise }) { const user = use(userPromise); // Suspends until resolved return <div>{user.name}</div>; }
Implement optimistic UI updates:
function TodoList({ todos }) { const [optimisticTodos, addOptimisticTodo] = useOptimistic( todos, (state, newTodo) => [...state, { ...newTodo, pending: true }] ); async function createTodo(title) { addOptimisticTodo({ id: Date.now(), title }); await saveTodo(title); } return optimisticTodos.map(todo => ( <Todo key={todo.id} {...todo} /> )); }
Built-in support for
<title>,<meta>, etc.:function BlogPost({ post }) { return ( <> <title>{post.title}</title> <meta name="description" content={post.excerpt} /> <article>{post.content}</article> </> ); }
Preload resources for better performance:
import { preload, preinit } from 'react-dom'; preload('/font.woff2', { as: 'font' }); preinit('/script.js', { as: 'script' });
-
The
use()hook allows you to read the value of a resource (Promise or Context) during render, with Suspense integration.import { use, Suspense } from 'react'; function UserProfile({ userPromise }) { const user = use(userPromise); // Suspends until resolved return ( <div> <h1>{user.name}</h1> <p>{user.email}</p> </div> ); } function App() { const userPromise = fetchUser(123); return ( <Suspense fallback={<div>Loading...</div>}> <UserProfile userPromise={userPromise} /> </Suspense> ); }
import { use } from 'react'; import { ThemeContext } from './context'; function Button() { const theme = use(ThemeContext); return <button className={theme}>Click me</button>; }
Feature use() useContext() useState() Can be called conditionally ✅ Yes ❌ No ❌ No Can be called in loops ✅ Yes ❌ No ❌ No Suspends for Promises ✅ Yes ❌ N/A ❌ N/A Reads Context ✅ Yes ✅ Yes ❌ N/A function Component({ showUser, userPromise }) { // ✅ This is allowed with use()! const user = showUser ? use(userPromise) : null; return user ? <div>{user.name}</div> : <div>No user</div>; }
-
Server Actions allow you to call server-side functions directly from client components without writing API endpoints.
// app/actions.js 'use server' export async function createPost(formData) { const title = formData.get('title'); const content = formData.get('content'); const post = await db.posts.create({ title, content, userId: await getCurrentUser() }); revalidatePath('/posts'); redirect(`/posts/${post.id}`); }
// app/new-post.jsx import { createPost } from './actions'; export default function NewPost() { return ( <form action={createPost}> <input name="title" required /> <textarea name="content" required /> <button type="submit">Create Post</button> </form> ); }
'use client' import { useFormState } from 'react-dom'; import { createPost } from './actions'; export default function NewPost() { const [state, formAction] = useFormState(createPost, { message: '' }); return ( <form action={formAction}> <input name="title" required /> <textarea name="content" required /> <button type="submit">Create Post</button> {state.message && <p>{state.message}</p>} </form> ); }
Server Actions work even if JavaScript is disabled!
// This form works without JavaScript <form action={serverAction}> <input name="email" type="email" /> <button>Subscribe</button> </form>
- Automatically CSRF protected
- Always run on server (never exposed to client)
- Can use server-only packages safely
-
These hooks simplify form handling with Server Actions in React 19.
Manages form state and handles server responses:
'use client' import { useFormState } from 'react-dom'; import { loginAction } from './actions'; export default function LoginForm() { const [state, formAction] = useFormState(loginAction, { errors: {}, message: '' }); return ( <form action={formAction}> <input name="email" type="email" /> {state.errors.email && <p>{state.errors.email}</p>} <input name="password" type="password" /> {state.errors.password && <p>{state.errors.password}</p>} <button type="submit">Login</button> {state.message && <p>{state.message}</p>} </form> ); }
Get the pending state of parent form:
'use client' import { useFormStatus } from 'react-dom'; function SubmitButton() { const { pending, data, method, action } = useFormStatus(); return ( <button type="submit" disabled={pending}> {pending ? 'Submitting...' : 'Submit'} </button> ); } // Must be used in a child component of <form> export default function MyForm() { return ( <form action={serverAction}> <input name="email" /> <SubmitButton /> </form> ); }
'use client' import { useFormState, useFormStatus } from 'react-dom'; function SubmitButton() { const { pending } = useFormStatus(); return ( <button disabled={pending}> {pending ? '⏳ Saving...' : '💾 Save'} </button> ); } export default function EditProfile() { const [state, formAction] = useFormState(updateProfile, null); return ( <form action={formAction}> <input name="name" defaultValue={user.name} /> <input name="bio" defaultValue={user.bio} /> <SubmitButton /> {state?.success && <p>✅ Profile updated!</p>} {state?.error && <p>❌ {state.error}</p>} </form> ); }
useFormState: For managing server responses and errorsuseFormStatus: For UI feedback during submissionuseFormStatusmust be used in a child component of the form- Works seamlessly with Server Actions
-
useOptimisticenables optimistic UI updates - showing changes immediately before server confirmation.import { useOptimistic } from 'react'; function TodoList({ todos, addTodo }) { const [optimisticTodos, addOptimisticTodo] = useOptimistic( todos, (currentTodos, newTodo) => [...currentTodos, { ...newTodo, pending: true }] ); async function handleSubmit(formData) { const title = formData.get('title'); // Immediately show optimistic update addOptimisticTodo({ id: Date.now(), title }); // Send to server await addTodo(title); // Component re-renders with real data when complete } return ( <> <form action={handleSubmit}> <input name="title" /> <button>Add</button> </form> <ul> {optimisticTodos.map(todo => ( <li key={todo.id} style={{ opacity: todo.pending ? 0.5 : 1 }}> {todo.title} {todo.pending && ' ⏳'} </li> ))} </ul> </> ); }
'use client' import { useOptimistic } from 'react'; import { likePost } from './actions'; export default function Post({ post, likes }) { const [optimisticLikes, addOptimisticLike] = useOptimistic( likes, (currentLikes, amount) => currentLikes + amount ); async function handleLike() { addOptimisticLike(1); // Immediate UI update await likePost(post.id); // Server update } return ( <div> <h2>{post.title}</h2> <button onClick={handleLike}> ❤️ {optimisticLikes} Likes </button> </div> ); }
function ShoppingCart({ items, removeItem }) { const [optimisticItems, removeOptimistic] = useOptimistic( items, (current, removedId) => current.filter(item => item.id !== removedId) ); async function handleRemove(itemId) { removeOptimistic(itemId); // Immediate removal from UI try { await removeItem(itemId); } catch (error) { // Automatic rollback on error! toast.error('Failed to remove item'); } } return ( <ul> {optimisticItems.map(item => ( <li key={item.id}> {item.name} <button onClick={() => handleRemove(item.id)}>Remove</button> </li> ))} </ul> ); }
- ✅ Toggling likes/favorites
- ✅ Adding/removing items from lists
- ✅ Sending messages in chat
- ✅ Any action where immediate feedback improves UX
- ❌ Financial transactions (wait for confirmation)
- ❌ Critical operations requiring server validation
-
The React Compiler (formerly known as React Forget) automatically optimizes your components by adding memoization where needed - eliminating the need for manual
useMemo,useCallback, andReact.memo.function TodoList({ todos, filter }) { // Manual optimization needed const filteredTodos = useMemo(() => { return todos.filter(todo => todo.status === filter); }, [todos, filter]); const handleToggle = useCallback((id) => { toggleTodo(id); }, [toggleTodo]); return ( <div> {filteredTodos.map(todo => ( <TodoItem key={todo.id} todo={todo} onToggle={handleToggle} /> ))} </div> ); } // Need to wrap in React.memo export default React.memo(TodoList);
function TodoList({ todos, filter }) { // Compiler automatically optimizes this! const filteredTodos = todos.filter(todo => todo.status === filter); const handleToggle = (id) => { toggleTodo(id); }; return ( <div> {filteredTodos.map(todo => ( <TodoItem key={todo.id} todo={todo} onToggle={handleToggle} /> ))} </div> ); } // No React.memo needed! export default TodoList;
- Analyzes code during build time
- Identifies expensive calculations and renders
- Automatically inserts memoization where beneficial
- Preserves React semantics - your code still behaves correctly
- ✅ Simpler code - no manual optimization
- ✅ Better performance by default
- ✅ Fewer bugs from incorrect dependencies
- ✅ Easier to maintain and read
- ✅ Works with existing code
// next.config.js (Next.js) module.exports = { experimental: { reactCompiler: true } } // vite.config.js (Vite) import { defineConfig } from 'vite' import react from '@vitejs/plugin-react' export default defineConfig({ plugins: [ react({ babel: { plugins: [['babel-plugin-react-compiler']] } }) ] })
// For external libraries without Compiler support import { expensiveLibFunction } from 'old-library'; function MyComponent() { // May still need manual memoization here const result = useMemo(() => expensiveLibFunction(), []); return <div>{result}</div>; }
- Works with React 18.3+ and React 19
- Compatible with TypeScript
- Works with all React hooks
- Supports Server Components and Client Components
-
Streaming SSR sends HTML to the browser in chunks as it's generated, rather than waiting for the entire page. React 18+ dramatically improves this with Suspense integration.
Server: Wait for ALL data → Generate ALL HTML → Send to client Client: Receive HTML → Download ALL JS → Hydrate ALL components Problem: Slow components block entire page!Server: Send HTML as it's ready, wrap slow parts in <Suspense> Client: Render immediately, hydrate progressively Benefit: User sees content faster!import { Suspense } from 'react'; export default function Page() { return ( <html> <body> {/* Sent immediately */} <header> <h1>My App</h1> </header> {/* Sent immediately with fallback */} <Suspense fallback={<div>Loading comments...</div>}> <Comments /> {/* Streamed when ready */} </Suspense> {/* Also streamed separately */} <Suspense fallback={<div>Loading recommendations...</div>}> <Recommendations /> {/* Streamed when ready */} </Suspense> <footer>© 2026</footer> </body> </html> ); }
// This is a Server Component (async!) async function Comments() { const comments = await db.comments.findMany(); return ( <ul> {comments.map(comment => ( <li key={comment.id}>{comment.text}</li> ))} </ul> ); }
- Server starts sending HTML immediately
- When it hits
<Suspense>, it sends the fallback - Continues streaming rest of the page
- When data is ready, sends the actual component
- Client replaces fallback with real content
- Hydration happens independently per component
function App() { return ( <div> <header>Header</header> {/* Hydrates first */} <Suspense fallback={<Spinner />}> <HeavyComponent /> {/* Hydrates when user interacts */} </Suspense> <Suspense fallback={<Spinner />}> <Comments /> {/* Hydrates independently */} </Suspense> </div> ); }
- Faster TTFB (Time to First Byte): User sees content sooner
- Better UX: Progressive loading instead of blank screen
- Prioritized hydration: Interactive elements hydrate first
- Resilient: Slow components don't block fast ones
// app/page.tsx import { Suspense } from 'react'; import ProductList from './ProductList'; import Reviews from './Reviews'; export default function ProductPage() { return ( <div> <h1>Product Page</h1> {/* Streams product list first */} <Suspense fallback={<ProductSkeleton />}> <ProductList /> </Suspense> {/* Reviews stream separately */} <Suspense fallback={<ReviewSkeleton />}> <Reviews /> </Suspense> </div> ); } // These are async Server Components async function ProductList() { const products = await fetchProducts(); // Doesn't block Reviews return <div>{/* render products */}</div>; } async function Reviews() { const reviews = await fetchReviews(); // Doesn't block ProductList return <div>{/* render reviews */}</div>; }
- Use React 18+ with
createRootandhydrateRoot - Wrap slow components in
<Suspense> - Use frameworks supporting streaming (Next.js, Remix, etc.)
- Server must support streaming responses
-
renderToPipeableStreamis the React 18+ Node.js streaming SSR API fromreact-dom/server. It streams HTML in chunks, so users can see content earlier and React can coordinate Suspense boundaries during server rendering.renderToStringis the older API that generates the entire HTML string first and sends it only after rendering is fully complete.Aspect renderToStringrenderToPipeableStreamRendering model All-at-once Streaming/chunked Suspense on server Limited fallback behavior First-class Suspense streaming Time to first byte Usually slower for large pages Faster, can flush shell early UX for slow data Entire page waits Progressive reveal with fallbacks Best for Small/simple SSR pages Modern SSR apps with async data import express from "express"; import { renderToString } from "react-dom/server"; import App from "./App"; const app = express(); app.get("/", (req, res) => { const html = renderToString(<App />); res.send(`<!doctype html><html><body><div id="root">${html}</div></body></html>`); });
import express from "express"; import { renderToPipeableStream } from "react-dom/server"; import App from "./App"; const app = express(); app.get("/", (req, res) => { const { pipe } = renderToPipeableStream(<App />, { onShellReady() { res.setHeader("Content-Type", "text/html"); res.write("<!doctype html><html><body><div id=\"root\">"); pipe(res); }, onAllReady() { res.end("</div></body></html>"); }, onError(error) { console.error(error); }, }); });
In practice, prefer
renderToPipeableStreamfor React 18+ SSR because it improves perceived performance and works naturally with Suspense-driven progressive loading.
-
Both Higher-Order Components (HOCs) and Hooks let you reuse logic across components, but they solve that problem in very different ways.
Aspect Higher-Order Components (HOCs) Hooks Pattern A function that takes a component and returns a new, enhanced component A function called directly inside a function component Component tree Adds an extra wrapper component, which can lead to "wrapper hell" with multiple HOCs Adds no extra components to the tree Sharing logic Injects props/behavior into the wrapped component Shares stateful logic directly via custom hooks ( useX)Prop handling Can cause prop name collisions when composing multiple HOCs No prop collisions since state lives inside the component itself Debugging Harder to trace which HOC injected which prop (often needs displayName)Easier to trace; shows up as plain hook calls in React DevTools Usage Works with both class and function components Can only be used in function components (or other hooks) Using a HOC:
function withToggle(WrappedComponent) { return function Enhanced(props) { const [on, setOn] = useState(false); const toggle = () => setOn((prev) => !prev); return <WrappedComponent {...props} on={on} toggle={toggle} />; }; } const Modal = withToggle(BaseModal);
Using a custom Hook:
function useToggle(initial = false) { const [on, setOn] = useState(initial); const toggle = () => setOn((prev) => !prev); return [on, toggle]; } function Modal() { const [on, toggle] = useToggle(); // ... }
In short, Hooks were introduced to solve the same logic-reuse problem as HOCs (and render props), but without adding extra components to the render tree—avoiding wrapper hell and making the code easier to read, type, and debug. See also Do Hooks replace render props and higher-order components?.
-
No.
React.memoonly performs a shallow comparison of a component's props — it has no visibility into context. If a component reads a value viauseContext/Context.Consumer, that component re-renders whenever the context value changes, regardless of whether it's wrapped inReact.memoand regardless of whether its own props changed.const CountContext = React.createContext(); // Wrapping with React.memo does NOT help here const Display = React.memo(function Display() { const count = useContext(CountContext); return <div>{count}</div>; }); function App() { const [count, setCount] = useState(0); return ( <CountContext.Provider value={count}> <button onClick={() => setCount((c) => c + 1)}>Increment</button> <Display /> </CountContext.Provider> ); }
Every time
countchanges,Displayre-renders even though it takes no props and is memoized —React.memobails out based on prop equality, but context consumption bypasses that check entirely.- Split contexts by concern so a component only subscribes to the slice of state it actually needs (see What's a common pitfall when using useContext with objects?).
- Memoize the provider's value with
useMemoso the reference only changes when the underlying data changes — this reduces churn but doesn't stop consumers from re-rendering when the value itself legitimately changes. - Push
useContextdown into a small wrapper component and pass the extracted value as a prop to a memoized child. The child (wrapped inReact.memo) will now correctly skip re-rendering when that specific prop hasn't changed, since the memoization check happens one level below the context read. - Use a state management library or selector-based API (Redux's
useSelector, Zustand, Jotai) when you need fine-grained, per-field subscriptions instead of one large context object.
-
A reusable Context bundles the
createContextcall, itsProvider(with local state/logic), and a custom hook to consume it into a single module. This hides the rawContextobject from consumers, provides a clear API, and lets you validate that the hook is used within its provider.// ThemeContext.js import { createContext, useContext, useMemo, useState } from "react"; const ThemeContext = createContext(undefined); export function ThemeProvider({ children }) { const [theme, setTheme] = useState("light"); const toggleTheme = () => setTheme((prev) => (prev === "light" ? "dark" : "light")); // Memoize so the value reference is stable across renders const value = useMemo(() => ({ theme, toggleTheme }), [theme]); return ( <ThemeContext.Provider value={value}>{children}</ThemeContext.Provider> ); } // Custom hook consumers use instead of importing ThemeContext directly export function useTheme() { const context = useContext(ThemeContext); if (context === undefined) { throw new Error("useTheme must be used within a ThemeProvider"); } return context; }
// App.js function App() { return ( <ThemeProvider> <Toolbar /> </ThemeProvider> ); } function Toolbar() { const { theme, toggleTheme } = useTheme(); return <button onClick={toggleTheme}>Current theme: {theme}</button>; }
- Encapsulation: Consumers never import or touch the raw
Contextobject, so its internal shape can change without breaking callers. - Guardrails: The custom hook throws a clear error if used outside its provider, instead of silently returning
undefined. - Colocation: State, updater functions, and derived values live next to the provider, making the context self-contained and easy to test in isolation.
- Composability: Multiple reusable contexts (theme, auth, locale, etc.) can be combined by nesting providers, or composed with a helper that merges them.
- Performance-friendly: Memoizing the provider's value (with
useMemo) avoids creating a new object on every render, reducing unnecessary consumer re-renders (see DoesReact.memoprevent Context consumers from re-rendering?).
- Encapsulation: Consumers never import or touch the raw
-
Redux Toolkit (RTK) is the official, opinionated way to write Redux logic today. It's built on top of plain Redux and re-exports its APIs, but wraps them with utilities that remove most of the boilerplate and footguns of hand-written Redux.
Problem with plain Redux How Redux Toolkit fixes it Verbose store setup ( combineReducers, manual middleware wiring)configureStore()sets up the store,redux-thunk, and Redux DevTools automaticallyHand-written action types/creators and switch-based reducers createSlice()generates action types, action creators, and a reducer from a single objectReducers must return new state immutably (easy to mutate by mistake) Uses Immer internally, so you can write "mutating" logic that's safely converted to immutable updates Async logic needs extra middleware setup (thunk/saga boilerplate) createAsyncThunk()standardizes async action creators with pending/fulfilled/rejected statesRepeated normalization code for lists/entities createEntityAdapter()provides prebuilt reducers/selectors for normalized stateNo built-in data-fetching/caching layer RTK Query (built on top of RTK) handles caching, refetching, and loading/error states for API calls Plain Redux:
const INCREMENT = "counter/increment"; const increment = () => ({ type: INCREMENT }); function counterReducer(state = { value: 0 }, action) { switch (action.type) { case INCREMENT: return { ...state, value: state.value + 1 }; // must copy manually default: return state; } }
Redux Toolkit:
import { createSlice, configureStore } from "@reduxjs/toolkit"; const counterSlice = createSlice({ name: "counter", initialState: { value: 0 }, reducers: { increment: (state) => { state.value += 1; // "mutation" is safe — Immer produces new state }, }, }); export const { increment } = counterSlice.actions; const store = configureStore({ reducer: { counter: counterSlice.reducer } });
In short, Redux Toolkit is recommended because it enforces best practices by default (immutability, DevTools, sensible middleware), drastically cuts boilerplate via
createSlice/createAsyncThunk, and is what the official Redux docs now recommend for any new Redux code.
-
Client state is data that lives entirely in the browser and is owned by the UI — it doesn't need to be synchronized with a backend. Server state is data that actually lives on a remote server/database; the client only holds a cached copy of it, which can go stale at any time.
Aspect Client state Server state Ownership Owned entirely by the UI Owned by the backend/database; UI only has a cached copy Examples Form input values, modal open/closed, selected tab, theme, filters before submit Fetched user profile, product list, comments, any REST/GraphQL response Persistence Usually reset on refresh (unless explicitly persisted) Persists on the server regardless of client refreshes Staleness Never "stale" — it's the source of truth itself Can become stale/out of date; needs refetching, caching, and invalidation Sharing Typically local to one component/feature Often shared across many components/screens Async concerns None — synchronous updates via setState/reducersRequires handling loading, error, retries, pagination, race conditions Typical tools useState,useReducer, Context, Redux/ZustandReact Query / TanStack Query, RTK Query, SWR, Apollo Client Treating server state like client state (e.g., dumping a fetched API response into
useStateor a Redux slice and manually managing loading/error flags) reinvents caching, deduplication, background refetching, and invalidation by hand. Dedicated server-state libraries solve these problems out of the box:// Server state handled manually — lots of boilerplate to get right function Users() { const [users, setUsers] = useState([]); const [loading, setLoading] = useState(true); const [error, setError] = useState(null); useEffect(() => { fetch("/api/users") .then((res) => res.json()) .then(setUsers) .catch(setError) .finally(() => setLoading(false)); }, []); // ... }
// Server state via React Query — caching, refetching, and status handled for you function Users() { const { data: users, isLoading, error } = useQuery({ queryKey: ["users"], queryFn: () => fetch("/api/users").then((res) => res.json()), }); // ... }
In short, use local state/Context/Redux for client state (UI-only concerns), and a data-fetching library like React Query, RTK Query, or SWR for server state (anything that mirrors data owned by a backend).
-
By default,
useSelectorre-renders a component whenever the selected value's reference changes between renders (it uses strict===comparison). Most unnecessary re-renders come from selectors that return a new object/array/function on every call, so React-Redux thinks the data changed even though it didn't. Ways to prevent this:-
Select the smallest piece of state you need instead of the whole slice:
// BAD: re-renders whenever ANY field in `user` changes const user = useSelector((state) => state.user); // GOOD: only re-renders when `name` changes const name = useSelector((state) => state.user.name);
-
Memoize derived/computed selectors with
createSelector(see next question) so a new array/object is only created when its actual inputs change. -
Use a custom equality function (e.g.,
shallowEqualfromreact-redux) when you must select multiple fields as an object:import { shallowEqual, useSelector } from "react-redux"; const { name, email } = useSelector( (state) => ({ name: state.user.name, email: state.user.email }), shallowEqual );
-
Split one large connected component into smaller ones, each with its own narrow
useSelector, so a state change only re-renders the component that actually cares about it. -
Wrap presentational children in
React.memoso they skip re-rendering when their own props haven't changed, even if their parent re-renders.
-
-
createSelector(from Reselect, which Redux Toolkit re-exports) creates memoized selectors. It takes one or more "input selectors" and a "result function", and only recomputes the result when the outputs of the input selectors change — otherwise it returns the previously cached value.import { createSelector } from "@reduxjs/toolkit"; const selectItems = (state) => state.cart.items; // Recomputes total only when `items` reference actually changes const selectTotal = createSelector([selectItems], (items) => items.reduce((sum, item) => sum + item.price * item.qty, 0) ); function Cart() { const total = useSelector(selectTotal); // ... }
Without memoization, computing
totalinline insideuseSelectorwould return a brand-new number/object on every dispatch, which is fine for primitives but becomes a real problem when deriving arrays/objects (e.g., filtering or sorting a list), since a new reference on every render defeatsReact.memo/useSelector's equality check and causes unnecessary re-renders.
-
Normalized state stores data the way a relational database would: each type of entity is kept in a lookup table keyed by ID, instead of being nested/duplicated inside arrays. Redux Toolkit's
createEntityAdaptergenerates this shape for you.// Un-normalized — posts are duplicated wherever they appear { posts: [ { id: 1, title: "Post 1", author: { id: 1, name: "Sudheer" } }, { id: 2, title: "Post 2", author: { id: 1, name: "Sudheer" } }, ]; } // Normalized — each entity stored once, referenced by id { posts: { ids: [1, 2], entities: { 1: { id: 1, title: "Post 1", authorId: 1 }, 2: { id: 2, title: "Post 2", authorId: 1 }, }, }, users: { ids: [1], entities: { 1: { id: 1, name: "Sudheer" } }, }, }
import { createEntityAdapter, createSlice } from "@reduxjs/toolkit"; const postsAdapter = createEntityAdapter(); const postsSlice = createSlice({ name: "posts", initialState: postsAdapter.getInitialState(), reducers: { postAdded: postsAdapter.addOne, postUpdated: postsAdapter.updateOne, }, });
-
- O(1) lookups by ID instead of scanning/
find()-ing through an array every time a component needs one item. - Updates are localized: changing one entity only replaces that entity's entry in the
entitiesmap, so components subscribed to other entities don't see a changed reference and don't re-render. - No duplicate data to keep in sync: with nested/duplicated data, updating a single author's name might require updating it in every post that embeds it; normalized state updates it once.
- Cheaper equality checks: since each entity is a small, independent object, memoized selectors (
createSelector) anduseSelectorreference comparisons stay cheap and precise instead of comparing/deep-cloning large nested trees. - Simpler reducers: adding/removing/updating one item is a straightforward map operation, rather than mapping/filtering over deeply nested arrays.
- O(1) lookups by ID instead of scanning/
-
Middleware provides a way to extend Redux with custom logic that runs between dispatching an action and the moment it reaches the reducer. It's the standard extension point for side effects (logging, crash reporting, async calls, analytics) since reducers themselves must stay pure and synchronous.
import { configureStore } from "@reduxjs/toolkit"; const logger = (store) => (next) => (action) => { console.log("dispatching", action); const result = next(action); console.log("next state", store.getState()); return result; }; const store = configureStore({ reducer: rootReducer, middleware: (getDefaultMiddleware) => getDefaultMiddleware().concat(logger), });
Common middleware includes
redux-thunk(dispatch functions for async logic),redux-saga(generator-based side effects),redux-logger(action/state logging), and RTK's built-in serializable/immutable-state check middleware.
-
Middleware is written as three nested (curried) functions:
const exampleMiddleware = (store) => (next) => (action) => { // store => { getState, dispatch } // next => calls the next middleware in the chain (or the reducer if last) // action => the action currently being dispatched return next(action); };
storegives access togetState()anddispatch().nextpasses the action along to the next middleware (or the root reducer, if this is the last middleware).actionis the action object being processed.
Middleware must call
next(action)(ordispatch(...)for a different action) to keep the chain moving — forgetting to callnextsilently swallows every action.
-
store.dispatch(action)is called with a plain action object ({ type, payload }).- The action passes through the middleware chain in order (e.g., logger → thunk → your custom middleware); async/thunk middleware may intercept it here (e.g., a thunk function is invoked instead of being forwarded, or a Promise/generator is handled) or asynchronous side-effects can trigger further dispatches later.
- Once every middleware calls
next(action), the action reaches the root reducer. - The root reducer (usually built with
combineReducersor RTK'sconfigureStore) forwards the action to every slice reducer, each returning either its unchanged state or a new state object. - The store replaces its internal state tree with the combined result and marks the update complete.
- The store notifies all subscribers (React-Redux's
Provider/useSelectorinternals) that state changed. - Each connected component's selector is re-run and compared (via
===or a custom equality function) against its previous result; components only re-render if their selected slice actually changed.
-
The recommended approach (and what Redux Toolkit is designed around) is a "feature folder" / "ducks" structure rather than splitting by technical type (
actions/,reducers/,constants/):src/ app/ store.js # configureStore() + root reducer wiring features/ posts/ postsSlice.js # createSlice: reducer + actions + thunks postsSelectors.js # createSelector-based selectors PostList.jsx # components using useSelector/useDispatch users/ usersSlice.js usersSelectors.jsGuidelines:
- Colocate a feature's slice, selectors, thunks, and components in one folder instead of scattering related code across parallel
actions/reducers/constantsfolders. - One slice per domain concept (posts, users, cart), created with
createSlice, combined once instore.js. - Keep components decoupled from the store shape by reading data only through selectors, never
state.posts.entitiesdirectly in a component. - Normalize related/nested data (see Q336) so features can reference each other by ID instead of duplicating data.
- Use RTK Query (or a dedicated API slice) for server state, and keep hand-written slices for genuine client/app state.
- Colocate a feature's slice, selectors, thunks, and components in one folder instead of scattering related code across parallel
-
Since each
createSliceonly manages its own piece of state, a few patterns let one slice react to actions or data from another:-
extraReducers: listen for another slice's action type without importing its reducer.const notificationsSlice = createSlice({ name: "notifications", initialState: [], reducers: {}, extraReducers: (builder) => { builder.addCase(postsSlice.actions.postAdded, (state, action) => { state.push({ message: `New post: ${action.payload.title}` }); }); }, });
-
Thunks that touch multiple slices: a single
createAsyncThunk/thunk candispatchactions belonging to several slices, or readgetState()to combine data before deciding what to dispatch. -
Selectors that combine slices: a
createSelectorcan take input selectors from different slices (e.g., posts + users) and join them together for the UI, without the slices knowing about each other. -
Listener middleware / sagas:
createListenerMiddleware(RTK) orredux-saga'stakeEverycan watch for an action dispatched by one slice and, in response, dispatch actions belonging to a completely different slice.
In all cases, slices stay decoupled — they communicate only through dispatched actions or shared selectors, never by directly importing and mutating each other's reducer state.
-
-
Redux (and Redux Toolkit's default middleware) expects state and actions to contain only plain, serializable data: strings, numbers, booleans,
null, plain objects, and arrays. Values like class instances,Promises, functions,Map/Set,Symbol, or DOM elements are not serializable and shouldn't be put in the store or dispatched inside an action.// BAD: Date and a function are not serializable dispatch({ type: "user/loaded", payload: { createdAt: new Date(), onDone: () => {} }, }); // GOOD: store a serializable representation instead dispatch({ type: "user/loaded", payload: { createdAt: new Date().toISOString() }, });
This matters because:
- Redux DevTools rely on serializing actions/state for time-travel debugging and persisting/replaying action logs.
redux-persistneeds to serialize state tolocalStorage/AsyncStorage.- Non-serializable values can hide subtle bugs (e.g., mutable class instances bypassing Redux's change-detection).
Redux Toolkit's
configureStoreincludes aserializableCheckmiddleware (dev-only) that warns in the console whenever a non-serializable value is dispatched or stored.
-
A race condition happens when multiple async requests are in flight and they resolve out of order — e.g., a user types quickly in a search box, an older request for "re" resolves after the newer request for "react", overwriting the correct results with stale ones.
-
createAsyncThunk+ request tracking: store the latestrequestIdand ignore results from stale requests.const fetchResults = createAsyncThunk("search/fetch", async (query) => { const res = await fetch(`/api/search?q=${query}`); return res.json(); }); builder.addCase(fetchResults.fulfilled, (state, action) => { // Only apply the result if it belongs to the most recent request if (action.meta.requestId === state.currentRequestId) { state.results = action.payload; } });
-
Abort stale requests using
AbortController, whichcreateAsyncThunksupports viathunkAPI.signal— cancel the previous request when a new one starts. -
Debounce/throttle the trigger (e.g., debounce keystrokes) so fewer overlapping requests are made in the first place.
-
Use RTK Query, which automatically de-duplicates in-flight requests, cancels/ignores stale ones, and keeps the cache consistent without manual bookkeeping.
-
-
redux-persistis the standard library for persisting and rehydrating a Redux store across page reloads/app restarts. It wraps your root reducer so selected slices are automatically saved to storage (e.g.,localStorageon web,AsyncStorageon React Native) and restored on startup.import { combineReducers } from "redux"; import { configureStore } from "@reduxjs/toolkit"; import { persistStore, persistReducer } from "redux-persist"; import storage from "redux-persist/lib/storage"; // localStorage const rootReducer = combineReducers({ user: userReducer, cart: cartReducer }); const persistConfig = { key: "root", storage, whitelist: ["cart"], // only persist the `cart` slice }; const persistedReducer = persistReducer(persistConfig, rootReducer); export const store = configureStore({ reducer: persistedReducer, middleware: (getDefaultMiddleware) => getDefaultMiddleware({ serializableCheck: false }), }); export const persistor = persistStore(store);
// index.js import { PersistGate } from "redux-persist/integration/react"; <Provider store={store}> <PersistGate loading={null} persistor={persistor}> <App /> </PersistGate> </Provider>;
Key points: use
whitelist/blacklistto persist only the slices that need it (e.g., auth token, cart), disableserializableCheckfor the persistence actions RTK flags by default, and wrap the app in<PersistGate>so rendering waits until the persisted state has been rehydrated.
-
A practical, step-by-step approach:
- Confirm it's actually Redux: use the React DevTools Profiler to see which components re-render and how often, before assuming Redux is the culprit.
- Inspect actions/state with Redux DevTools: check how frequently actions are dispatched and how large/deeply nested the state diffs are on each action.
- Look for unstable selector results: a selector that returns a new object/array/function on every call (e.g.,
state => state.items.filter(...)) breaksuseSelector's reference equality check and forces re-renders even when nothing meaningful changed. Wrap it increateSelector(Q335). - Check for over-broad
useSelectorcalls: selecting an entire slice (state.user) instead of the specific field needed (state.user.name) causes re-renders on unrelated field changes (Q334). - Verify normalization: deeply nested/duplicated state (Q336) often causes broad reference changes on every update; normalizing narrows down what actually changes.
- Check for missing memoization on connected children: wrap presentational components in
React.memoso a parent re-render doesn't cascade if their own props are unchanged. - Use the
why-did-you-renderlibrary (or React DevTools' "highlight updates") to visually confirm exactly which components re-render and why. - Measure, don't guess: use the Profiler's flame chart/ranked view to confirm the fix actually reduced render counts/time before moving on.
-
A common mistake is storing computed/derived values in Redux state itself, which then has to be kept in sync manually every time the source data changes. The rule of thumb: store the minimal raw data, and compute everything else with selectors.
Store in Redux (source of truth) Derive with selectors (computed) Raw entities fetched from the server ( items,users)Filtered/sorted/paginated views of that list Simple flags representing real state ( isLoggedIn,selectedId)Aggregates like totals, counts, averages IDs of selected/active items The full object looked up by that ID Form field values Validation results / "is form valid" flags // BAD: `total` is derived data stored redundantly in state // Now every reducer that touches `items` must also recompute `total` { items: [...], total: 42 } // GOOD: store only `items`; compute `total` with a memoized selector const selectItems = (state) => state.cart.items; const selectTotal = createSelector([selectItems], (items) => items.reduce((sum, i) => sum + i.price * i.qty, 0) );
Storing only raw data and deriving the rest avoids state getting out of sync, removes the need for extra reducer logic to keep computed fields updated, and keeps re-renders scoped to components that actually depend on the derived value (thanks to selector memoization).
-
No — not by default. Server data (see client state vs server state) has different needs than plain client state: caching, background refetching, deduplication of in-flight requests, invalidation, pagination, and loading/error tracking. Hand-rolling all of that inside Redux slices reinvents a data-fetching layer.
Guidance:
- Use RTK Query (or React Query/SWR) for server data — these libraries already integrate with the Redux store (RTK Query lives inside your Redux store) and handle caching/invalidation/refetching for you.
- Use plain Redux slices for genuine client state: UI state, auth/session flags, user preferences, multi-step form state, feature toggles — anything that isn't just a mirror of server data.
- Avoid duplicating server data into a separate hand-written slice "just in case" — it creates two sources of truth that can drift out of sync (e.g., a
usersslice updated manually alongside an RTK Query cache for the same endpoint). - It's fine to combine both: e.g., store the currently selected item's ID in a normal slice, while the actual item data comes from an RTK Query/React Query cache keyed by that ID.
In short, Redux (or any store) is best reserved for state your UI truly owns; let a dedicated data-fetching layer own anything that mirrors the server.
-
All three are drop-in
<Router>implementations fromreact-router-dom(see What are the<Router>components of React Router v6?) that wrap a differenthistoryimplementation, so your app's routes work the same way — only how the URL is stored/read differs.Aspect <BrowserRouter><HashRouter><MemoryRouter>URL format Clean URLs using the HTML5 History API ( /about)Uses a URL hash fragment ( /#/about)No URL at all — history is kept purely in memory Where history lives Browser's window.historyBrowser's window.location.hashAn in-memory array/stack, not tied to the browser Server requirement Server must be configured to return index.htmlfor every route (fallback routing), otherwise a hard refresh on/about404sNone — the part after #is never sent to the server, so any static server works with zero configNot applicable — there's no browser/server involved Typical use case Standard web apps deployed behind a server/CDN you control (or configure) for SPA fallback Static hosting with no server-side routing support (e.g., plain GitHub Pages, legacy browsers) Unit/integration tests, Storybook, React Native, or any non-DOM environment Back/forward buttons Fully supported via native browser history Supported, but the hash shows up in the URL/bookmark Not applicable — no visible URL to bookmark/share Bookmarking/sharing links Works naturally Works, but URLs look less clean ( example.com/#/about)N/A — not meant to be visible to a user import { BrowserRouter } from "react-router-dom"; // Standard choice for most deployed web apps <BrowserRouter> <App /> </BrowserRouter>;
import { HashRouter } from "react-router-dom"; // Good when you can't configure server-side rewrites <HashRouter> <App /> </HashRouter>;
import { MemoryRouter } from "react-router-dom"; // Great for tests — you can even seed the starting route render( <MemoryRouter initialEntries={["/dashboard"]}> <App /> </MemoryRouter> );
In short: use
BrowserRouterfor real, deployed apps with clean URLs (as long as your server supports SPA fallback),HashRouterwhen you can't control server routing (plain static hosting), andMemoryRouterfor tests or non-browser environments where there's no real URL bar to sync with.
-
A dynamic route is a route path that contains a placeholder segment (a route parameter) instead of a fixed, hard-coded value, so a single route definition can match many different URLs. Route parameters are the named placeholder segments (prefixed with
:in React Router) whose actual values are extracted from the matched URL at runtime.import { BrowserRouter, Routes, Route, useParams } from "react-router-dom"; function UserProfile() { // useParams() returns an object of all dynamic segments matched for this route const { userId } = useParams(); return <div>Profile for user: {userId}</div>; } function App() { return ( <BrowserRouter> <Routes> {/* :userId is a route parameter — matches /users/1, /users/abc, etc. */} <Route path="/users/:userId" element={<UserProfile />} /> </Routes> </BrowserRouter> ); }
A route can also define multiple parameters and an optional catch-all (splat) parameter:
// Multiple params: /posts/2024/react-hooks-guide <Route path="/posts/:year/:slug" element={<Post />} /> // Optional segment (v6.4+): matches /shop and /shop/electronics <Route path="/shop/:category?" element={<Shop />} /> // Splat/wildcard param: matches any depth, e.g. /docs/a/b/c <Route path="/docs/*" element={<Docs />} />
function Post() { const { year, slug } = useParams(); // year -> "2024", slug -> "react-hooks-guide" return <h1>{slug} ({year})</h1>; }
Key points:
- Route params are always returned as strings by
useParams()— convert them (e.g.,Number(id)) if you need a number. - Static routes (
/about) are matched exactly; dynamic routes (/users/:userId) match a whole family of URLs and are essential for detail/edit pages, pagination, category filters, etc. - Route params are different from query/search params (
?sort=asc), which are read withuseSearchParams()instead and are meant for optional, non-hierarchical data like filters or sorting. - Because dynamic segments can match unexpected values, always validate/guard params (e.g., check the fetched resource exists) rather than assuming the value is always well-formed.
- Route params are always returned as strings by
-
In React Router v6+, programmatic navigation (redirecting from code rather than a user clicking a link) is done with the
useNavigatehook, which replaces the oldhistory.push()/this.props.history.push()approach from v4/v5 (see How do you programmatically navigate using React Router v4?).import { useNavigate } from "react-router-dom"; function LoginForm() { const navigate = useNavigate(); async function handleSubmit(e) { e.preventDefault(); await login(); navigate("/dashboard"); // push a new entry (like clicking a link) // navigate("/dashboard", { replace: true }); // replace current entry (no back button to login) // navigate(-1); // go back, like history.back() // navigate("/users/42", { state: { from: "login" } }); // pass state to the next route } return <form onSubmit={handleSubmit}>{/* ... */}</form>; }
Key points:
navigate(to)pushes a new history entry;navigate(to, { replace: true })replaces the current one (useful after login/logout so the back button doesn't return to the old page).navigate(delta)with a number (e.g.,navigate(-1),navigate(1)) moves through history like the browser back/forward buttons.useNavigatecan only be called inside components rendered under a<Router>; it can't be used outside React (for that, some apps keep a module-level history object created withcreateBrowserRouter/historypackage instead).- Prefer declarative navigation (
<Link>/<NavLink>) for user-initiated clicks, and reserveuseNavigatefor navigation triggered by logic — form submissions, redirects after auth, timers, etc.
-
All three render an anchor tag in the DOM, but they behave very differently when clicked:
Aspect <a href><Link to><NavLink to>Navigation Full page reload — browser makes a fresh request and the whole app (JS, CSS) reloads Client-side navigation via History API — no reload, app state is preserved Same as Link— client-side, no reloadActive styling None built-in None built-in Automatically knows if it matches the current URL and exposes that via a class/style/children render function Typical use Linking to external sites/domains outside the app Regular in-app navigation (e.g., a card linking to a detail page) Navigation menus/tabs where you need to highlight the current section import { Link, NavLink } from "react-router-dom"; // Plain in-app link — no active-state awareness <Link to="/about">About</Link>; // NavLink automatically applies the "active" class (or your own style function) // when the current URL matches "/dashboard" <NavLink to="/dashboard" className={({ isActive }) => (isActive ? "nav-link active" : "nav-link")} > Dashboard </NavLink>; // Plain <a> — causes a full browser navigation/reload, breaks SPA behavior <a href="/dashboard">Dashboard (avoid for in-app links)</a>;
Rule of thumb: use
<Link>/<NavLink>for any route inside your React Router tree, and reserve a plain<a href>for links leaving your app (external URLs, mailto:, downloadable files) or for non-SPA full-reload cases.
-
A protected (or private) route only renders its content when the user meets some condition (usually "is authenticated"), otherwise it redirects them elsewhere (e.g., to
/login). In React Router v6+, the cleanest way is a small wrapper component that renders<Outlet />for its children or a<Navigate>redirect:import { Navigate, Outlet, useLocation } from "react-router-dom"; function RequireAuth() { const { user } = useAuth(); // your own auth hook/context const location = useLocation(); if (!user) { // Redirect to login, remembering where the user was headed return <Navigate to="/login" state={{ from: location }} replace />; } return <Outlet />; // render the matched child route }
import { Routes, Route } from "react-router-dom"; function App() { return ( <Routes> <Route path="/login" element={<Login />} /> {/* Every nested route below requires auth */} <Route element={<RequireAuth />}> <Route path="/dashboard" element={<Dashboard />} /> <Route path="/settings" element={<Settings />} /> </Route> </Routes> ); }
After a successful login, read
location.state?.from(set above) andnavigate(from, { replace: true })to send the user back to the page they originally tried to reach.Key points:
- Wrapping with a layout route (
<Route element={<RequireAuth />}>) that renders<Outlet />lets you protect many nested routes at once, instead of guarding eachelementindividually. - Use
replaceon the redirect so the protected URL isn't left in history (prevents "back button" from flashing the protected page). - For role-based protection (e.g., admin-only), generalize
RequireAuthto accept anallowedRolesprop and check both authentication and authorization. - Client-side route guards are a UX convenience, not a security boundary — always enforce access control on the server/API too.
- Wrapping with a layout route (
-
React Router matches routes top-to-bottom/most-specific-first, so a catch-all route with
path="*"placed last will match any URL that didn't match an earlier route — this is the v6+ equivalent of the older approach in How do you implement a default or NotFound page?.import { Routes, Route } from "react-router-dom"; function App() { return ( <Routes> <Route path="/" element={<Home />} /> <Route path="/about" element={<About />} /> <Route path="/users/:userId" element={<UserProfile />} /> {/* Catch-all — must be last; matches any unmatched path */} <Route path="*" element={<NotFound />} /> </Routes> ); } function NotFound() { return <h1>404 — Page Not Found</h1>; }
For apps using the newer data router APIs (
createBrowserRouter), a route-levelerrorElementhandles both unmatched paths and thrown errors/loader failures for that branch:import { createBrowserRouter } from "react-router-dom"; const router = createBrowserRouter([ { path: "/", element: <Root />, errorElement: <ErrorPage />, // renders on 404s and unhandled loader/action errors children: [{ path: "users/:userId", element: <UserProfile />, loader: userLoader }], }, ]);
Key points:
- Always keep the
path="*"route last — route matching order matters, and an earlier catch-all would shadow every route after it. - Return a real HTTP 404 status from your server for true not-found responses when doing SSR, so search engines and monitoring tools see the correct status code (the client-only SPA route doesn't set the HTTP status by itself).
- Distinguish "route not found" (bad URL) from "resource not found" (valid route, but e.g.
/users/999doesn't exist) — the latter is usually handled inside the page component after a failed fetch/loader, not by the router itself.
- Always keep the
-
Starting with React Router v6.4, the library ships data APIs (
createBrowserRouter,loader,action,useLoaderData,useActionData,useFetcher) that move data fetching and mutations out of components and into the route definitions themselves — conceptually similar to Next.js server components/actions, but framework-agnostic.- Loader: a function attached to a route that fetches the data that route needs before (or in parallel with) rendering, eliminating loading-state waterfalls ("render-then-fetch").
- Action: a function attached to a route that handles data mutations (form submissions — create/update/delete), typically triggered via
<Form>oruseFetcher(). useLoaderData()/useActionData(): hooks that read the data returned by the matching route'sloader/actioninside the rendered component.
import { createBrowserRouter, RouterProvider, useLoaderData, Form, redirect } from "react-router-dom"; // Loader: runs before the route renders, its return value is available via useLoaderData() async function userLoader({ params }) { const res = await fetch(`/api/users/${params.userId}`); if (!res.ok) throw new Response("Not Found", { status: 404 }); return res.json(); } // Action: runs when a <Form> on this route is submitted async function updateUserAction({ request, params }) { const formData = await request.formData(); await fetch(`/api/users/${params.userId}`, { method: "PUT", body: formData }); return redirect(`/users/${params.userId}`); // navigate after a successful mutation } function UserProfile() { const user = useLoaderData(); // already-fetched data, no useEffect needed return ( <Form method="put"> <input name="name" defaultValue={user.name} /> <button type="submit">Save</button> </Form> ); } const router = createBrowserRouter([ { path: "/users/:userId", element: <UserProfile />, loader: userLoader, action: updateUserAction, errorElement: <ErrorPage />, }, ]); function App() { return <RouterProvider router={router} />; }
Key points:
- Loaders run before the route component renders, so data is ready immediately — no
useEffect+isLoadingflicker for the initial fetch. - Errors thrown inside a
loader/action(including thrownResponses for status codes) are caught by the nearest route'serrorElement, unifying error handling for fetch failures and render errors. useFetcher()lets you call loaders/actions without navigating (e.g., optimistic "like" buttons, inline edits in a list).- This pattern requires the data-router setup (
createBrowserRouter+<RouterProvider>) instead of the plain<BrowserRouter>/<Routes>components — it's opt-in, existing<Routes>-based apps keep working unchanged.
-
Query (search) parameters are the
?key=value&key2=value2portion of a URL. Unlike route params (see What are dynamic routes and what are route parameters?), they aren't part of the route'spathdefinition — they're read and updated with theuseSearchParamshook, which mirrors the browser'sURLSearchParamsAPI.import { useSearchParams } from "react-router-dom"; function ProductList() { // URL: /products?category=shoes&sort=price&page=2 const [searchParams, setSearchParams] = useSearchParams(); const category = searchParams.get("category"); // "shoes" const sort = searchParams.get("sort"); // "price" const page = Number(searchParams.get("page") ?? "1"); // params are always strings function handleSortChange(nextSort) { // Updates the URL (?sort=...) and triggers a re-render with the new value setSearchParams((prev) => { prev.set("sort", nextSort); return prev; }); } return ( <div> <select value={sort ?? ""} onChange={(e) => handleSortChange(e.target.value)}> <option value="price">Price</option> <option value="rating">Rating</option> </select> {/* render products filtered by category, sorted by sort, paginated by page */} </div> ); }
Key points:
useSearchParams()returns[searchParams, setSearchParams], similar touseState—searchParamsis a read-onlyURLSearchParamsinstance (.get(),.getAll(),.has()), andsetSearchParams()updates the URL (and re-renders).- Updating search params pushes a new history entry by default; pass
{ replace: true }as a second argument tosetSearchParamsto avoid cluttering back/forward history (useful for things like live search-as-you-type). - Query params are ideal for optional, non-hierarchical, shareable UI state — filters, sorting, pagination, search text — because the resulting URL can be bookmarked/shared and still reproduces the same view.
- Unlike route params, missing query params don't cause a 404/no-match;
searchParams.get("missing")simply returnsnull, so always provide sensible defaults.
-
The Concurrent rendering makes React apps to be more responsive by rendering component trees without blocking the main UI thread. It allows React to interrupt a long-running render to handle a high-priority event. i.e, When you enabled concurrent Mode, React will keep an eye on other tasks that need to be done, and if there's something with a higher priority it will pause what it is currently rendering and let the other task finish first. You can enable this in two ways,
// 1. Part of an app by wrapping with ConcurrentMode <React.unstable_ConcurrentMode> <Something /> </React.unstable_ConcurrentMode>; // 2. Whole app using createRoot ReactDOM.unstable_createRoot(domNode).render(<App />);
-
If you try to update the state directly then it won't re-render the component.
//Wrong this.state.message = "Hello world";
Instead use
setState()method. It schedules an update to a component's state object. When state changes, the component responds by re-rendering.//Correct this.setState({ message: "Hello World" });
Note: You can directly assign to the state object either in constructor or using latest javascript's class field declaration syntax.
-
The callback function provided as the second argument to
setStateis executed after the state has been updated and the component has re-rendered. BecausesetState()is asynchronous, you cannot reliably perform actions that require the updated state immediately after callingsetState. The callback ensures your code runs only after the update and re-render are complete.this.setState({ name: "Sudheer" }, () => { console.log("The name has been updated and the component has re-rendered."); });
Use the
setStatecallback when you need to perform an action immediately after the DOM has been updated in response to a state change. i.e, The callback is a reliable way to perform actions after a state update and re-render, especially when the timing is critical due to the asynchronous nature of state updates in React. For example, if you need to interact with the updated DOM, trigger analytics, or perform further computations that depend on the new state or rendered output.- In modern React (with function components), you can achieve similar effects using the
useEffecthook to respond to state changes. - In class components, you can also use lifecycle methods like
componentDidUpdatefor broader post-update logic. - The
setStatecallback is still useful for one-off actions that directly follow a specific state change.
- In modern React (with function components), you can achieve similar effects using the
-
There are 3 possible ways to achieve this in class components:
-
Binding in Constructor: In JavaScript classes, the methods are not bound by default. The same rule applies for React event handlers defined as class methods. Normally we bind them in constructor.
class User extends Component { constructor(props) { super(props); this.handleClick = this.handleClick.bind(this); } handleClick() { console.log("SingOut triggered"); } render() { return <button onClick={this.handleClick}>SingOut</button>; } }
-
Public class fields syntax: If you don't like to use bind approach then public class fields syntax can be used to correctly bind callbacks. The Create React App enables this syntax by default.
handleClick = () => { console.log("SingOut triggered", this); };
<button onClick={this.handleClick}>SingOut</button>
-
Arrow functions in callbacks: It is possible to use arrow functions directly in the callbacks.
handleClick() { console.log('SingOut triggered'); } render() { return <button onClick={() => this.handleClick()}>SignOut</button>; }
Note: If the callback is passed as prop to child components, those components might do an extra re-rendering. In those cases, it is preferred to go with
.bind()or public class fields syntax approach considering performance. -
-
You can use an arrow function to wrap around an event handler and pass parameters:
<button onClick={() => this.handleClick(id)} />
This is an equivalent to calling
.bind:<button onClick={this.handleClick.bind(this, id)} />
Apart from these two approaches, you can also pass arguments to a function which is defined as arrow function
<button onClick={this.handleClick(id)} />; handleClick = (id) => () => { console.log("Hello, your ticket number is", id); };
-
The ref is used to return a reference to the element. They should be avoided in most cases, however, they can be useful when you need a direct access to the DOM element or an instance of a component.
-
There are two approaches
-
This is a recently added approach. Refs are created using
React.createRef()method and attached to React elements via therefattribute. In order to use refs throughout the component, just assign the ref to the instance property within constructor.class MyComponent extends React.Component { constructor(props) { super(props); this.myRef = React.createRef(); } render() { return <div ref={this.myRef} />; } }
-
You can also use ref callbacks approach regardless of React version. For example, the search bar component's input element is accessed as follows,
class SearchBar extends Component { constructor(props) { super(props); this.txtSearch = null; this.state = { term: "" }; this.setInputSearchRef = (e) => { this.txtSearch = e; }; } onInputChange(event) { this.setState({ term: this.txtSearch.value }); } render() { return ( <input value={this.state.term} onChange={this.onInputChange.bind(this)} ref={this.setInputSearchRef} /> ); } }
You can also use refs in function components using closures. Note: You can also use inline ref callbacks even though it is not a recommended approach.
-
-
Ref forwarding is a feature that lets some components take a ref they receive, and pass it further down to a child.
const ButtonElement = React.forwardRef((props, ref) => ( <button ref={ref} className="CustomButton"> {props.children} </button> )); // Create ref to the DOM button: const ref = React.createRef(); <ButtonElement ref={ref}>{"Forward Ref"}</ButtonElement>;
-
It is preferred to use callback refs over
findDOMNode()API. BecausefindDOMNode()prevents certain improvements in React in the future.The legacy approach of using
findDOMNode:class MyComponent extends Component { componentDidMount() { findDOMNode(this).scrollIntoView(); } render() { return <div />; } }
The recommended approach is:
class MyComponent extends Component { constructor(props) { super(props); this.node = createRef(); } componentDidMount() { this.node.current.scrollIntoView(); } render() { return <div ref={this.node} />; } }
-
If you worked with React before, you might be familiar with an older API where the
refattribute is a string, likeref={'textInput'}, and the DOM node is accessed asthis.refs.textInput. We advise against it because string refs have below issues, and are considered legacy. String refs were removed in React v16.-
They force React to keep track of currently executing component. This is problematic because it makes react module stateful, and thus causes weird errors when react module is duplicated in the bundle.
-
They are not composable — if a library puts a ref on the passed child, the user can't put another ref on it. Callback refs are perfectly composable.
-
They don't work with static analysis like Flow. Flow can't guess the magic that framework does to make the string ref appear on
this.refs, as well as its type (which could be different). Callback refs are friendlier to static analysis. -
It doesn't work as most people would expect with the "render callback" pattern (e.g. )
class MyComponent extends Component { renderRow = (index) => { // This won't work. Ref will get attached to DataTable rather than MyComponent: return <input ref={"input-" + index} />; // This would work though! Callback refs are awesome. return <input ref={(input) => (this["input-" + index] = input)} />; }; render() { return ( <DataTable data={this.props.data} renderRow={this.renderRow} /> ); } }
-
-
The component lifecycle has three distinct lifecycle phases:
-
Mounting: The component is ready to mount in the browser DOM. This phase covers initialization from
constructor(),getDerivedStateFromProps(),render(), andcomponentDidMount()lifecycle methods. -
Updating: In this phase, the component gets updated in two ways, sending the new props and updating the state either from
setState()orforceUpdate(). This phase coversgetDerivedStateFromProps(),shouldComponentUpdate(),render(),getSnapshotBeforeUpdate()andcomponentDidUpdate()lifecycle methods. -
Unmounting: In this last phase, the component is not needed and gets unmounted from the browser DOM. This phase includes
componentWillUnmount()lifecycle method.
It's worth mentioning that React internally has a concept of phases when applying changes to the DOM. They are separated as follows
-
Render The component will render without any side effects. This applies to Pure components and in this phase, React can pause, abort, or restart the render.
-
Pre-commit Before the component actually applies the changes to the DOM, there is a moment that allows React to read from the DOM through the
getSnapshotBeforeUpdate(). -
Commit React works with the DOM and executes the final lifecycles respectively
componentDidMount()for mounting,componentDidUpdate()for updating, andcomponentWillUnmount()for unmounting.
React 16.3+ Phases (or an interactive version)
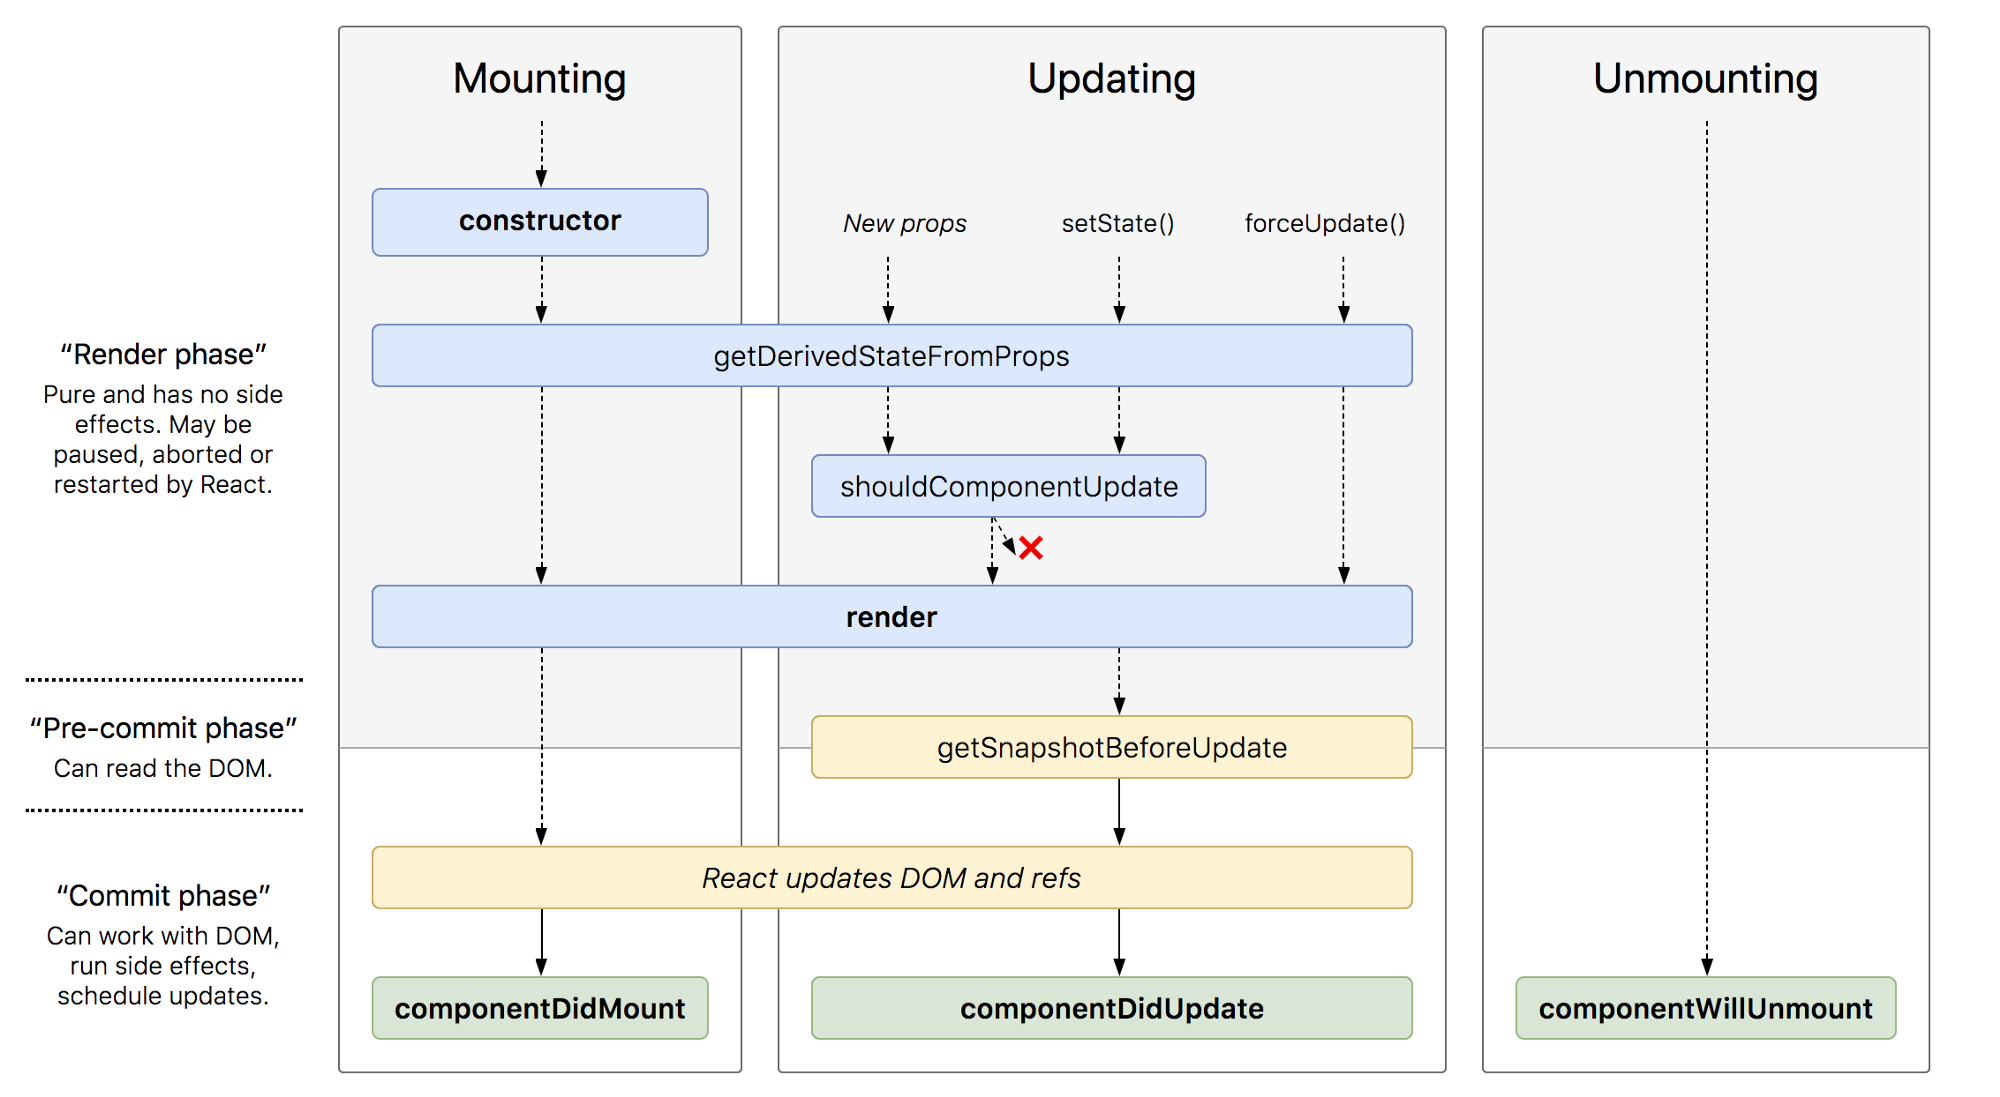
Before React 16.3
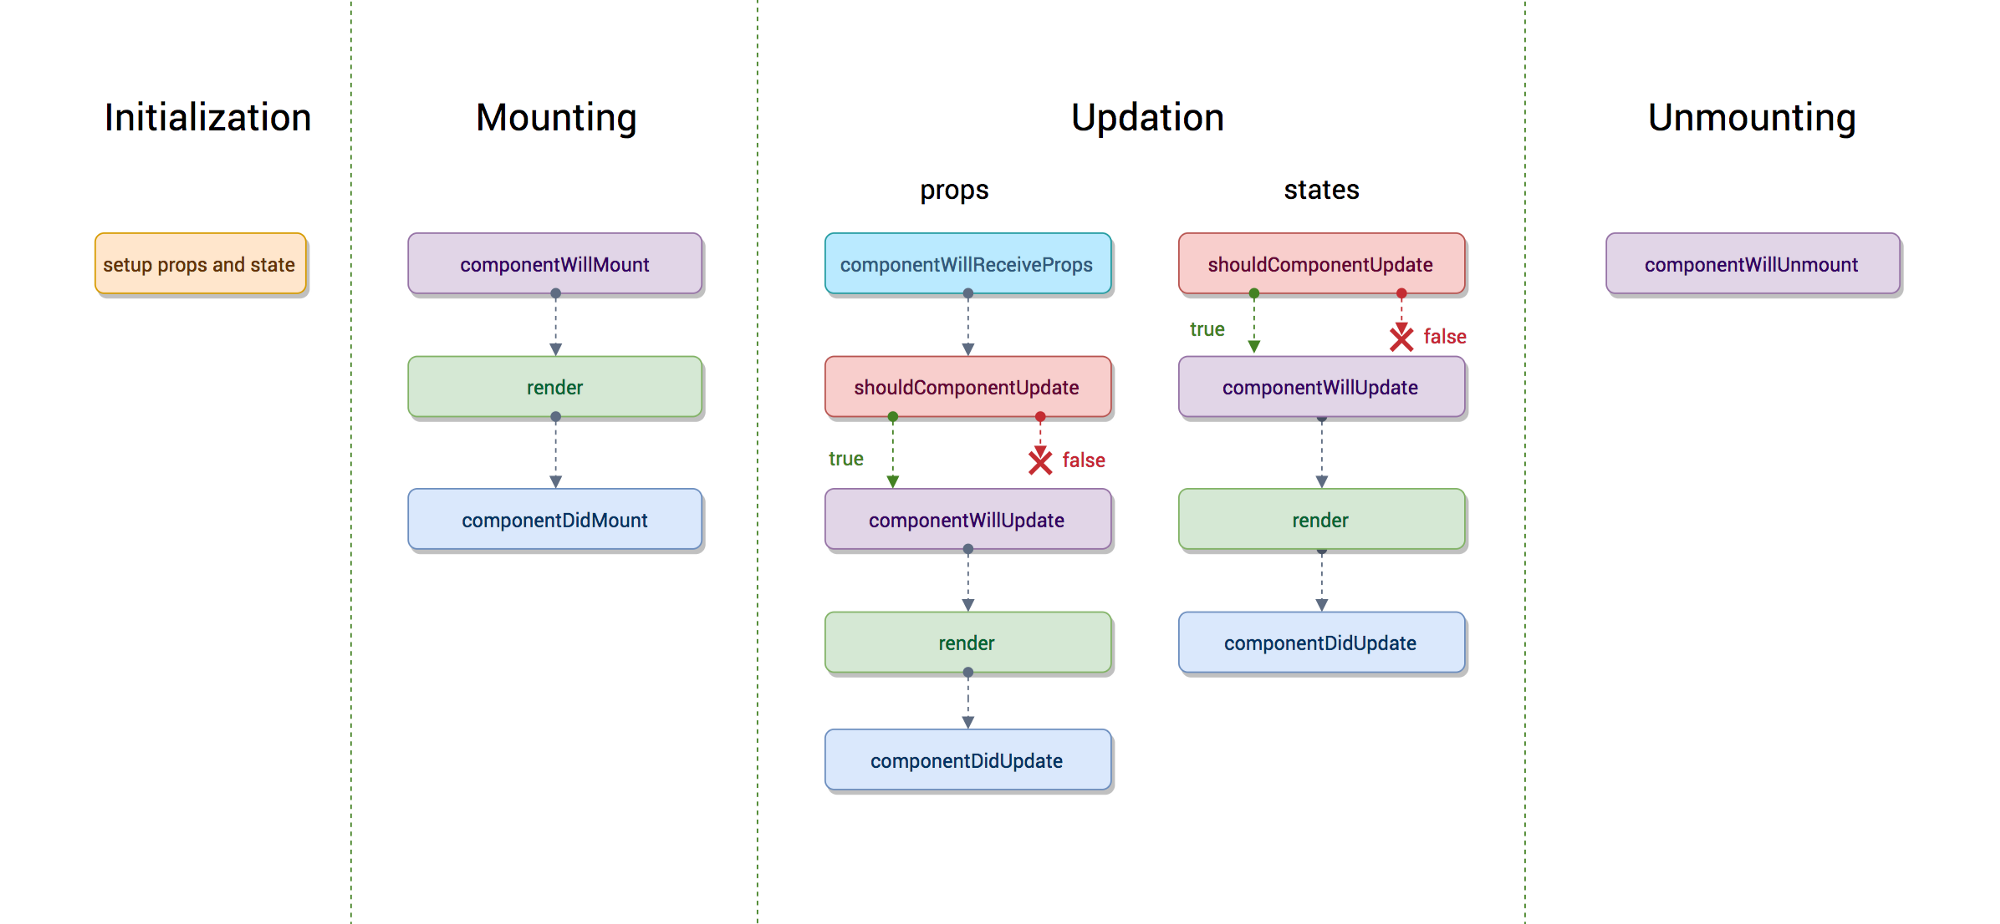
-
-
Before React 16.3
- componentWillMount: Executed before rendering and is used for App level configuration in your root component.
- componentDidMount: Executed after first rendering and here all AJAX requests, DOM or state updates, and set up event listeners should occur.
- componentWillReceiveProps: Executed when particular prop updates to trigger state transitions.
- shouldComponentUpdate: Determines if the component will be updated or not. By default it returns
true. If you are sure that the component doesn't need to render after state or props are updated, you can return false value. It is a great place to improve performance as it allows you to prevent a re-render if component receives new prop. - componentWillUpdate: Executed before re-rendering the component when there are props & state changes confirmed by
shouldComponentUpdate()which returns true. - componentDidUpdate: Mostly it is used to update the DOM in response to prop or state changes.
- componentWillUnmount: It will be used to cancel any outgoing network requests, or remove all event listeners associated with the component.
React 16.3+
- getDerivedStateFromProps: Invoked right before calling
render()and is invoked on every render. This exists for rare use cases where you need a derived state. Worth reading if you need derived state. - componentDidMount: Executed after first rendering and where all AJAX requests, DOM or state updates, and set up event listeners should occur.
- shouldComponentUpdate: Determines if the component will be updated or not. By default, it returns
true. If you are sure that the component doesn't need to render after the

